Introduction: Why Process Matters for Grouting a Centrifugal Pump Skid Void-Free
Grouting a centrifugal pump skid in a void-free manner isn’t just about following instructions—it’s about preventing vibration, misalignment, and reducing costly downtime in industrial settings. The process: step-by-step: grouting a centrifugal pump skid void-free is critical to ensure system reliability over time. Proper grouting techniques, choice of high-quality epoxy, and adherence to standards such as API 610 all come together to guarantee safe, repeatable installations that last.
Industry professionals recognize that void-free grout is the backbone for stable operations. It anchors the skid, transfers loads, and resists dynamic forces. With mounting pressure for precision and durability, understanding the complete process is vital for every installer, supervisor, and engineer alike.
Understanding Centrifugal Pump Skid Grouting: Purpose and Industry Standards
Grouting anchors the baseplate, stabilizing the pump and motor against movement and vibration. The goal is to create full contact between the skid and concrete foundation, eliminating air pockets and voids. This maintains precise alignment and operational safety.
API 610 sets the benchmark for pump baseplate grouting, requiring effective load transfer and minimal grout shrinkage. Following best practices ensures performance, extended equipment life, and compliance with industry standards.
The Science Behind Epoxy Grout Selection
Epoxy grout has become the material of choice for heavy machinery installations. Unlike cement-based products, epoxy offers superior compressive strength, chemical resistance, and negligible shrinkage. Choosing the correct formula is vital for tight-tolerance applications.
ZDSpoxy engineers recommend weighing flowability, ambient temperature tolerance, and exothermic behavior to match project demands. For help selecting the optimum product, review heavy machinery epoxy grout specifications for compatibility and performance data.
Key Advantages of Using Epoxy Grout for Void-Free Installation
Epoxy grout secures pump skids with distinct benefits:
- High early and ultimate compressive strength
- Superior chemical and oil resistance
- Low shrinkage—enabled void-free grouting
- Ability to cure in challenging conditions, including underwater or cold substrates
If you need to tackle underwater or extreme cold applications, reference ZDS-1417AB High Strength Underwater Epoxy Grout for guaranteed reliability.
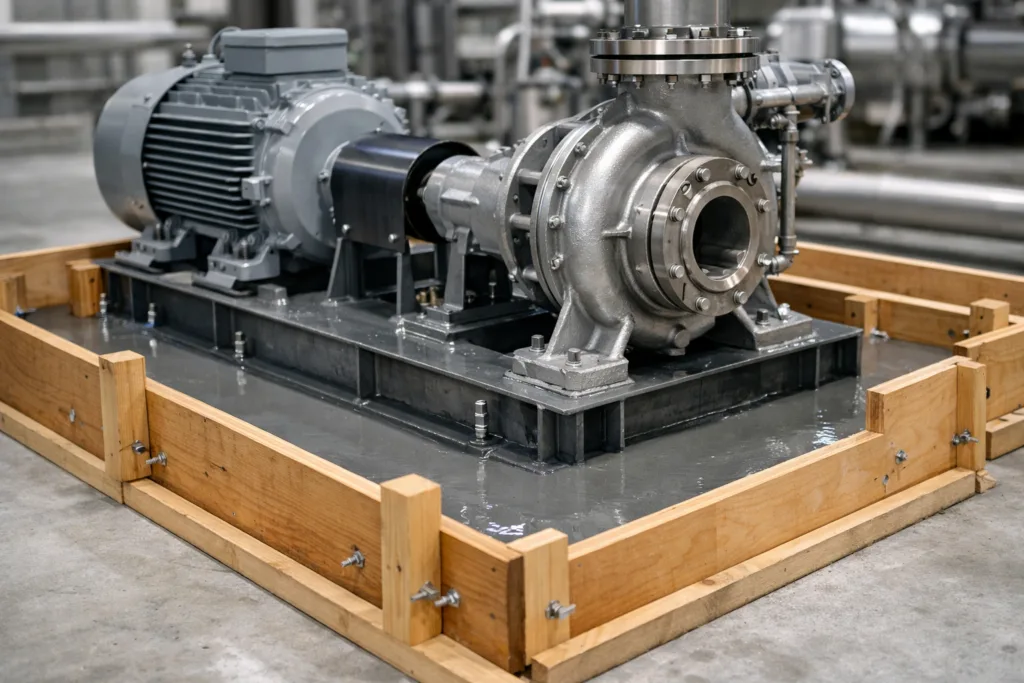
Site Preparation: Ensuring the Foundation Supports a Void-Free Grout Job
Successful grouting starts long before mixing epoxy. The foundation must be:
- Free of laitance, dust, oil, and contaminants
- Profiled for bonding—ideally with a shot-blast or scrabbled surface
- Dry or correctly primed with solvent-free epoxy primer to prevent bond failure
Foundation moisture content is key. ZDSpoxy’s solvent-free epoxy primer for wet concrete helps tackle dampness without sacrificing bond strength.
Step-by-Step Guide: Grouting a Centrifugal Pump Skid Void-Free
The heart of the process: step-by-step: grouting a centrifugal pump skid void-free lies in solid site discipline. Follow these guidelines:
Inspection and Preparation
Verify foundation quality, profile, and dryness. Set up formwork tightly around the skid to contain grout and prevent leaks. Check the alignment and ensure all nuts, bolts, and shims are ready but not overtightened.
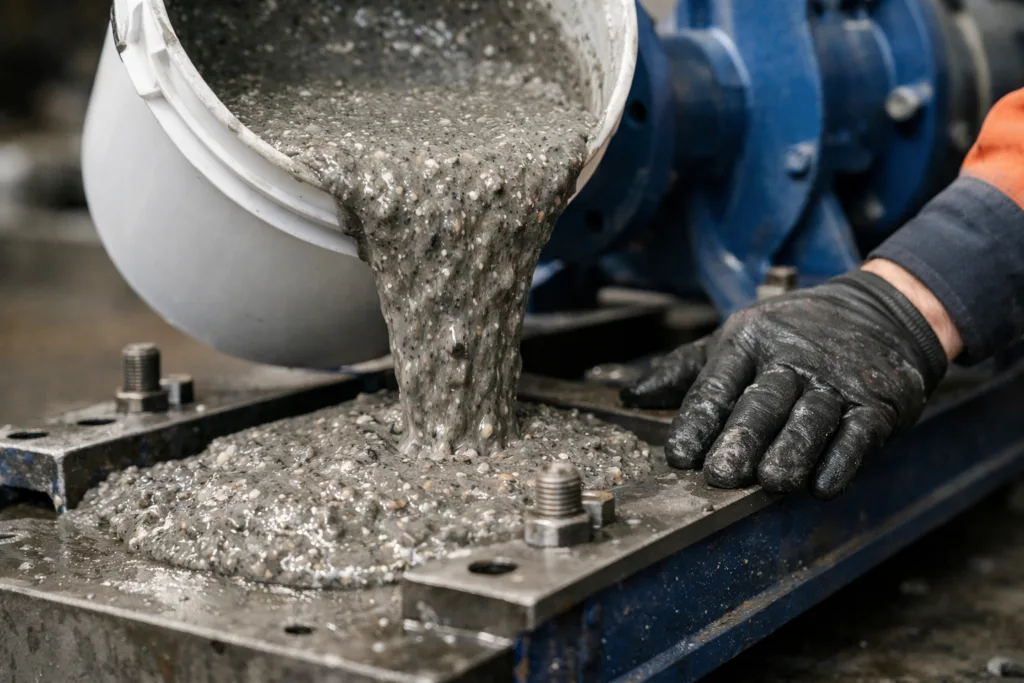
Mixing Epoxy Grout Correctly
Adhering to strict ratios is crucial. Pre-batch aggregate, resin, and hardener as per manufacturer’s instructions. Mix mechanically until fully wetted, ensuring homogeneity. Observe pot life—most epoxies offer 30–45 minutes, requiring rapid placement.
For high compressive installations, consider ZDS-1410AB for crushers and heavy-duty skids, ensuring performance even under dynamic loads.
Placing Epoxy Grout
Pour grout systematically from one side, allowing gravity to help air escape and fill all voids. Never pour from multiple directions—this can trap air pockets. Use slow, continuous pouring and gentle rod or tap formwork as necessary.
Air Release and Void Prevention
Proper methodical placement and skilled rodding or vibrating around the baseplate ensure air bubbles rise and escape. Pre-inspect and seal leaks in formwork to avoid grout loss.
Leveling and Alignment Checks
Immediately after placement, check pump alignment and baseplate levels. Grout must fully support the skid without hollow spots. Adjust shims or re-tension anchors as required.
Curing and Post-Installation Protocols
Allow epoxy grout to cure undisturbed for the recommended time (typically 24–48 hours) before tightening anchor bolts or starting up the pump. Protect against vibrations or moisture exposure during curing.
Common Challenges and How to Overcome Them
Several issues can compromise a void-free grout job:
- Poor surface preparation leading to bond failure
- Inaccurate mixing ratios affecting strength or cure
- Overly rapid placement causing segregation
- Insufficient formwork tightness resulting in leaks
- Air entrapment due to hasty pouring or lack of vibration
Troubleshooting means methodical review of each stage. Reference Heavy Machinery Epoxy Grout specifications for troubleshooting and adjustment tips.
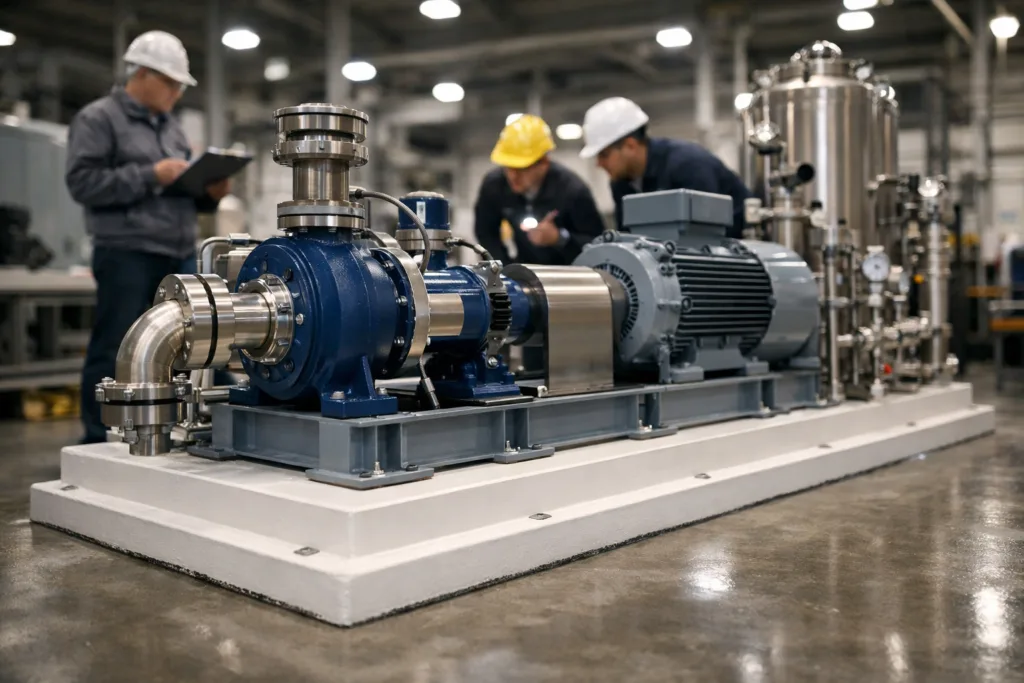
Precise Alignment and Leveling: The Foundation of Operational Efficiency
Alignment is not a one-time event. Regular checks ensure the pump and motor remain true even after curing and bolt tightening. Misalignments can cause vibration, excessive wear, and premature failure. Follow API 610 recommendations for in-service rechecking and periodic maintenance.
Well-executed grouting simplifies alignment corrections and supports long-term operational efficiency.
Quality Assurance: Batch Consistency and Inspection Best Practices
Maintaining quality involves:
- Documenting batch mix records with resin and aggregate weights
- Monitoring viscosity and temperature before pouring
- Testing set grout for compressive strength and bond
- Visual inspection and ultrasonic void detection (as needed)
ZDSpoxy recommends gel time checks and written QC protocols, especially for mission-critical pump installations. Quality assurance means every pour meets design criteria for safety and performance.
Epoxy Grout Volume Calculator: Ensuring Sufficient Coverage and Avoiding Waste
To determine the exact epoxy grout requirement and prevent shortages or waste, calculate your usage with our Epoxy Grout Volume Calculator Project Quote. This ensures full coverage beneath the skid and up the side forms, reducing expensive over-ordering.
Best Practices for Achieving Void-Free Grout Installations
Summarize top tips for installers:
- Always prep the foundation for maximum bond
- Seal formwork meticulously
- Batch and mix components with discipline
- Pour from one side; do not split pours
- Vibrate or manually rod to release air
- Use only tested epoxy systems for mission-critical machinery
API 610 Compliance and Documentation
API 610 compliance offers assurance to facility owners and operators. Accurate logs, batch data sheets, and inspection records demonstrate adherence. This reduces liability and instills confidence in maintenance crews and auditors.
Advanced Considerations: Thermal Expansion, Vibration, and Chemical Loads
Heavy-duty installations may encounter thermal cycling, variable dynamic loading, and chemical attacks. Epoxy grout with high creep resistance and compatibility across steel, resin, and concrete interfaces are preferred for minimizing long-term deformation.
ZDSpoxy advises select formulations for extreme environments, balancing modulus and strength against substrate movement.
Maintenance Tips After Grouting a Centrifugal Pump Skid Void-Free
Even expertly grouted skids require routine checks:
- Inspect edges and anchor areas for signs of grout separation or cracking
- Monitor pump vibration and alignment at set intervals
- Address leaks or spills immediately to protect chemical resistance
Red Flags and Warning Signs: When Grout Needs Professional Assessment
Be vigilant for:
- Excessive vibration or noise from pump set
- Visible voids, cracks, or shifting baseplates
- Unusual drop in pump alignment after startup
Early identification and intervention avoid further equipment or foundation damage.
Case Study: Troubleshooting a Void-Filled Pump Skid Grout Installation
In a recent installation, partial failure due to uneven pouring and poor air release left several voids beneath a critical pump. Ultrasonic testing revealed hollow areas, requiring costly removal and re-grouting. Adhering to process: step-by-step: grouting a centrifugal pump skid void-free prevents these issues, saving time and resources.
Expert Tips for Challenging Environments (Cold, Wet, Tight Spaces)
Special conditions demand tailored approaches:
- For tight gaps, use low-viscosity products such as ZDS-4131AB Low Viscosity Epoxy Grout
- Apply solvent-free primers in damp or wet conditions
- Pre-warm resin if ambient is below 10°C to prevent thickening and short pot life
Process: Step-by-Step: Grouting a Centrifugal Pump Skid Void-Free
Here is a condensed process workflow for achieving void-free results:
- Review pump and baseplate documentation, API 610 standards, and site conditions
- Prepare foundation: clean, dry, profiled, primed if damp
- Seal formwork, set shims, ensure tight assembly
- Batch and mix epoxy grout by weight per manufacturer’s guide
- Pour slowly from one side, rod or vibrate as needed
- Check alignment, allow to set/protect against disturbance
- Document inspection, batch, and post-cure checks
Quality Control and Testing for Grout Installations
Confirm installation by:
- Ultrasonic or acoustic inspection for voids
- Measuring hardness and compressive strength
- Recording all grouting and curing data
Frequently Asked Questions
What is the best grout for centrifugal pump skid installations?
Epoxy grout is preferred for its superior strength, chemical resistance, and minimal shrinkage—ideal for void-free, reliable installations.
How do I prevent air pockets during grouting?
Pour epoxy grout from one side only, use slow placement, and rod or gently vibrate the mix to release entrapped air and avoid voids.
How long should epoxy grout cure before commissioning the pump?
Allow at least 24–48 hours, or longer per manufacturer’s recommendations, before final bolt tightening and startup to ensure full strength.
Can epoxy grout be used in cold or wet environments?
Special formulations such as low-temperature or underwater epoxy grout are available for successful application in challenging site conditions.
What API 610 requirements are relevant for pump skid grouting?
API 610 calls for full baseplate support, minimal grout shrinkage, documented installation, and precise alignment before and after grout cure.
How can I estimate how much grout I need?
Use an epoxy grout volume calculator to determine the exact quantity needed to fill beneath and around the skid base without excess waste.
Related Reading
- API 610 Grouting: Pitfalls and Precision Steps Explained
- Avoid Epoxy Waste: The Lifetime vs. Pot Life Dilemma Solved
- Prevent Thermal Failures: Exothermic Curve Control in Mass Pours
- Choosing the Right Grout: Static vs Dynamic Loads Explained
- Mastering Expansion Issues: Epoxy, Steel & Concrete Compatibility