Introduction to Epoxy Mix Ratio: A Critical Starting Point
When working with marine epoxy resin systems, mastering the epoxy mix ratio—also called the A:B ratio—is non-negotiable for achieving a sound cure, reliable strength, and true performance. Whether mixing by weight or by volume, precision matters. The right method prevents cure failure, poor bonding, excessive surface tack, and safety risks.
Many problems start with incorrect measuring or rushed mixing. This guide delivers practical know-how: correct measuring techniques, essential tools, mixing time tips, and the right application steps—including common errors and fast, safe fixes. Always follow the technical data sheet (TDS) from your system supplier. For deeper guidance on selecting marine systems, see our Marine Epoxy Resin Manufacturer resource.
Why the Epoxy Mix Ratio Is the Key to Performance
The mix ratio defines how much resin (Part A) and hardener (Part B) you blend for marine jobs. Too much of either part—sometimes attempted as an unsafe hack—can cause partial cures or sticky surfaces. Correct measuring and thorough mixing ensure maximum strength, chemical resistance, and waterproofing. Every batch you make is an opportunity to get this right.
Epoxy Mix Ratio: Definitions and Manufacturer Guidance
Manufacturers specify epoxy mix ratios as weight (grams) or volume (milliliters)—commonly 2:1, 4:1, or even 1:1, depending on chemical formulation. Reading the Technical Data Sheet (TDS) gives you the exact guidance needed for each system and job. ZDSpoxy recommends verifying the ratio for both bulk and repair batches.
Why Marine Epoxy Has Specific Ratio Standards
Marine environments challenge epoxies with moisture, salt, and movement. Precise ratios help marine epoxies resist osmosis, swelling, and degradation. Products like ZDS-2060AB are engineered with strict A:B requirements to maintain structure—even underwater.
Mixing by Weight vs. Mixing by Volume: Choosing the Method
Choosing between mixing by weight and mixing by volume depends on your application and workplace setup. Let’s compare:
| Method | Pros | Cons | Best For |
|---|---|---|---|
| Mixing by Weight | Accurate, good for dense epoxies, digital scales | Requires clean scale, may need conversion chart | Marine repair, industrial shop work |
| Mixing by Volume | Fast, easy, suitable for small jobs, fewer tools | Accuracy drops with different densities, measuring cups needed | Field repair, quick surface patches |
How Density Changes the Game
Different epoxies mean different densities. The ratio by volume may not equal the ratio by weight, especially for marine epoxies with additives. Always check your TDS. Use weight for best accuracy where possible—especially for structural jobs.
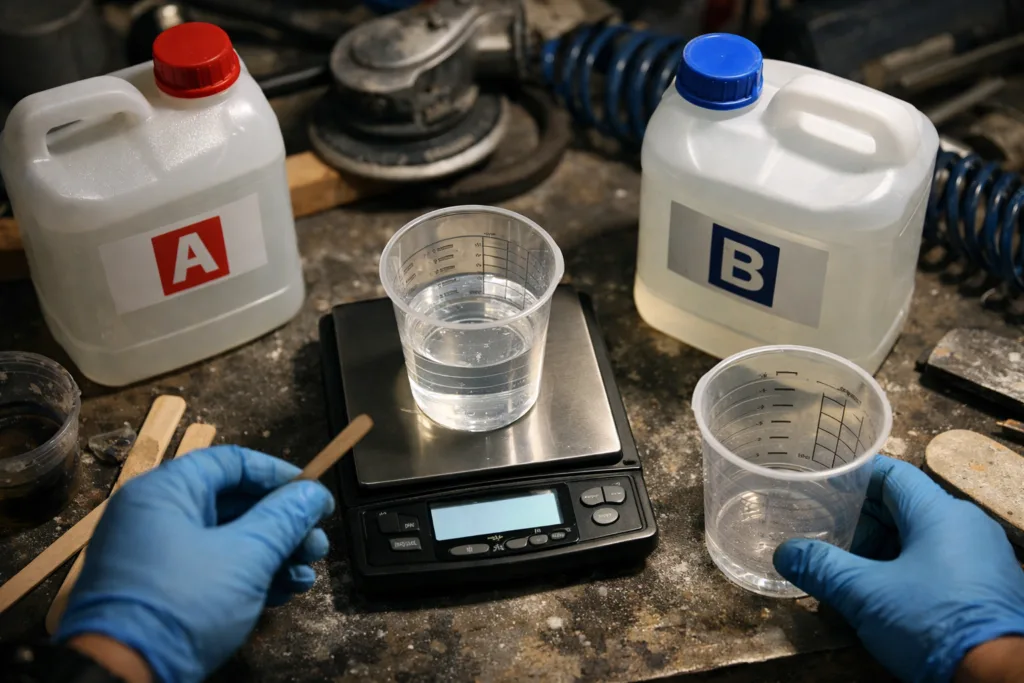
Step-by-Step: Mixing By Weight
- Place a digital scale on a level, dust-free surface
- Zero (tare) with mixing vessel on scale
- Pour Part A to the exact weight specified
- Zero scale again, add Part B to total batch weight
- Check for batching errors before proceeding
Step-by-Step: Mixing By Volume
- Use clear, graduated mixing cups
- Pour Part A to the indicated mark
- Slowly add Part B to next line (based on ratio)
- Confirm meniscus for accurate view
- Stir gently to avoid bubbles—then mix thoroughly
A:B Ratio in Practice: Getting It Right Every Batch
The classic marine epoxy ratio—like 2:1 (resin:hardener)—may seem simple. But field experience shows errors often creep in during busy jobs or when rushing. Stick to these proven steps:
- Double-check ratio before pouring
- Use fresh tools, mix only full batches (avoid “guesswork” scaling)
- Protect work area from contamination (oil, water, dust)
- Always wear gloves and eye protection
Ratio Tables for Popular Marine Epoxy Systems
| System | Ratio (Weight) | Ratio (Volume) |
|---|---|---|
| ZDSpoxy ZDS-2060AB | 100:44 | 2:1 |
| Generic Marine Epoxy | 100:50 | 2:1 |
| Wood Repair Putty | 100:60 | 3:1 |
Always cross-reference your ratio with the product label and technical sheets, as subtle differences can impact both cure and application results.
Essential Measuring Tools for Epoxy Mixing
The right tools not only simplify the process—they prevent costly mistakes. For batch accuracy, professionals recommend:
- Digital kitchen scale (0.1g precision for small jobs)
- Graduated mixing cups (clear, solvent-resistant)
- Straight-sided mixing sticks or spatulas
- Disposable pipettes for very small batches
- Clean rags and alcohol wipes for tool prep
Viscosity differences mean accurate weighing often beats volume, especially with filled or thickened industrial systems.
Quick Checks Before You Mix
- Inspect scale for calibration loss
- Check cups for dust or leftover cured epoxy
- Dispose of any batch where ratios were uncertain
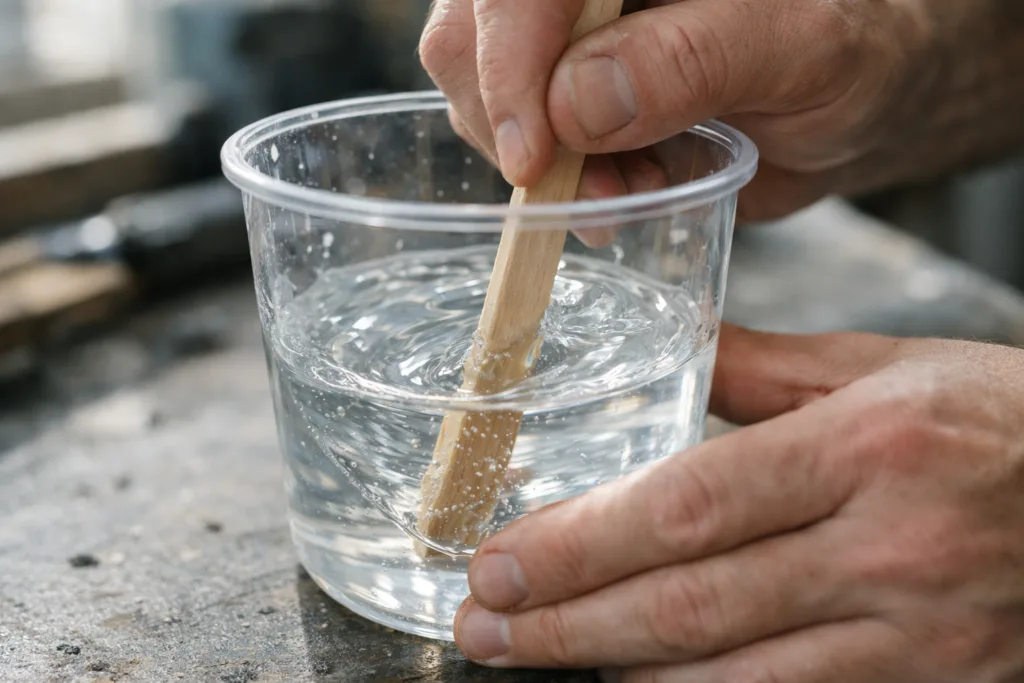
Mixing Time, Technique, and Air Release
An accurate ratio starts the cure process, but mixing time affects it just as much. Under-mixing can leave streaks, sticky areas, or soft spots (signs of cure failure).
How Long to Mix?
Industry advice is clear: Mix for at least 2-3 minutes, scraping both sides and bottom of vessel throughout. Do not stop until streaks between resin and hardener vanish. For larger batches, pour into a fresh vessel and mix again for 30-60 seconds (“double-potting”).
Scrape Technique: Why It Matters
Failing to scrape the sides leaves unreacted resin or hardener; this produces weak, sticky zones. Use a flat-sided stick or spatula, keeping a steady motion. For confined spaces or vertical repairs, consider specialized mixers to reduce trapped air.
Common Mixing Mistakes (And Quick Fixes)
Even trained professionals can slip up with epoxy—especially under time pressures or in poor site conditions. Watch for these common errors:
- Guessing the batch ratio (rarely ends well)
- Poor tool cleaning introduces contamination
- Short mixing time increases risk of streaks and off-ratio patches
- Adding “extra” hardener to speed cure (dangerous, often fails)
Safe Quick Fixes (Never Unsafe Hacks)
- If unsure of ratio, dispose of batch—never attempt to “save” it with more hardener or resin
- Scrape off affected surface and restart, using fresh tools
- Follow system technical sheet for remediation (sometimes, a fresh overlay will bond to undercured epoxy)
Never add more hardener or resin to “fix” a batch during or after mixing—this almost always produces incomplete cures or brittle zones.
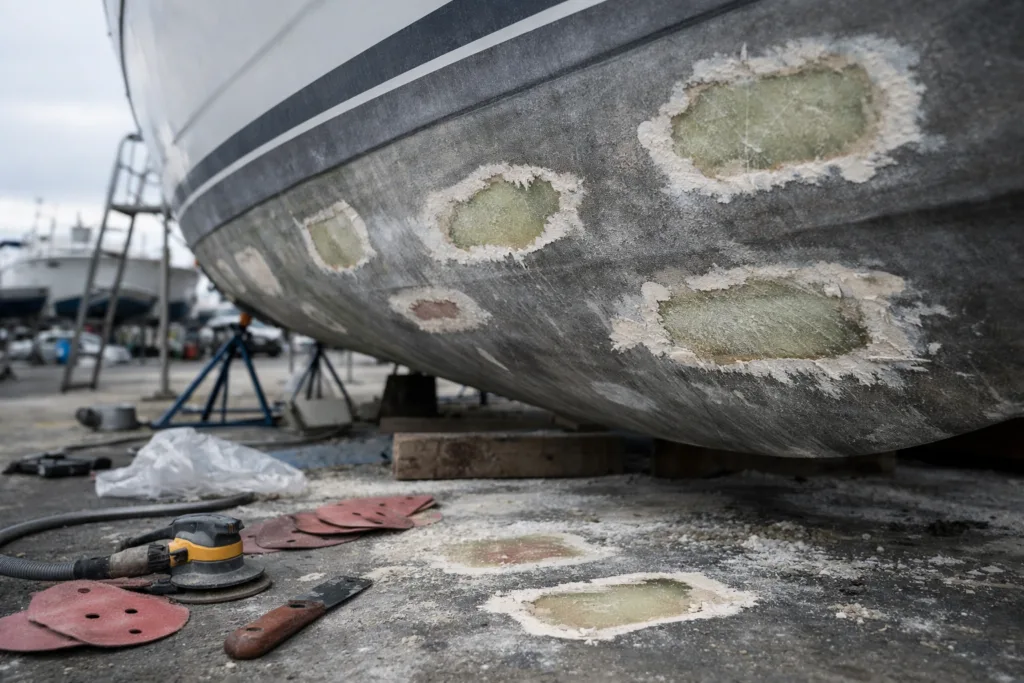
Off-Ratio Symptoms: How to Spot Cure Failure in Marine Epoxy
Bad mixing ratios lead to predictable symptoms. Knowing these helps you intervene early:
- Sticky surface after cure time
- Incomplete hardening or “soft spots”
- Strong ammonia or off-chemical smells after mixing
- Frosting or cloudiness (often from excess hardener)
- Poor adhesion to substrates or near-instant separation
For marine and underwater repairs, these failures can threaten waterproofing and long-term strength. Always check pot life and ensure mixing tools match your system’s chemical resistance.
What To Do if You Suspect Off-Ratio Mixing
Cut out and replace any affected areas, sanding or grinding back to sound substrate. For larger pours, full removal is often recommended. Consult the technical guide for your system, such as ZDSpoxy. If unsure, contact the supplier or check for further troubleshooting steps in the TDS.
Proper Batch Size Planning to Avoid Ratio Errors
Oversized batches can lead to rushed measuring or incomplete stirring—especially in warm weather or mass pours. Break the total job into manageable batches, and remember:
- Never mix more than you can apply within open time (pot life)
- Label and date each batch if curing overnight
- Practice with test batches if new to the system
When to Use Rapid Epoxy Systems
For fast-setting repairs like those needed after underwater damage or emergency patching, systems like ZDS-1002AB follow the same ratio discipline—accuracy must never be sacrificed for speed.
Real-World Site Challenges: Moisture, Temperature, and Application
Blueprint mixing ratios only succeed when batch conditions are right. Field crews often face high humidity, cold substrates, or direct sun. Adjust only your batch size and working speed, never the A:B ratio. For wood fill and gap sealing, products like wood floor gap filler ZDS-1240 maintain cure reliability even in changing field temperatures.
Temperature vs. Mixing Ratio
Lower temperature slows cure; higher can shorten working time, increase exotherm, or release bubbles. These effects do not require changing the A:B ratio—focus on environmental control, batch size, and application speed.
Why ZDSpoxy Recommends Strict Ratio Management
As a manufacturer, ZDSpoxy sees firsthand how quality control impacts marine repairs. In our testing, even a 5% error in A:B ratio can drop compressive strength by over 20% and severely reduce bonding to wet or deteriorated substrates. Our R&D-backed advice: log every mix, use scales not “eyeballing,” and batch control records for major repairs, always following TDS guidance.
Best Practices for Consistent Epoxy Results
- Always store resin and hardener in dry, temperature-controlled locations
- Pre-warm containers (for viscous epoxies) to recommended factory specs
- Use labels to avoid cross-contamination across batch types
- Routinely calibrate measuring tools
- Mix, pour, and work within the specified pot life window
Consistency is key, especially for marine environments—errors multiply with offshore, humid, or underwater jobs.
Practical Quality Checks During Mixing
- Conduct gel-time checks for each new batch
- Observe for color uniformity
- Test cured samples for hardness and adhesion before committing to large-scale repairs
Epoxy Mix Ratio: A:B Ratio, Mixing by Weight, Mixing by Volume, Off-Ratio Symptoms, Cure Failure, Measuring Tools
A reliable marine epoxy repair or build depends on several fundamentals: correct mix ratio (by weight or volume), precise measuring tools, careful technique, and discipline in batch management. Off-ratio mixing risks cure failure and structural loss, while strict methods yield lasting results.
Fix errors safely: never use hack fixes, never add more hardener or resin after the fact. Follow your TDS, check ratios, and use the right tools—your job is only as strong as your process.
Conclusion
Getting the A:B mix ratio right for marine epoxy is a foundation for lasting waterproofing, strength, and safety. Whether you’re mixing by weight or volume, using calibrated tools, thorough technique, and quality checks saves jobs from failure and costly rework. Always follow technical guidelines—never rely on risky workarounds or guesswork. With precision and discipline, marine repairs and builds overcome the toughest environmental challenges.
Frequently Asked Questions
What happens if I use the wrong epoxy mix ratio?
Incorrect ratios can lead to sticky surfaces, cure failure, soft areas, or weak bonds. The only safe fix is removal and correct reapplication.
Should I mix marine epoxy by weight or by volume?
Mixing by weight is most accurate, especially for large or mission-critical jobs. Volume works for small batches, but always match your method to the system’s instructions.
Can adding extra hardener speed up epoxy cure safely?
No. Adding extra hardener often causes incomplete cures or brittleness and fails TDS guidance. Only adjust batch size or temperature within recommended limits.
How do I know if my epoxy has cured properly?
Properly cured epoxy is hard, chemical-resistant, and bonds without tackiness. Signs of failure include sticky, soft surfaces or uneven hardness.
What tools guarantee accurate marine epoxy mixing?
Digital scales and graduated mixing cups are essential. Scrape and stir thoroughly to ensure consistent blend—never guess ratios.
Are all marine epoxy systems mixed using the same ratio?
No. Each manufacturer sets their unique ratio based on chemistry and application. Always review the product’s TDS before mixing.