Understanding Bubbles in Epoxy Coating and Waterproof Systems
Bubbles in epoxy coating or waterproofing layers can disrupt both appearance and long-term performance. From pinholes to blistering, the presence of bubbles signals a problem with surface preparation, mixing, or environmental conditions. Whether you’re renovating a balcony, waterproofing tile, or applying industrial flooring, recognizing the causes and preventing bubbles is crucial for achieving durable, professional results.
The Science Behind Bubbles in Epoxy Coating
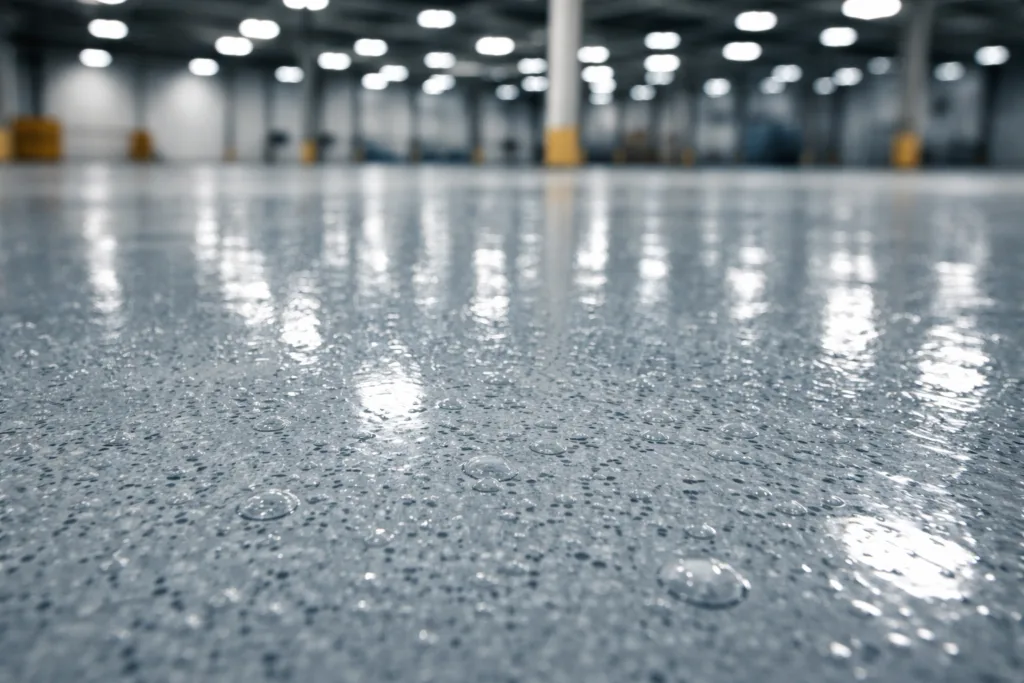
Epoxy coatings harden from a viscous liquid into a solid film. During this transition, trapped air, moisture, or volatiles can expand, forming bubbles if pathways for escape aren’t available or the system isn’t properly sealed. Because epoxy and polyurea systems are engineered for high adhesion and impermeability, once bubbles develop, they often compromise both aesthetics and performance.
Where Do Bubbles Come From in Epoxy Coating?
Bubbles may seem random, but they’re caused by predictable factors. Most stem from substrate porosity, moisture trapped within, or environmental conditions. Here’s how:
- Porous Substrate: Concrete has open pores that trap air. When impermeable coatings are applied, especially thick layers, air is forced up and out, forming visible bubbles.
- Residual Moisture: Moist substrates or those with water vapor cause steam to form as temperature rises, expanding and bubbling beneath the coating.
- Improper Mixing: Fast mixing or whisking introduces air pockets that fail to escape before curing.
- Temperature Swings: Applying coatings during cold weather only for temperatures to rise after application can cause air and moisture to expand, forming bubbles.
Environmental Conditions That Trigger Bubbles
Humidity, temperature, and air movement onsite affect how coatings cure. For best results, always check ambient conditions and substrate moisture before applying epoxy or polyurethane waterproof systems. Visit our terrace balcony outdoor floor renovation hub for more tips on handling outdoor substrates.
Bubbles in Epoxy Coating: Causes and Effects
The root causes vary by coating system, but all bubbles share similar origins:
- Entrapped Air in substrate pores or mixes
- Water vapor: When substrate or environment is humid
- Poor surface prep: Dust, oil, or weak material releases gas during curing
- Excessive coating thickness: Thick layers block escape paths for air and vapor
- Rapid curing: If curing is too fast, bubbles cannot surface and burst before film locks
Bubbles aren’t just cosmetic. They weaken the waterproof layer, cause local failures, and may lead to delamination or peel-off.
Case Study: Waterproofing Kitchen and Bathroom Tiles
Tile waterproofing often suffers from air trapped between tile and substrate. Utilizing a kitchen bathroom tile waterproofing primer ensures pores are sealed, eliminating most bubble risk.
How Surface Porosity Affects Bubbles in Epoxy Coating
Porous surfaces like concrete and cement screeds are notorious for releasing air during coating application. One solution is applying a low-viscosity floor renovation primer to fill and seal pores before applying the main waterproof layer.
Why Thick Coatings Tend to Bubble
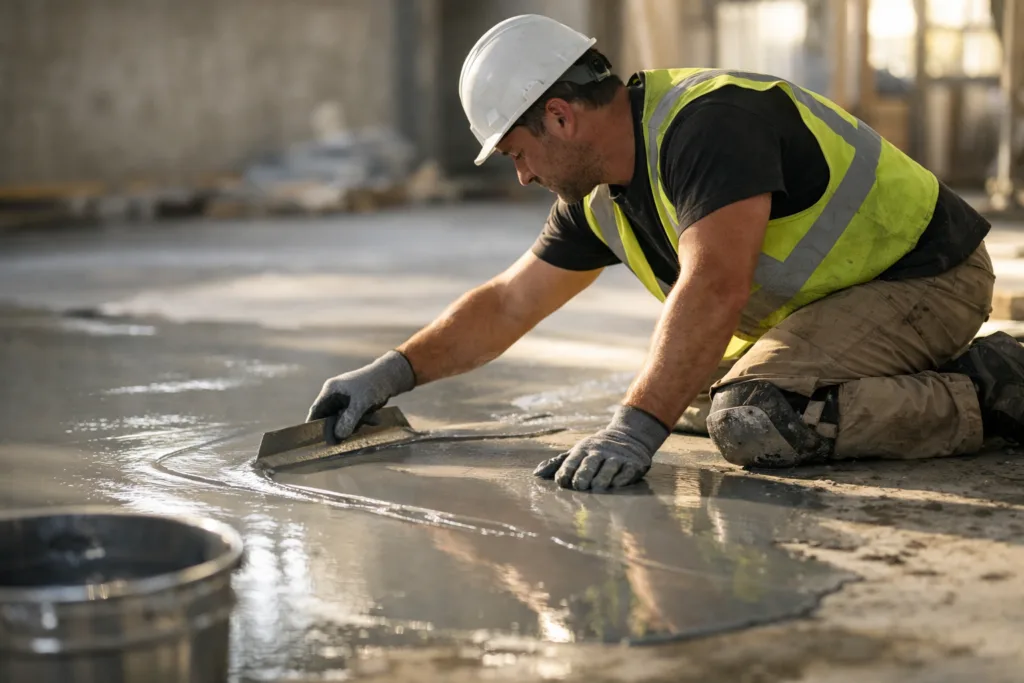
Epoxy’s self-leveling ability can tempt applicators to apply thick coats for speed. However, thick layers block air from escaping, trapping bubbles within. Professional installers prefer several thin coats, allowing each layer to cure properly and release any residual air.
Mixing and Application: Bubbles Due to Improper Technique
Mixing epoxy or polyurethane with a whisk or high-speed drill can trap air. It’s essential to mix slowly, scraping sides and bottom, and let the blend stand for a few minutes so air can escape.
- Use spiral paddles for gentle mixing
- Allow 2-5 minutes “degas” after mixing
- Apply with slow, controlled movements
The Role of Temperature and Humidity
Temperature affects viscosity, cure rate, and vapor pressure. Applying coatings too cold slows curing, while rapid warming causes trapped moisture or air to expand into bubbles. Humidity triggers vapor bubbling—especially in damp basements or pool decks.
Bubbles in Epoxy Coating: Prevention Strategies
Prevention starts at the substrate and ends at curing:
- Apply primer to seal surface pores and prevent air release
- Check moisture content; ensure substrate is dry (<3.5% is typical target)
- Thin coats allow air and vapor to escape between layers
- Maintain optimal temperature and humidity (20–25°C, <70% RH for most systems)
- Mix gently to avoid air incorporation
Waterproofing renovation solutions rely on both proper prep and materials designed for your conditions. Explore our waterproofing renovation solutions hub for more insight on selecting systems that prevent bubbles.
Primer Selection for Bubble-Free Waterproofing
Choosing the right primer is critical. Epoxy primers with penetrating capability fill and seal porosity—ZDSpoxy recommends low-viscosity options for porous concrete or screed. This helps lock out moisture and prevents air release during main coating application.
Application Techniques to Minimize Bubbles
Techniques matter as much as materials:
- Apply with roller or brush in thin layers
- Allow each coat to dry before proceeding
- Maintain steady environmental conditions
- Use spike rollers on self-leveling coatings to pop air bubbles
Controlling Batch Size and Pot Life
Epoxy has limited pot life; mixing large batches risks uneven curing and trapped air. Use the right ratio for your job size and always follow manufacturer instructions for best results.
Common Mistakes Leading to Bubbles in Epoxy Coating
Practical experience shows bubbling is often avoidable with proper attention:
- Skipping primer on porous substrate
- Applying thick layers instead of multiple thin coats
- Mixing too aggressively
- Ignoring ambient moisture and temperature
Manufacturers like ZDSpoxy continuously test formulations in real-world environments, ensuring coatings resist bubbling under controlled site conditions.
Real-World Substrate Testing for Bubble Prevention
Before applying any waterproof coating, conduct moisture tests, porosity checks, and mock-ups if possible. This step is vital—especially for renovation projects where unexpected contaminants or latent moisture can sabotage your work.
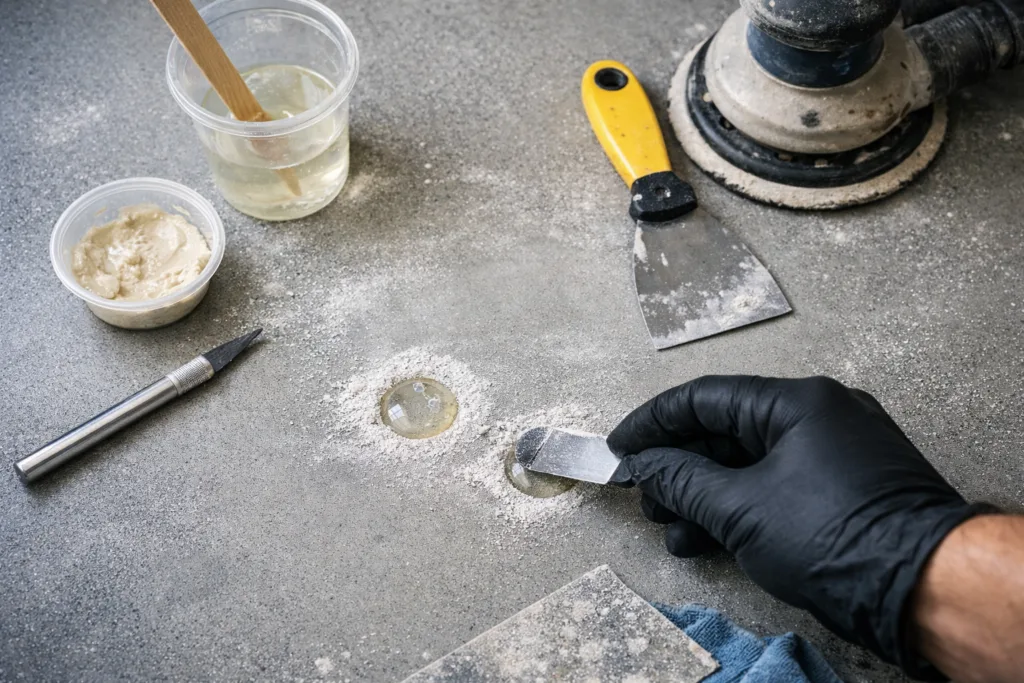
How to Fix Bubbles in Epoxy Coating
Once bubbles form, the fix depends on severity:
- Minor bubbling: Sand away bubbles, clean the surface, and apply a thin corrective layer.
- Severe blistering or delamination: Remove coating back to the substrate. Address porosity and moisture, then reapply primer and waterproofing layers for lasting protection.
Epoxy floor coatings often require professional evaluation to decide whether repair or full rework is necessary. For tiled surfaces, patch repairs may be possible, but full system replacement may be more reliable.
Spot Repairs vs Full Redo: Decision Tree
| Bubble Severity | Repair Method |
|---|---|
| Pinholes/minor blisters | Sand & spot coat |
| Widespread bubbling | Remove, prep, reapply |
| Delamination | Full system replacement |
Bubbles in Epoxy Coating: Causes and Fixes
To sum up, bubbles in waterproof coatings usually arise from a combination of substrate porosity, moisture vapor, thick film application, improper mixing, and environmental changes. Prevention is straightforward—seal the substrate, work in thin layers, manage temperature and humidity, and mix carefully. If bubbles occur, assess severity and select repair or replacement as needed. Visit our floor renovation solutions for further guidance on substrate preparation and coating selection.
Pro Tips from the Field: ZDSpoxy’s Practical Approach
ZDSpoxy engineers advise checking substrate moisture, air porosity, and environmental conditions before every application. On job sites, real-world variables like weather swings, unexpected water ingress, and batch-to-batch variability affect coating integrity. Only through rigorous surface prep, disciplined mixing, and careful layer technique can bubbling be truly minimized. This commitment to field reality shapes ZDSpoxy’s product development and application guidance for contractors and facility managers.
Frequently Used Bubble Prevention Tools
- Digital moisture meters for substrate
- Spike rollers for self-leveling epoxies
- Low-viscosity primers
Checklist: Bubble-Free Waterproofing Application
- Inspect substrate and check moisture
- Apply appropriate primer
- Mix gently and allow degassing
- Apply first coat thinly
- Check environmental conditions
- Use spike roller if self-leveling
- Repeat thin coats for build-up
Best Practices for Renovation Projects
Renovations present unpredictable challenges—old substrates, hidden moisture, and prior contamination. Always conduct preliminary tests, plan for extra prep, and use compatible materials across all layers. Consider visiting our expert guides for balcony and tile waterproofing for detailed step-by-step instruction.
Conclusion
Bubbles in epoxy coating and waterproof systems can undermine the results of any surface renovation. Prevention is grounded in realistic site assessment, disciplined mixing, thin-layer application, and environmental control. When bubbles occur, a practical approach to assessment and repair ensures coatings deliver lasting protection and visual appeal. Use the knowledge above to boost consistency, safety, and value in your next waterproofing project.
Frequently Asked Questions
What causes bubbles in epoxy coating?
Bubbles are mainly caused by trapped air, substrate moisture, improper mixing, thick application, and temperature swings during curing.
How can I prevent bubbles in waterproof coatings?
Seal substrate pores with a primer, apply in thin layers, mix gently, and control site temperature and humidity to allow air and vapor to escape.
Can bubbles be repaired without redoing the entire coating?
Minor pinholes or small blisters may be sanded and re-coated, but severe bubbling or delamination require stripping back to the substrate and reapplication.
Does substrate moisture always cause bubbling?
Substrate moisture is a common cause—especially in concrete. Always check moisture levels and avoid applying coatings if readings are above manufacturer guidelines.
What’s the best tool for mixing epoxy without bubbles?
Use a spiral mixing paddle at low speed, allow the mix to rest for degassing, and avoid whisking or fast agitation.
Are bubbles more common in thick or thin epoxy coatings?
Thick coatings are more likely to trap air and form bubbles. Multiple thin layers reduce risk and improve bubble-free performance.