Introduction: Coating Over Ceramic Tiles—Costs, Concerns, and Smart Solutions
Homeowners and facility managers are often confronted with outdated or damaged ceramic tiles. Facing the high costs and mess of tile removal, many seek reliable, durable alternatives. One question arises again and again: Can you apply resin directly over old ceramic tile? In this comprehensive guide, we’ll navigate the critical steps to successful resin application—including sanding preparation and the decisive role of an adhesion promoter—so that you can make an informed, cost-effective decision. This article blends hands-on experience, technical rigor, and industry-backed solutions for lasting results on ceramic tile renovations.
Understanding the Challenge: Why Ceramic Tiles Are Tricky Substrates
Ceramic tiles are dense, non-porous, and often glazed. Their slick surface resists most adhesives and coatings, leading to common issues like peeling or delamination when overcoated without careful preparation. Attempting direct application of resin without the right steps can cause costly failures.
The Practical Answer: Can You Apply Resin Directly Over Old Ceramic Tile?
The short answer: Yes, but only with careful preparation and the correct system sequence. Applying resin directly over old ceramic tile is feasible if the essential steps—sanding, cleaning, and using a compatible adhesion promoter—are strictly followed. Skipping any of these can compromise bonding, creating hidden risks beneath a glossy new surface.
Benefits of Resin Overcoating on Ceramic Tiles
- Cost-effective—no need for demolition or disposal of existing tiles
- Minimal downtime—fast system installation
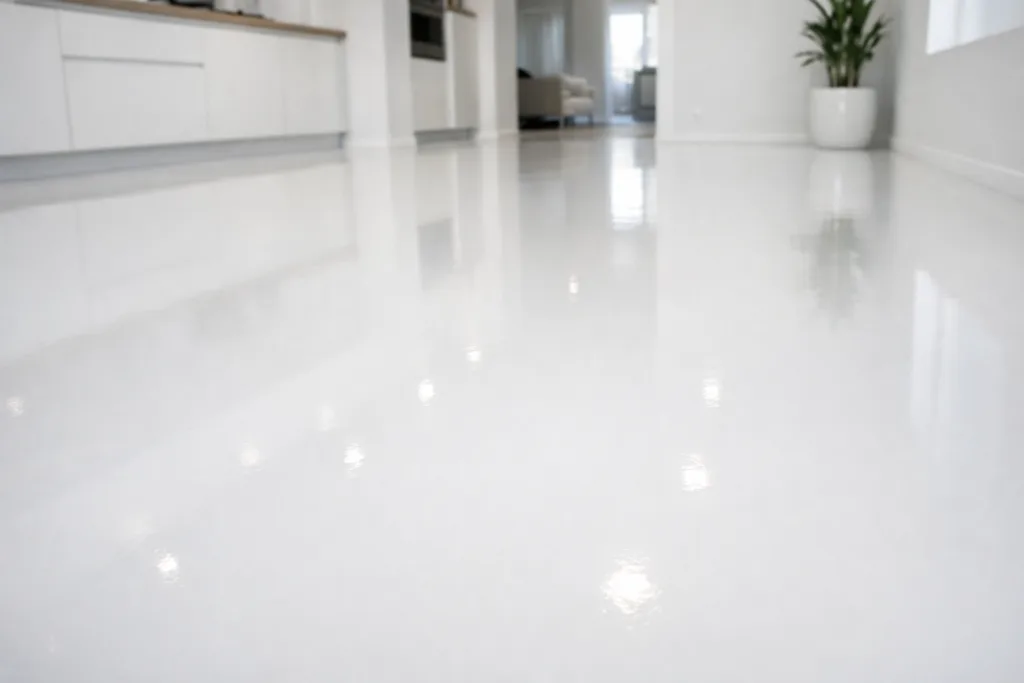
- Smooth, seamless finish—modernizes outdated spaces
- Improved chemical and stain resistance versus old grout lines
- Customizable colors and textures, fitting any aesthetic
Risks and Common Pitfalls Without Proper Preparation
- Delamination: Resin peels off smooth, glazed tiles without surface profiling
- Poor adhesion: Cleaning shortcuts leave oils, dust, or residues
- Inter-floor movement: Unstable or cracked tiles transfer movement, causing cracks
- Trapped moisture: Poorly bonded tiles or grout allow water migration
For renovators, this means attention to preparation is non-negotiable.
Step-by-Step Guide: Coating Over Ceramic Tiles
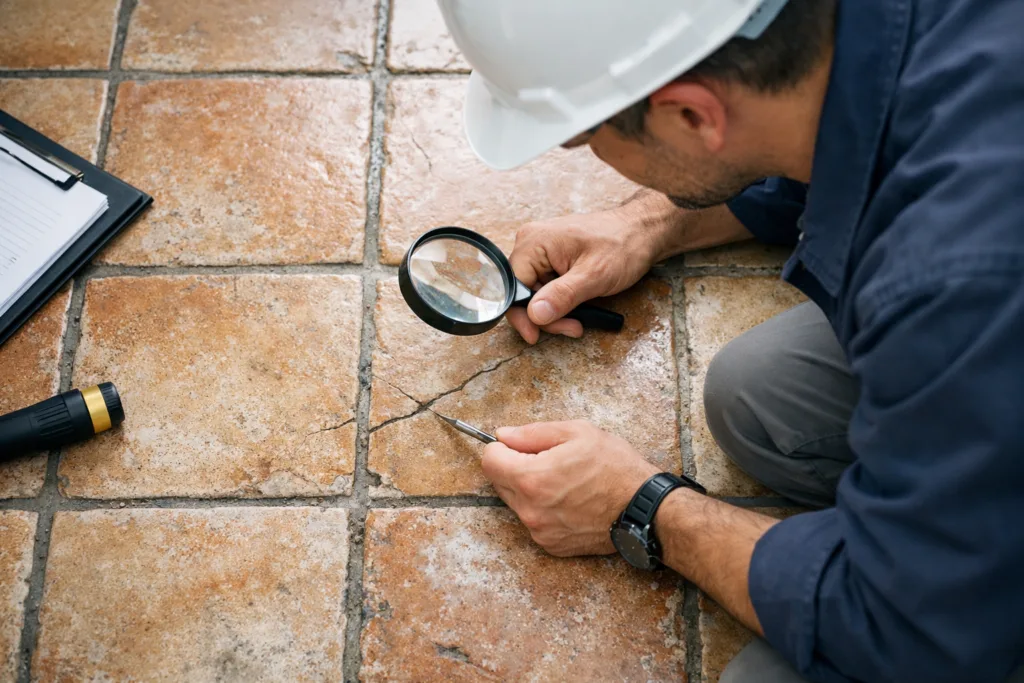
Inspection: Assess Tile and Substrate Integrity
Before starting, inspect the tile field for any loose, cracked, or hollow tiles. Tapping tiles with a hard tool helps detect voids. Replace or re-bond unstable tiles as needed—resin coatings demand a sound, unmoving base.
Thorough Cleaning: Remove Contaminants for Maximum Bond
Any oil, grease, soap residue, or dust will undermine adhesion. Scrub thoroughly using an alkaline detergent, rinse with clean water, and allow to fully dry. Pay special attention to grout lines and tile edges.
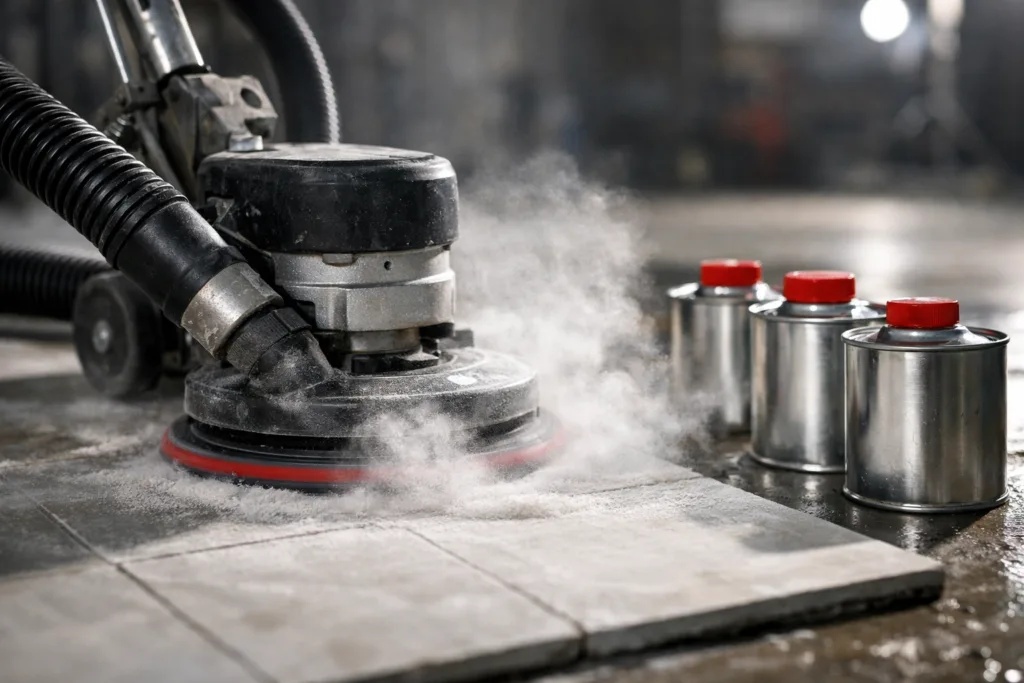
Sanding Preparation: Key to Resin Bonding
Sanding preparation is critical. Mechanical abrasion—using a rotary sander or diamond grinder—removes gloss and roughens the tile surface. The goal: a consistent matte profile for the adhesion promoter to grip. Vacuum all dust thoroughly after sanding.
| Preparation Step | Why It Matters | ZDSpoxy Expert Tip |
|---|---|---|
| Sanding tiles with 100–120 grit | Removes glaze, enables primer penetration | Test with water—surface should stay damp for 5–10 sec |
| Filling grout lines | Prevents resin ‘sink-ins’ over deep lines | Use rapid-set mortar compatible with resin coating |
| Vacuum all debris | Ensures dust-free priming | Consider HEPA-filtered vacuums in sensitive areas |
Grout Line Treatment: Achieving a Seamless Surface
Wide, deep grout lines must be leveled before priming. Use a quality cementitious patch or fast-set resin filler. Allow full cure, then profile with a sanding block.
The Role of Adhesion Promoter: Essential for Success
No matter how effectively tiles are sanded, resin coatings demand a chemistry-driven bond to ceramic. This is the job of a modern adhesion promoter—sometimes called an epoxy primer—engineered for non-porous substrates. These bridge the gap between hard, smooth tile and the subsequent resin system.
ZDSpoxy’s line of primers, like ZDS-1012ab or ZDS-105, exemplify this principle: engineered to penetrate micro-scratches in sanded ceramic, chemically anchor, and guarantee consistent adhesion. If the primer is skipped or the wrong system is used, long-term performance is compromised.
Choosing the Right Resin and Coating System
Not every resin is suited for tiled floors. For optimal results, select a two-part, self-leveling epoxy suitable for both ceramics and concrete. Fast-cure systems might be tempting, but slower, higher-strength variants are better for uneven or high-traffic spaces.
Consider a system with integrated flexibility (such as a polyaspartic or polyurethane topcoat) to accommodate thermal movement or residual tile flexing.
Recommended System Sequence
- Surface sanding and grout leveling
- Primer/adhesion promoter application (e.g., ZDS-105)
- Resin base coat (self-leveling epoxy)
- Optional mid-coat for heavy traffic use (e.g., ZDS-3136AB-90)
- Topcoat: UV-resistant polyaspartic or polyurethane for color stability and scratch resistance
Primer Selection: Water-Based vs Solvent-Based Adhesion Promoters
Water-based epoxy primers (such as ZDSpoxy’s ZDS-105) are safe, low odor, and tolerate site moisture—excellent for kitchens and baths. Solvent-based primers can offer higher penetration but require ventilation and stricter safety measures.
| Primer Type | Best For | Notes |
|---|---|---|
| Water-Based Epoxy | Indoor, occupied areas | Low VOC; more forgiving of slight dampness |
| Solvent-Based Epoxy | Commercial sites, heavy wear | Fast penetration; requires PPE and airflow |
Curing and Environmental Controls: What Makes a Difference
Curing rates and successful resin bonding depend on ambient temperature, humidity, and airflow. For example, ZDSpoxy recommends maintaining at least 15°C and clean, dust-free conditions to guarantee full crosslinking between layers. Always follow product technical data sheets for time between coats and final cure—shortcutting this can invalidate warranties.
Key Quality Controls: Ensuring a Long-Lasting Resin Over Tile
- Test adhesion with tape pull after primer curing—ensure no film lifting
- Monitor room temperature and humidity before and during application
- Stir and mix all two-component products according to manufacturer’s ratio
- Batch recording: Track product lot numbers in larger installations
ZDSpoxy Insights: What Field Observations Reveal
When supervising jobsites, ZDSpoxy technical advisors emphasize mixing discipline and cleanliness as the two main controllables. Field crews that stick to proper sanding, use the specified primer, and mix resins by weight—not by eye—see far higher bonding reliability on ceramic tiles. Unexpected failures usually trace back to shortcuts in either grinding or primer omission.
Cost Comparison: Resin Overcoating vs Tile Removal
| Task | Tile Removal & New Tile | Resin Over Existing Tile |
|---|---|---|
| Demolition | $9–$14/m2 | $0 |
| Waste Hauling | $2–$4/m2 | $0 |
| Surface Prep | $4–$6/m2 | $2–$3/m2 |
| New Surface Material | $28–$45/m2 | $20–$30/m2 |
| Total Installed | $43–$69/m2 | $22–$33/m2 |
The numbers don’t lie: resin overcoating typically saves 30–50% in material, labor, and downtime—no wonder it’s gaining traction for renovations.
When NOT to Use Resin Over Tiles
- If most tiles are loose, severely cracked, or moisture-pumped from below
- In situations where rapid, repeated structural movement is expected
- On flexible wood-backed tiles or in constantly submerged areas (check specific resin product limitations)
Resin System Performance: Expected Durability on Ceramic Tile
Properly installed epoxy and polyurethane coatings typically last 10–20 years on stable substrates, provided preparation was thorough. Periodic cleaning and recoating (as per manufacturer guidance) can extend service life even further.
Final Inspection and Care After Installation
- Wait full recommended cure time before heavy furniture or foot traffic
- Protect during move-in with felt pads or soft mats
- Establish cleaning routines using neutral-pH cleaners—avoid acids or abrasive pads
Frequently Asked Questions
Is coating over ceramic tiles durable enough for high-traffic areas?
With proper sanding preparation, adhesion promoter application, and a high-quality topcoat, resin coatings can easily withstand the demands of commercial and residential high-traffic zones—often outlasting traditional tile.
Do all types of ceramic tiles require sanding before resin application?
Yes. Even matte or “unglazed” ceramics must be mechanically roughened to ensure chemical and mechanical bond with the primer or adhesion promoter. Skipping sanding risks delamination.
How do I choose an adhesion promoter or primer for ceramic tiles?
Select a product specifically formulated for dense, non-porous substrates—like ZDSpoxy’s ZDS-105. Review technical data sheets to match primer to your resin and tile type for optimal adhesion.
Can I use resin coatings in wet zones like showers or kitchens?
Yes, but you must ensure all substrate movement or trapped moisture issues are resolved prior, and you must use primers and topcoats rated for occasional water exposure. Always consult manufacturer suitability for immersion or extreme humidity.
What happens if I skip the adhesion promoter when coating over ceramic tiles?
Omitting a proper primer risks immediate or delayed failure: the new coating may peel, blister, or delaminate—especially in areas with moisture, temperature swings, or mechanical cleaning routines.
How soon can I return the coated space to use?
Most resin systems allow light foot traffic in 24–36 hours and full service in 3–7 days after final topcoat, depending on cure speed and ambient conditions. Check product data for site-specific guidance.
Related Reading
- 7 Real-World Fixes for Peeling Coatings on Old Tiles
- Resin vs Tile Floors: What Will Last and How to Pick
- U.S. Resin Flooring Manufacturing: How Custom Solutions Solve Site Challenges
- Choosing the Right Waterproof Coating: An Engineer’s Simple Decision Guide
- 15 Pro Tips for UV-Stable Epoxy: Preventing Yellowing Long-Term