Why Marine Epoxy Adhesive is a Game-Changer for Hardware Bonding
Marine environments are demanding—deck hardware must withstand pounding waves, wind, and saltwater corrosion. That’s why marine epoxy adhesive is prized for its unmatched bond strength, chemical resistance, and ability to fill gaps even in irregular surfaces. But is epoxy always the safest solution? Here, we dig deep into practical, detail-focused methods for bonding deck fittings, smart edge sealing, and when to combine adhesives with mechanical fasteners for ultimate reliability.
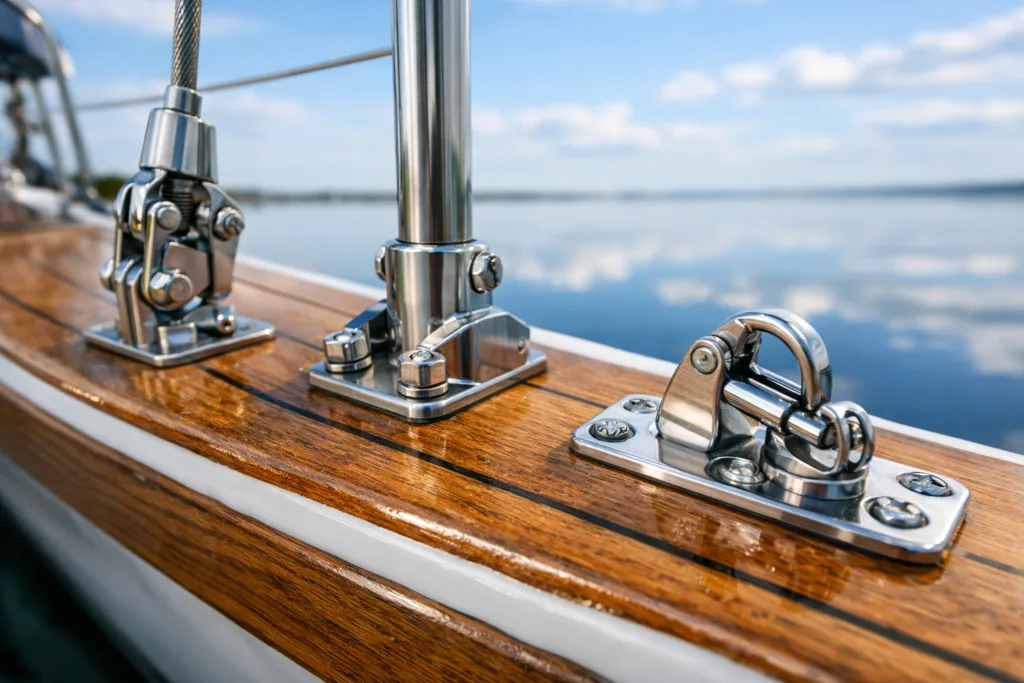
The Role of Deck Hardware and the Bonding Challenge
Deck hardware like cleats, stanchions, hinges, and handrails is critical for safe operation. It connects loads directly to the hull and deck. The challenge is creating a watertight, vibration-resistant, and durable attachment—especially when wood, fiberglass, and metal intersect. Not all adhesives or prep methods are sufficient for this high-stress interface.
Understanding Marine Epoxy Adhesives: Properties that Matter
Marine epoxy adhesives stand apart due to their high modulus, excellent chemical resistance, and ability to adhere tenaciously to diverse substrates. Key features to focus on include:
- Viscosity: Thicker pastes work to fill gaps; lower viscosity liquids flow into tight joints.
- Open Time vs. Cure Time: How long you have to work before it sets, and when full strength is achieved.
- Flexibility: Some deck areas move. Flexible adhesives can absorb shock and vibration.
- Gap Filling: The ability to bridge uneven or imperfectly matched surfaces.
- Surface Tolerance: Some formulations bond even to damp or slightly oily surfaces—but surface prep still matters.
For a technical side-by-side of marine epoxy options, see ZDSpoxy’s Marine Epoxy Resin Manufacturer pillar page.
Surface Preparation for Reliable Hardware Bonds
No matter how advanced the chemistry, the key to durable marine hardware bonding is surface preparation. Here’s how to do it right:
- Degreasing: Wash all parts with solvent or appropriate cleaner. Even invisible oils will sabotage adhesion.
- Abrasion: Sand mating surfaces with 80–120 grit. Remove all gloss, oxidation, and loose matter.
- Dust removal: Use compressed air or a clean rag to clear away sanding debris.
- Dry fit first: Test assembly without adhesive to check alignment and clamp plan.
Careful surface prep is especially vital for bonding dissimilar materials (like stainless to fiberglass). For advanced tips on perfecting prep, ZDSpoxy’s guide on Marine Epoxy for Aluminum & Stainless Steel: Surface Prep & Corrosion Defense is a valuable resource.
How to Choose the Right Marine Epoxy Adhesive for Hardware Bonding
Not all epoxies are created equal. Consider these criteria:
- Gel vs. Liquid: Use gel/paste for vertical joints or whenever gap filling is necessary; liquid epoxies are suited for hairline joints or inlaying
- Cure Speed: Fast-cure resins are great for quick jobs but may not develop the highest strength or allow enough working time—critical for precise hardware alignment
- Low Odor/VOC: In confined spaces, a low-odor option like ZDS-2060AB can reduce PPE and ventilation requirements
- Substrate Compatibility: Confirm compatibility with deck, hull, or hardware materials—wood, metals, composites, plastics
- Pot Life: Pick a pot life that matches the job size and complexity (small hardware vs. long rail installations)
Why Viscosity Matters: Matching Adhesive Flow to the Application
The flow of an epoxy adhesive—its viscosity—directly affects bond strength and ease of use. For filling big gaps beneath deck fittings, a thixotropic or non-sag paste will stay put and bridge irregularities. For narrow bond lines, a thinner self-leveling resin ensures complete wetting and maximum adhesion.
ZDSpoxy’s product line highlights these differences: ZDS-189 is a wood repair putty ideal for filling and shaping, while ZDS-1240 acts as a flexible, waterproof gap sealer. Select viscosity with both structural needs and application method in mind.
Application Prep: Temperature, Humidity, and Substrate Condition
Environmental factors make or break epoxy bonding success. Key points include:
- Temperature: Most marine epoxies cure best between 15–30°C. Too cold, and cure times drag; too hot, and pot life plummets.
- Humidity: High moisture can create blush, bubbles, and poor cure—always keep dewpoint in mind, especially outdoors.
- Substrate Moisture: Damp wood or unventilated compartments require careful selection (see solutions for damp surfaces such as safe coating over damp substrates for context).
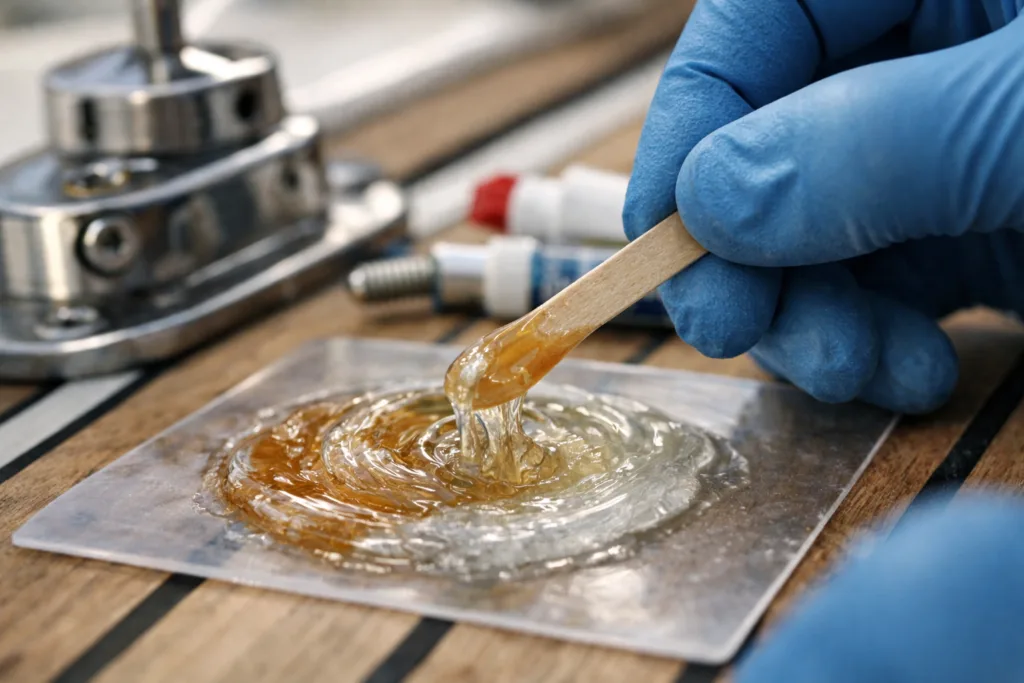
Mixing Marine Epoxy Adhesive: Discipline and Batch Control
Mixing two-part epoxies demands precision. Always verify the mixing ratio by volume or weight—never guess or “eyeball”. Mix thoroughly, scraping the sides and bottom of the container to avoid unmixed pockets. For critical bonds or large batches, it’s wise to mix only what you can apply within pot life limits.
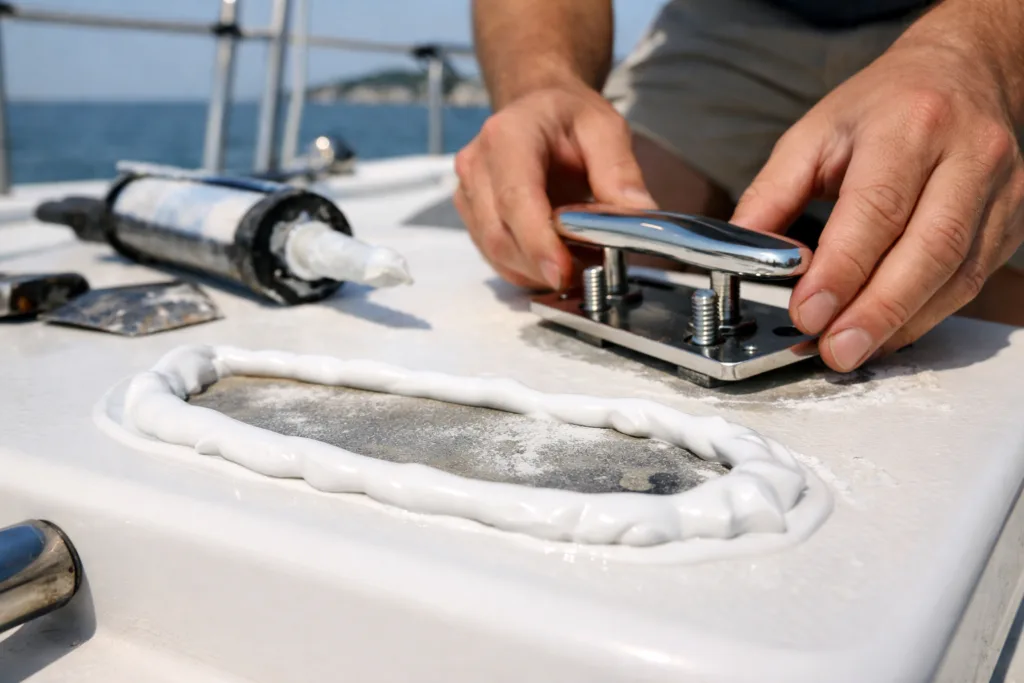
Edge Sealing: Preventing Water Ingress and Delamination
Hardware is often installed on cored decks—if epoxy fails to seal edges, moisture can invade, leading to core rot or freeze-thaw damage. Brush epoxy on all exposed edges, let it soak in, and topcoat with the chosen adhesive. Fillet under flanges to create a water-shedding ramp. Edge-sealing is vital for foam or balsa cores but boosts longevity on solid laminates, too.
Gap Filling: How to Handle Irregular Surfaces
Most marine deck and hull surfaces are not perfectly flat. Marine epoxy adhesives with gap-filling properties are required in these cases. Use spreaders or caulking guns for larger beads beneath hardware flanges. Avoid excessive squeeze-out that starves the bond. For deep voids or cracks, consider a putty-grade filler such as ZDS-189—a product formulated to cure hard, sand easily, and bond strongly for durable wood repair and filling irregularities.
Strategic Clamping for Maximum Bond Strength
Clamping allows epoxy to wet out the surfaces and set without movement. For deck hardware:
- Use even, moderate pressure—enough to slightly compress, not force out all adhesive
- Avoid overtightening (can squeeze all epoxy away; starves the joint)
- For through-bolts, finger-tight until the fillet is firm; only torque fully after full cure
- Jigs and blocks help keep hardware aligned during cure
- Use peel-ply or release film if cleanup is a concern
How Cure Time Shapes Project Planning
Full cure for marine epoxy adhesives can vary from 4 hours (for fast-curing) up to 48 hours, especially in cool or damp conditions. Follow manufacturer guidelines for minimum clamp and handling time. Be patient—shortcuts lead to weak bonds or surface blushing.
If you need rapid service, products like ZDS-1010AB epoxy system allow for much quicker installation, but balance the need for speed against working time and strength requirements.
When Epoxy Is Not Enough: Using Mechanical Fasteners with Adhesive Bonds
For safety-critical hardware like lifeline stanchions, winches, or cleats, epoxy alone should not be the sole retention method. Adhesive bonds add tremendous holding power and water resistance but may fail under extreme shock or over-tightened bolts. The proven approach is combining epoxy bonding with mechanical fasteners (through-bolts, washers, backing plates). Always follow the hardware manufacturer’s recommendations for bolt torque and bed in sufficient epoxy to seal out moisture. For broad insight on selecting the right marine adhesive (including methyl methacrylate, polyurethanes), reference ZDSpoxy’s comprehensive marine epoxy resin overview.
Common Mistakes in Hardware Bonding—And How to Avoid Them
- Skipping or rushing surface prep (leads to delamination and leaking)
- Starving the joint with excessive clamp pressure
- Insufficient filleting or edge sealing
- Mixing large batches, exceeding pot life, then applying partially cured adhesive
- Substituting general-purpose epoxies for marine-grade, which may lack water resistance
Real-World Insights: Lessons from Field Applications
ZDSpoxy’s field team often finds that moisture contamination—especially on old, re-bedded hardware—is a root cause of premature failure. Before installation, test for substrate dryness and use epoxy formulations tolerant of slightly moist surfaces (but avoid fully wet conditions unless explicitly supported). For complex assemblies, record batch numbers and exact mix ratios to trace performance or troubleshoot later.
Special Scenarios: Bonding Metals, Composites, and Woods
- Bonding Stainless to Glass-Reinforced Plastics: Abrade with a fresh abrasive, clean with acetone, and use a higher-modulus marine epoxy for best results.
- Foam Cored Decks: Mix adhesive slightly thinner for better edge soaking; avoid solvents around closed-cell foams.
- Teak and Oily Woods: Wipe with solvent, abrade to fresh timber, and bond immediately before extractives rise to the surface again.
Finishing and Cleanup Tips
Remove excess epoxy with denatured alcohol or cleaning pads before it sets. Once cured, a chisel or scraper is often required. Sand any overflow smooth and re-seal if through the substrate layer. Always wear PPE and protect adjacent surfaces—it’s easy to miss drips and stains, especially in bright sunlight or crowded decks.
Routine Inspection and Maintenance
After installation, inspect bonds seasonally: look for cracks, movement, or yellowing. Check under hardware flanges for leaks or wicking—early detection and resealing prevent core or substrate failure. Document hardware installation methods and epoxy types for future repairs or re-bedding work.
Pitfalls: When Not to Use Epoxy for Marine Hardware
Avoid using epoxy adhesives for plastic-to-plastic joints unless the manufacturer confirms compatibility. Flexible polyurethanes or specialty methacrylates may be a better match for highly active joints, plastics, or where repeated disassembly is needed.
Choosing Smarter—A Guide to Marine Adhesive Options
Marine epoxy adhesives are strong, stable, and versatile—but the right choice depends on project specifics and site realities. Explore ZDSpoxy’s marine adhesives pillar for comparison to polyurethanes and other chemistries, including when to favor flexibility or low exotherm.
Summary and Best Practices
Before bonding marine deck hardware, prioritize substrate prep, choose epoxy viscosity for the job, control clamping and curing, and always seal edges against moisture. When in doubt, combine adhesives with mechanical fasteners. Recording methods and results improves every installation. With these best practices, you get durable, watertight, serviceable deck hardware installations that stand up to even harsh marine environments.
Frequently Asked Questions
What makes marine epoxy adhesive different from other adhesives?
Marine epoxy adhesive is formulated for strong adhesion, excellent water resistance, and the ability to bond to diverse substrates like wood, metal, and fiberglass, making it ideal for marine environments where moisture, vibration, and stress are common factors.
How can I tell if a marine epoxy adhesive is right for gap filling?
Check the product’s viscosity and gap-filling rating. Pastes and thick formulations are designed to fill and bridge gaps, while low-viscosity liquids are suited for hairline joints; look for mention of “gap-filling” properties in technical data sheets.
How important is clamping when installing deck hardware with epoxy?
Consistent, moderate clamping ensures proper wetting and bond strength—avoid overtightening, which can squeeze out adhesive and weaken the joint. Use jigs for alignment and remove clamps only after recommended cure time.
Should mechanical fasteners still be used with marine epoxy adhesives?
Yes, for safety-critical deck hardware, always combine adhesive bonding with mechanical fasteners like through-bolts or backing plates. Adhesives improve water resistance and load distribution but should not be the sole method for retention in high-load or shock-prone areas.
What’s the best way to prep a surface for marine epoxy?
Degrease with solvent, aggressively abrade with 80–120 grit sandpaper, remove all dust, and dry fit components before applying adhesive. Good preparation is key to long-term reliability of the bond.
How long should marine epoxy adhesive cure before using the hardware?
Most marine epoxies reach handling strength within 24 hours at room temperature, but full cure and strength can take up to 48 hours. Always follow the adhesive manufacturer’s guidelines for clamp removal and loading times.