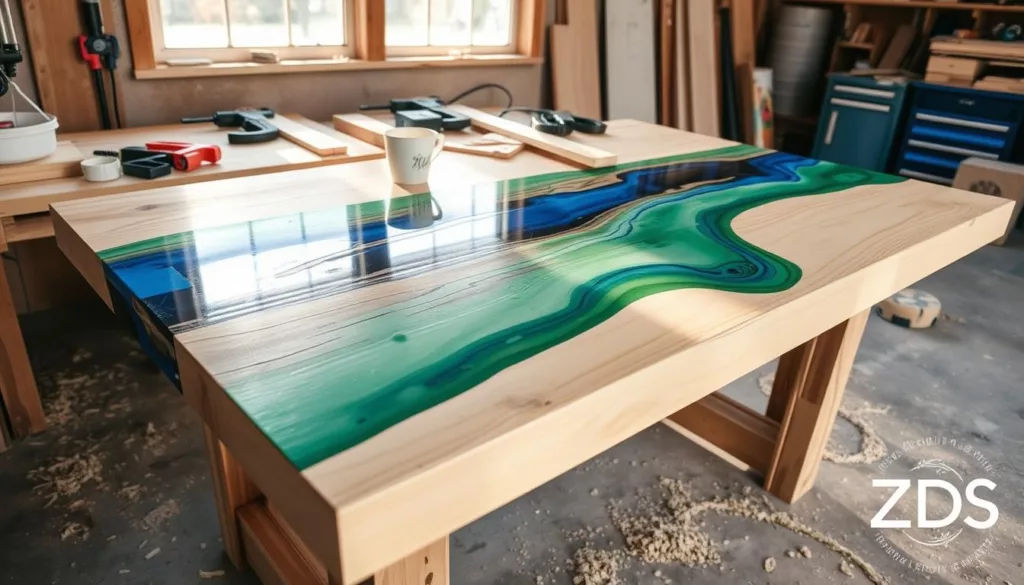
Make your home stand out with a beautiful table made from epoxy resin and wood. This DIY guide will show you how to make a unique and useful piece of furniture. It will be the highlight of your living area. Whether you’re experienced in woodworking or new to epoxy resin, this guide has everything you need to make your dream table come true.
Key Takeaways
- Discover the perfect wood species and properties of epoxy resin for your table project.
- Learn about the essential tools and materials required to create a stunning epoxy and wood table.
- Understand the importance of proper workspace preparation and safety measures.
- Explore techniques for wood selection, preparation, and epoxy resin application.
- Gain insights into creating unique patterns, color effects, and finishing touches.
Understanding Epoxy and Wood Combination for Table Making
Making a beautiful table with wood and epoxy resin needs knowing how they work together. The wood you pick is key, as some woods mix better with epoxy. Epoxy resins are great for making furniture because they are strong, last long, and can be shaped in many ways.
Types of Wood Suitable for Epoxy Tables
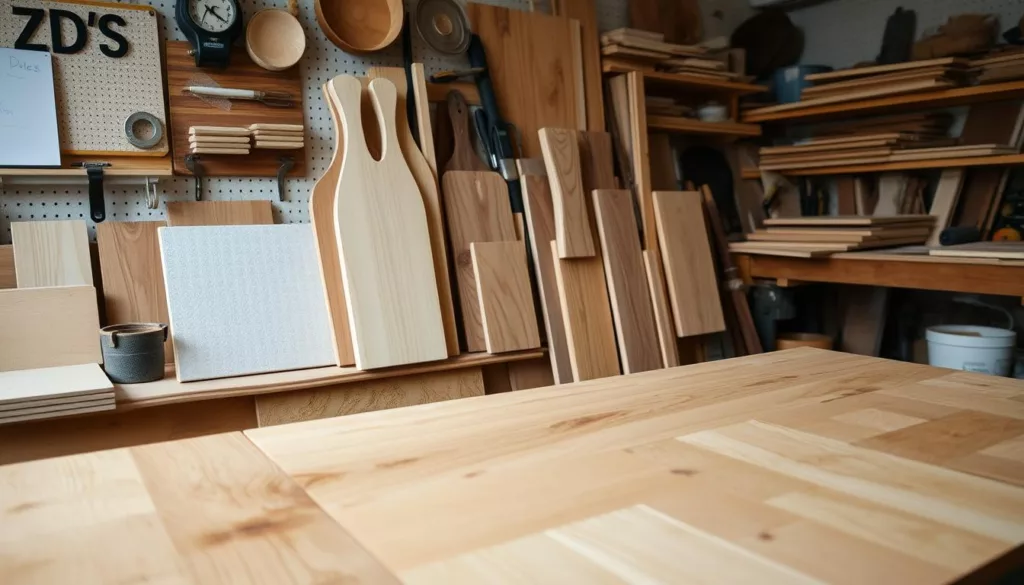
For epoxy tables, some woods are better than others. Maple, walnut, oak, and cherry are top picks. They have different looks, colors, and hardness that match well with epoxy’s shiny finish.
Properties of Epoxy Resins for Furniture
Epoxy resins are perfect for making furniture. They are strong, resist chemicals and wear, and can look really cool. Using ZDSpoxy ensures a strong bond between wood and resin.
Benefits of Using ZDSpoxy Products
Using ZDSpoxy for your table has many benefits. These resins bond wood and resin well and last a long time. Plus, ZDSpoxy makes the wood look amazing with a glass-like finish.
“The combination of carefully selected wood and high-performance epoxy resin creates a table that is not only visually stunning but also incredibly strong and durable.”
Essential Tools and Materials Needed for Your Project
Starting your epoxy and wood table project? You’ll need the right tools and materials. This ensures your project turns out great. Let’s look at the key items you’ll need to bring your idea to life.
Power Tools for Woodworking
Get high-quality power tools to make woodworking easier. You’ll need a table saw, a miter saw, and a random orbital sander. These tools help you cut, shape, and smooth the wood perfectly.
Measuring and Marking Instruments
Accurate measurements are key for a great project. Make sure you have a tape measure, a ruler, a carpenter’s square, and a pencil. These help you mark and measure your wood pieces accurately.
Epoxy Resin Mixing Supplies
Epoxy resin is the main attraction for your epoxy tables. Buy high-quality epoxy resin, like ZDSpoxy products. Also, get mixing cups, stir sticks, and a digital scale for precise mixing.
Safety Equipment
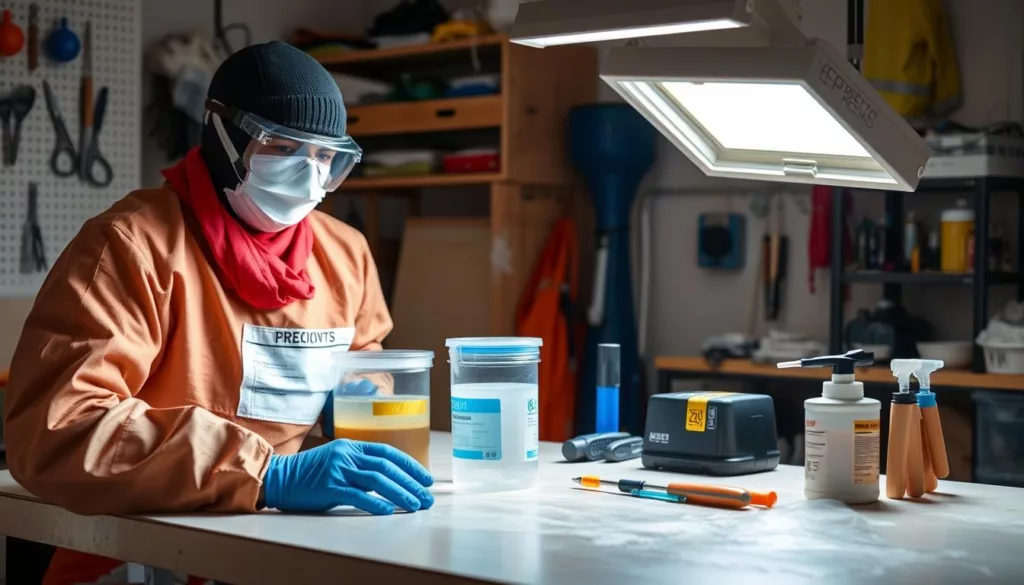
Don’t forget safety gear. You’ll need gloves, safety goggles, and a respirator or face mask. They protect you from dust and fumes during woodworking and epoxy application.
With these epoxy table tools, woodworking equipment, and resin mixing supplies, you’re ready to start your project. You’ll work with confidence and precision.
| Tool/Material | Purpose |
|---|---|
| Table Saw | Precise cutting of wood pieces |
| Miter Saw | Accurate angle cuts for design elements |
| Random Orbital Sander | Smooth the wood surface |
| Tape Measure | Measuring the dimensions of the table |
| Ruler | Precise measurements for woodworking |
| Carpenter’s Square | Ensure 90-degree angles for the table |
| ZDSpoxy Resin | High-quality epoxy for the table top |
| Mixing Cups | Containers for mixing the epoxy resin |
| Digital Scale | Measure the precise epoxy resin-to-hardener ratio |
| Gloves | Protect your hands during the project |
| Safety Goggles | Shield your eyes from dust and debris |
| Respirator | Safeguard your respiratory system |
“Preparation is the key to success when it comes to any DIY project. Equipping yourself with the right epoxy table tools, woodworking equipment, and resin mixing supplies will set you up for a smooth and enjoyable table-making experience.”
Preparing Your Workspace and Safety Measures
Making a beautiful epoxy and wood table needs a tidy workspace and careful safety steps. It’s key to focus on epoxy safety and set up your DIY area right for a great project.
Proper Ventilation Requirements
Good air flow is vital when working with epoxy resins. Make sure your area has enough air to avoid breathing in harmful fumes and chemicals. Use fans, open windows, and air purifiers to keep your space safe and comfy.
Personal Protective Equipment
- Wear protective gloves, preferably nitrile or latex, to shield your hands from direct contact with epoxy.
- Don a face mask or respirator to prevent inhalation of harmful particles and vapors.
- Utilize safety goggles to safeguard your eyes from possible splashes or airborne debris.
- Wear long sleeves and pants to cover exposed skin and lessen the chance of irritation or chemical burns.
Workspace Organization Tips
Keeping your DIY area tidy is key for a smooth epoxy project. Set up different zones for mixing, pouring, and curing. Organize your tools and materials well to work better. Also, keep your area clean, dry, and clutter-free to avoid accidents or messes.
| Epoxy Safety Precautions | DIY Workspace Setup | Ventilation for Resin Projects |
|---|---|---|
| Wear protective gloves, face masks, and safety goggles | Designate specific areas for mixing, pouring, and curing | Utilize exhaust fans, open windows, and air purifiers |
| Cover exposed skin to prevent irritation or chemical burns | Keep tools and materials neatly organized and within reach | Ensure adequate air circulation to mitigate fumes and VOCs |
| Maintain a clean and dry workspace to minimize contamination | Optimize workflow and workspace layout for efficiency | Prioritize ventilation to create a safe and comfortable environment |
“A well-prepared workspace and a keen eye for safety will ensure a successful and enjoyable epoxy table-making experience.”
How Can One Make a Table Using Epoxy and Wood
Making a table with epoxy resin and wood is a fun DIY project. It lets you show off your creativity. You’ll need to plan well, execute carefully, and add a bit of flair. Here’s a step-by-step guide to making your own epoxy table construction masterpiece.
First, pick the right wood for your table. Hardwoods like oak, maple, or walnut are great because they’re strong and look beautiful. Wood and resin table tutorial fans often choose live-edge or reclaimed wood for its unique look.
- Start by sanding the wood smooth and fixing any flaws.
- Measure and cut the wood to fit your table size, making sure it’s even.
- Build a strong frame or base for your table, using metal or more wood.
- Follow the instructions to mix the epoxy resin, paying attention to the right mix and drying time.
- Pour the epoxy over the wood, filling gaps and adding color if you want. Use pouring, brushing, or adding pigments for a cool DIY epoxy furniture look.
- Let the epoxy dry completely, as the maker suggests.
- After it’s dry, sand it smooth and add any final touches, like sealants or protective coatings.
By following these steps, you can make a beautiful epoxy table construction that highlights the wood’s natural beauty and the epoxy’s appeal. Be creative, try new things, and enjoy making a unique table that will be the heart of your home.
Wood Selection and Preparation Techniques
Making an epoxy table is all about choosing the right wood and preparing it well. The wood you pick and how you treat it can greatly affect the look and durability of your table. Let’s explore the important steps in preparing your wood for an epoxy table.
Drying and Moisture Content
Getting the wood’s moisture just right is key. Too much moisture can mess up the epoxy’s drying and cause problems. To get it just right, dry the wood naturally or use special equipment. It’s important to keep an eye on the moisture to know when it’s ready for the next step.
Surface Treatment Methods
After drying, it’s time to work on the surface. Sanding is a basic step to make the surface smooth for the epoxy. Use different grits of sandpaper to get the wood ready. You can also try other methods like planing or hand-sanding to add special touches to your table.
Dealing with Wood Defects
Every piece of wood has its flaws. It’s important to fix these before starting your epoxy table. Use fillers or special techniques to handle knots, cracks, and other issues. Fixing these problems will make your table look great and last longer.
Choosing the right wood, drying it properly, and treating the surface well are the first steps to a beautiful epoxy table. Paying close attention to these details will make your table a standout piece.
Mixing and Pouring Epoxy Resin Correctly
Making a beautiful epoxy and wood table needs careful mixing and pouring. Knowing the epoxy mixing ratio and the right resin pouring techniques is key. This ensures a smooth, bubble-free finish and a successful epoxy curing process.
Before starting, make sure your area is well-ventilated. Wear gloves and safety glasses for protection. Being prepared and organized helps the project go smoothly.
- Measure the epoxy resin and hardener accurately, following the manufacturer’s guide. The right epoxy mixing ratio is vital for proper curing.
- Mix the resin and hardener gently, making sure to mix well. Try not to create air bubbles during this step.
- After mixing, pour the epoxy resin slowly onto the wood. Use a spreader or squeegee for even coverage.
- Work fast, as the epoxy curing process starts right away. Watch the resin closely and adjust as needed for a smooth finish.
Learning resin pouring techniques takes time, but the result is a beautiful, durable table. It will be the highlight of your space.
| Step | Description |
|---|---|
| 1. Measure | Accurately measure the epoxy resin and hardener according to the manufacturer’s instructions. |
| 2. Mix | Gently mix the resin and hardener together, taking care to incorporate all the components thoroughly. |
| 3. Pour | Slowly and steadily pour the epoxy resin onto the prepared wood surface, using a spreader or squeegee to ensure an even, consistent coverage. |
| 4. Monitor | Work quickly, as the epoxy curing process begins immediately, and carefully monitor the resin’s behavior to make any necessary adjustments. |
“The key to a flawless epoxy and wood table is in the mixing and pouring technique. Take your time, follow the instructions, and the end result will be a stunning, durable piece of furniture.”
By mastering the epoxy mixing ratio, resin pouring techniques, and epoxy curing process, you can create a stunning and long-lasting epoxy and wood table. It will be the centerpiece of your home.
Creating Unique Patterns and Color Effects
Let your creativity shine and turn your epoxy resin table into a masterpiece. Our guide will show you how to make stunning patterns and color effects. You’ll learn about vibrant pigments and mesmerizing marbling techniques. Get ready to explore the endless possibilities of epoxy resin art.
Pigment Selection Guide
Choosing the right pigments is key to amazing color palettes. Try out different pigments, like mineral powders or liquid dyes. Find the perfect colors that match your wood and epoxy resin. Start with a little pigment and add more until you get the right intensity.
Marbling and Swirling Techniques
- Try fluid marbling by pouring and swirling the pigmented epoxy resin.
- Use tools like toothpicks or skewers to make cool patterns.
- Try different pour methods, like the “dirty pour” or “swipe,” to show off your style.
Adding Metallic Effects
Make your epoxy resin table shine with metallic accents. Use metallic powders, flakes, or leaf foil for glamour. Play with where and how much you add the metallic to contrast with the wood and resin.
“The true sign of intelligence is not knowledge but imagination.” – Albert Einstein
With these techniques, you can make your epoxy resin table a work of art. Let your imagination run wild and create unique patterns and colors. Your project will surely stand out.
Finishing Touches and Surface Treatment
Making the perfect epoxy and wood table needs focus on the last details. After the epoxy cures, it’s time for the finishing touches. These steps will make your table last longer and look amazing. From epoxy table finishing to wood and resin polishing, the right steps can turn your table into a beautiful centerpiece.
Sanding and Polishing
Start by sanding the table’s surface for a smooth finish. Use coarse grit sandpaper first, then move to finer grits for a silky feel. Make sure to sand uneven spots until the surface is perfect.
After sanding, polish the table. Use a top-notch polish made for epoxy and wood. Rub the polish in circles to make the table shine.
Protective Coatings
To protect your beautiful table, apply a strong protective coating. These coatings look good and keep the table safe from damage. Look into polyurethane or lacquer, following the instructions for use and drying.
| Finish | Durability | Shine | Ease of Application |
|---|---|---|---|
| Polyurethane | High | Moderate | Moderate |
| Lacquer | Moderate | High | Easy |
By sanding, polishing, and using the right protective coatings, you can make your table last and look great. It will be the highlight of any room.
“The final touches can make all the difference in elevating a good piece of furniture into a masterpiece.”
Common Mistakes to Avoid During Construction
Making a beautiful epoxy table needs precision and care. Even skilled DIYers can run into common problems. Knowing these issues and taking steps to avoid them can make your project go smoothly. Let’s look at some common mistakes to avoid when working with epoxy resins and wood for your table.
Temperature Control Issues
Keeping the right temperature during epoxy curing is key. If it’s too cold, the resin won’t cure right, making it tacky or soft. If it’s too hot, it cures too fast, causing bubbles and cracks. Make sure your workspace is at the right temperature for your epoxy.
Mixing Ratio Errors
Getting the epoxy resin and hardener mixed right is very important. If you mix it wrong, the resin won’t cure right or will be weak. Always follow the manufacturer’s mixing ratio and use precise tools for mixing.
Bubble Formation Solutions
Bubbles in epoxy can be a big problem. But, there are ways to stop and remove them. Make sure the surface is ready, degas the resin, and use a heat gun or torch to get rid of bubbles. Being patient and gentle is important when removing bubbles.
By watching out for temperature, mixing, and bubble issues, you can make a stunning epoxy and wood table. With the right steps and practice, you can fix common problems and get professional-looking results.
Conclusion
In this guide, we explored how to make a beautiful table with epoxy and wood. You now know how to pick the right materials and mix and pour epoxy. This lets you turn simple wood into a unique DIY epoxy table success. Creating your own furniture is incredibly rewarding, and you can achieve many woodworking achievements.
By following our steps and using top-notch products like ZDSpoxy, you can bring your custom furniture creation dreams to life. You can choose from modern to rustic designs. Making an epoxy and wood table is a fulfilling journey.
So, start now! Get your materials ready and set up your workspace. Your DIY epoxy table project will be a source of pride. Woodworking lets you explore new patterns and colors. Let your creativity run wild. The joy of making something special is unmatched.
FAQ
What types of wood are suitable for creating epoxy tables?
Maple, oak, walnut, and ash are top picks for epoxy tables. They have the right hardness and grain patterns. Plus, they work well with epoxy resins.
What are the key properties of epoxy resin that make it ideal for furniture-making?
Epoxy resins are super durable and resistant to scratches and impacts. They also create a smooth, glossy finish. These traits make epoxy great for making tables and furniture that last and look good.
What are the benefits of using ZDSpoxy products for an epoxy and wood table project?
ZDSpoxy products are made for woodworking and furniture-making. They offer clear, low-viscosity epoxy that’s easy to mix and pour. This makes for a smooth application and a bubble-free finish.
What are the essential tools and materials needed for an epoxy and wood table project?
You’ll need power tools like circular saws and orbital sanders. Also, measuring tools, safety gear, and epoxy resin and hardener are must-haves. Don’t forget pigments or additives and wood for the table top and base.
How can one ensure proper ventilation and safety when working with epoxy resin?
Good ventilation is key when working with epoxy. Make sure your workspace is well-ventilated. Wear gloves, goggles, and a respirator to protect yourself.
What are the key steps in the process of creating an epoxy and wood table?
First, pick and prepare your wood. Then, mix and pour the epoxy resin. Next, add unique patterns and colors. Finish with final touches on the table surface.
How can one achieve the optimal moisture content in wood for an epoxy table project?
Dry your wood properly to get it between 6-8% moisture. Use a moisture meter to check the wood’s moisture level before starting your project.
What are some common mistakes to avoid when mixing and pouring epoxy resin?
Avoid mixing errors, temperature issues, and air bubbles in the resin. Follow the manufacturer’s instructions and prevent bubbles to ensure success with your epoxy table.

