Understanding Epoxy Pot Life, Working Time, and Cure Schedule
Anyone embarking on a boat repair, lamination, or marine maintenance project with resin systems will quickly encounter words like epoxy pot life, working time, gel time, cure schedule, temperature effect, exotherm, and batch size. These terms are much more than jargon—they’re essential for successful planning, mixing, and application. Let’s clarify what they mean and their real on-site impact.
What Is Epoxy Pot Life? The Foundation of Application Timing
Epoxy pot life refers to the time after mixing your resin and hardener during which the epoxy stays pourable in a container. Pot life ends when the mixture thickens noticeably and is no longer workable. For marine repairs with resin-rich laminates, understanding pot life prevents wasted material and rushed applications.
The Science and Practicalities of Pot Life
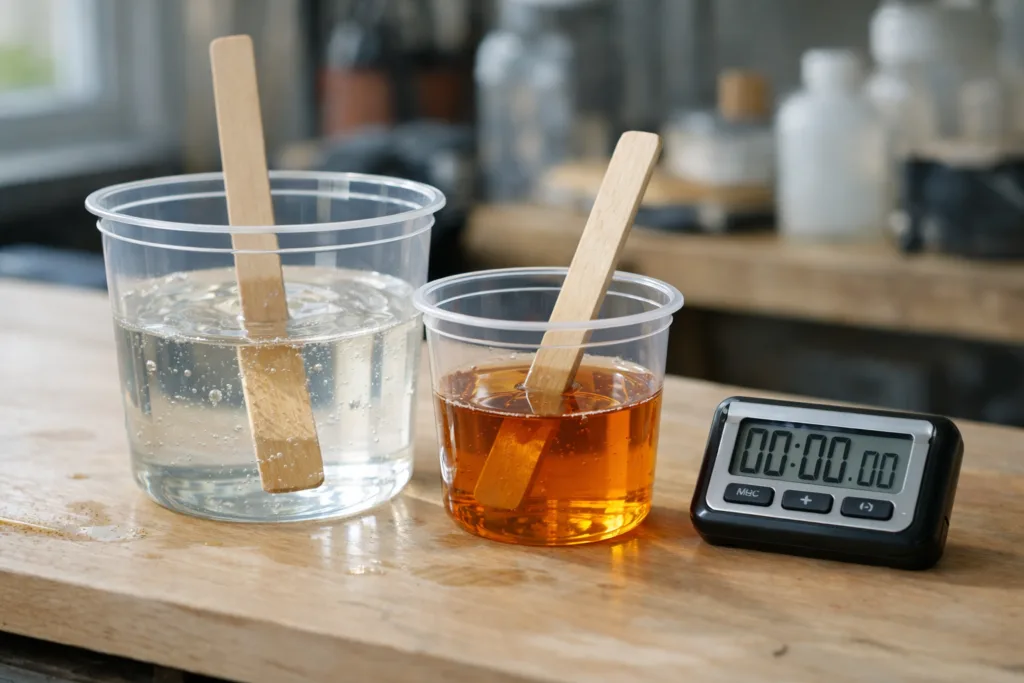
When you mix the epoxy parts, a chemical reaction releases heat—this is the “exotherm.” As heat and reaction products build up, viscosity increases, and eventually the resin gels. The pot life varies from just 5 minutes for fast-cure products to more than an hour for slow-cure marine epoxies used in warm climates or large layups. It’s critical to remember: pot life is measured in the mixing container, not on your substrate.
Defining Working Time: What Installers Need to Know
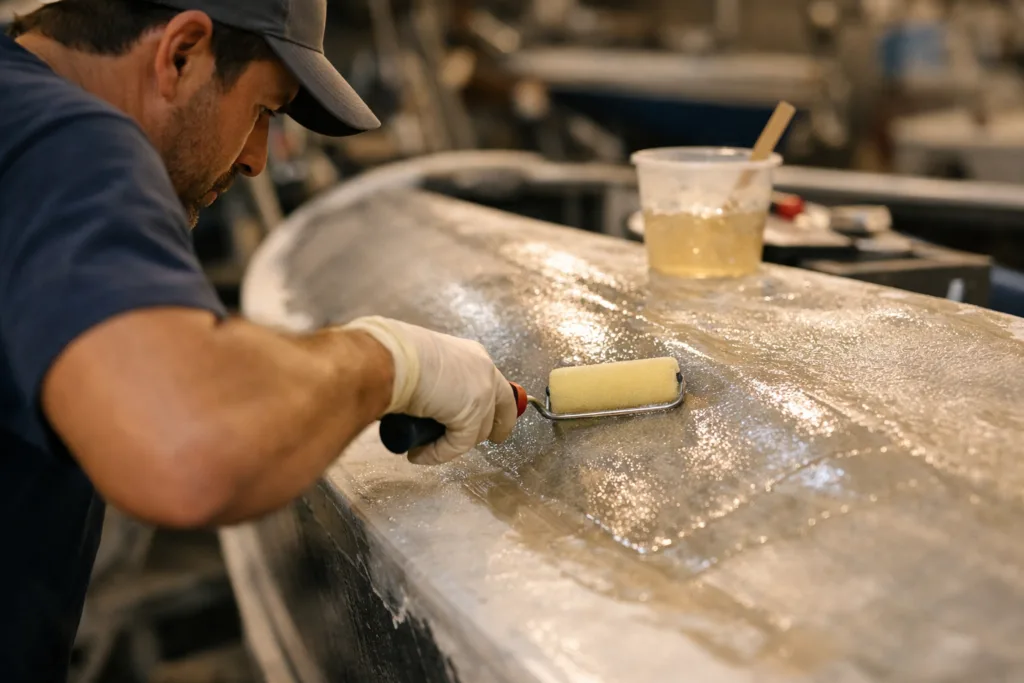
Working time, sometimes called open time, describes how long your epoxy system allows you to spread, roll, or brush the product onto the surface at usable viscosity. This period is generally a little longer than the pot life, since thin films dissipate heat more effectively.
How Working Time Differs From Pot Life
While pot life is measured in the mixing vessel, working time describes the material’s usability when spread onto your substrate. For example, a batch might have a 20-minute pot life but a 25-minute working time on a primed deck. Applying epoxy in thin layers extends the window, while thicker layers or hotter days reduce it significantly.
What Is Gel Time in Marine Epoxy?
Gel time is the moment the epoxy mix shifts from liquid to a jelly-like, non-pourable state. For most marine systems, this is similar (but not identical) to the end of pot life. Gel time is used more in laboratory and production settings, but awareness of it helps avoid sticky hands or ruined tools mid-task.
Practical Example: Gel Time in Boat Laminations
When laying fiberglass cloth with marine epoxy, you’ll feel the distinct change in texture as you approach the end of your window—rolling or brushing becomes increasingly tough. That’s gel time in action. If you try to work after this point, bond quality and aesthetics can suffer. For applications like marine epoxy resin systems, timing your batch size to stay ahead of gel time is key for professional outcomes.
Cure Schedule Explained: When Is Epoxy ‘Hard Enough’?
The cure schedule is the timeline over which the epoxy turns from freshly mixed to fully hardened and ready for use. Most cure schedules include:
- Initial Cure (no tack, can apply next layer without sanding)
- Full Cure (mechanical properties maximized—safe for load and immersion)
- Post-Cure (sometimes recommended for ultimate heat/chemical resistance)
Each stage is temperature- and batch-dependent, so it pays to check your system’s mix ratio and properties guide.
Temperature’s Role: Why Conditions Dictate All Timings
Epoxy is sensitive to temperature at every phase. As a rule, heat speeds up all reactions while cold slows them down. Here’s how temperature impacts each key stage:
| Temperature | Pot Life | Working Time | Gel/Cure Schedule |
|---|---|---|---|
| 10°C (50°F) | Very Long | Extended | Slow Cure |
| 20°C (68°F) | Standard (as per datasheet) | Usual | Standard |
| 30°C (86°F) | Much Shorter | Reduced | Fast Cure |
If you’re laminating a hull or filling a repair near noon in summer, plan on shorter working windows and mix smaller batches!
Understanding Exotherm: A Critical Safety and Quality Factor
Exotherm is the self-accelerating heat generated as epoxy cures. In larger batches, the reaction can build up a surprising amount of thermal energy, dramatically accelerating gel time and risking resin yellowing or even smoke. Always spread mixed epoxy into shallow trays if preparing a large batch, or opt for slow-cure systems for thicker applications. For deep pours—including some repairs with ZDS-2060AB wood primers—never exceed recommended pour depths.
Batch Size: How Much Is Too Much?
Doubling your batch volume does more than double the exotherm risk. Heat cannot escape from large masses as fast as from small batches. Always mix the minimum batch suitable for your task. For extended jobs, stagger batches: start small, use up, and then mix again. This is especially important for jobs requiring color consistency or surface flatness.
Quick Reference Table: Pot Life, Working Time, Gel Time, and Cure
| Term | What It Means | Typical Marine Value | Determining Factors |
|---|---|---|---|
| Pot Life | Usable time in-mixer post-blend | 15-45 mins | Batch size, temp, formulation |
| Working Time | Hand-on, spreadable application time | 20-60 mins | Film thickness, substrate temp, humidity |
| Gel Time | Turns rubbery, no longer spreadable | Near pot life end | Product type, ambient temp |
| Cure Schedule | Timing to reach hardness milestones | 6 hrs (handle), 24-72 hrs (full cure) | Temp, batch mass, airflow |
How Temperature and Batch Size Affect Epoxy Usability
Epoxy pot life, working time, gel time, cure schedule, temperature effect, exotherm, and batch size are all interconnected. Onboard, real-world conditions make them all variable:
- High temperature: Drastically reduces all time windows—mix smaller batches, work quickly, and avoid direct sunlight
- Large batch size: Unexpected heat and fast gel—use shallow pans or divide into smaller mixes
- Thick pours/repairs: Stick to manufacturer’s pour limits; exotherm can damage work and resin
ZDSpoxy’s site teams found that using temperature logs, keeping all resin and hardener containers in-shade, and mixing only what one worker can lay in 10–15 minutes prevents most waste and quality concerns.
Planning a Successful Marine Epoxy Repair or Lamination
Planning comes down to anticipating your variables. Here are actionable steps to maximize outcomes—without polymer chemistry headaches:
- Read your datasheet for recommended temperature and mixing ratio guidelines (see key term comparisons).
- Measure all parts by weight or volume before mixing—accuracy trumps speed.
- Mix in clean, flat-bottomed containers to maximize working time.
- For hot or humid boatyards: keep epoxy kits in cool shade, and schedule repair work for early morning or evening.
- Precut all glass cloth, sand surfaces, and lay out tools before mixing epoxy. Every minute counts!
- For thick, challenging repairs, select slow-cure or low-exotherm systems (visit the Marine Epoxy Resin Manufacturer page for help selecting slow/fast options).
- If in doubt, do a small test patch with your chosen batch size and note all timings before scaling up.
Choosing Between Fast- and Slow-Cure Marine Epoxies
The ideal cure speed depends on your application, project size, and air temperature. Fast-cure epoxies work for small, time-sensitive jobs. For laminating hulls, decks, or bulkheads, slow-cure grades maximize open time and reduce exotherm risks. ZDSpoxy recommends consulting a supplier who can match your ambient conditions to the right resin/hardener blend, instead of relying on guesswork.
Common Issues Caused by Not Understanding Pot Life and Working Time
- Sticky, soft, or weak bond lines due to rushing application past gel time
- Crisped, yellowed, or cracked resin in mass pours from excess exotherm
- Premature gel in-mixer, meaning the batch can’t be salvaged or used
- Poor consistency across repairs (e.g., patchwork color or texture)
- Wasted epoxy and increased job costs
Prevention Tips from Resin Plant and Site Supervisors
- Always use a watch or timer for each batch; track the real windows you observe, not just datasheet estimates
- For complex repairs, use color-coded mixing buckets and label with batch start time
- Test a small batch if in doubt, particularly in unfamiliar conditions
- If performance or appearance is critical, save a cured ‘witness tile’ to verify full cure and hardness
ZDSpoxy’s Approach: Batch Size, Application, and Real-World Quality
From the plant floor to the dry dock, batch size discipline and real-time timing are more impactful than laboratory-perfect ratios. ZDSpoxy’s process engineers always prioritize:
- Choosing batch volumes one worker can use in under 20 minutes for most boatyard jobs
- Shifting to slow-cure or specialty formulas for thick fillets, core bedding, or mass fills
- Using clear, shallow application trays to minimize exotherm risks
- Documenting ambient temperature and humidity on QC records during critical repair and coating jobs
These steps transform the theoretical pot life and working time into measurable, repeatable quality, even under challenging field conditions.
Preparing for Variable Weather and Temperature on Site
Outdoors, temperature swings can turn a well-planned marine repair into a race against time. Here’s how to prepare:
- Have auxiliary shading and portable fans to reduce direct sunlight and temperature spikes
- Plan for extra hands if ambient temperature exceeds 28°C (82°F) or batch sizes approach the upper limit
- If unexpected heat hits, pour out mixed epoxy quickly, or split into ice baths to extend usable time
- In cold conditions, store resins indoors overnight and allow slow warm-up before mixing
Best Practices for Large and Small Batch Mixing
Smaller batches minimize exotherm risk and offer more control. For very large laminations:
- Organize crew so one mixes, one lays, and one observes time and temperatures
- Invest in mixing sticks, graduated containers, and spreading tools to keep timing tight
- Consider split batch approaches: mix two small batches in parallel rather than one large one
Case Study: Efficient Repairs Using ZDS-189 Wood Repair Putty
During a recent dockside hull patch repair, a technician used ZDS-189 Wood Repair Putty for a 2-cm deep gouge. Careful attention to batch volume (<2:1 ratio) and 22°C shade meant the working time matched datasheet projections: 35 minutes, ample for shaping and smoothing with no rush. Avoiding over-mixing yielded a strong bond line and a sandable finish well before topping the repair with primer and finish coat.
The Role of Gel Time and Secondary Bond Windows
In large builds or laminations, there’s often a need to know when to add another layer or component for maximum bond. The “secondary bond window” falls between the end of working time and before full cure—most reliable when the surface is still sticky, but not so soft it deforms. Sanding between layers may be necessary if cure exceeds this period.
Additional Tips for Safe and Effective Mixing
- Always use gloves, eye protection, and ensure good ventilation
- Dispose of excess mixed epoxy in thin layers on cardboard—never let vessels overheat in a bin
- Keep clean mixing sticks for every batch to avoid cross-contamination
Conclusion: Mastering Pot Life, Working Time, and Cure for Marine Projects

Clarity on epoxy pot life, working time, gel time, cure schedule, temperature effect, exotherm, and batch size can mean the difference between a professional-quality marine repair and expensive, time-consuming headaches. Respecting batch size limits, accounting for actual temperature, and choosing the right resin/hardener blend will help you deliver results you can trust on water or land. Keep timing, batch, and environmental records, and always test before scaling up for larger repairs or installations. With the right planning, marine epoxy projects become predictable, safe, and durable in all conditions.
Frequently Asked Questions
How do temperature and batch size affect epoxy pot life?
Higher temperatures or larger batch sizes shorten epoxy pot life by quickening the chemical reaction and building up more exothermic heat, making the resin gel sooner.
What’s the difference between pot life and working time with marine epoxy?
Pot life is the time epoxy remains workable in the mixing container, while working time refers to the usable spreadable window once applied to a surface—typically a bit longer.
How can I extend epoxy working time in hot weather?
Move resin mixing and application to shade or cooler times, mix smaller batches, or use slow-cure epoxy systems to give more open time in high temperatures.
Why is exotherm dangerous in large epoxy batches?
Large volumes trap heat, potentially accelerating the reaction. This can cause premature curing, yellowing, weak bonds, or even melting of containers—spread epoxy thinly to reduce risk.
Can I add more hardener to make epoxy cure faster?
No, altering the resin-to-hardener ratio compromises epoxy strength and cure. Use a matched fast-cure system instead, not more hardener.
How do I tell if my epoxy is fully cured before sanding or painting?
Test with gentle finger pressure—the surface should be hard and non-tacky. For best results, allow full datasheet-recommended cure time before sanding or finishing.
Related Reading
- Shelf Life, Pot Life, and Working Time: When Each One Matters Most in Repairs
- How Precision Mix Ratios Prevent Marine Epoxy Failures
- Avoiding Failures: A Guide to Exothermic Reaction Curves in Large Pours
- What Shore D Hardness Means for Real-World Epoxy Floor Durability
- Find the Best Marine Epoxy for Your Project: Fast vs Slow Cure Explained