Introduction: Mastering Laminating Epoxy Resin Marine with Hand Lay-Up
Laminating fiberglass with marine epoxy resin using the hand lay-up method is the gold standard for creating durable, water-resistant structures in boatbuilding, repairs, and custom marine projects. Whether you’re restoring a classic hull or building sleek new panels, understanding the mechanics of laminating epoxy resin marine is essential for getting a flawless, bubble-free result. This guide offers a technical walkthrough—covering material selection, wet-out technique, roller choices, air removal, resin consumption, and managing the critical cure window. You’ll learn not only how to perform every step but also why each detail matters for lasting performance.
Laminating Epoxy Resin Marine: What Makes It Unique?
Unlike standard epoxies, laminating epoxy resin marine is formulated for high bond strength, moisture resistance, and controlled viscosity—optimized for wetting fiberglass cloth and mat. It resists water penetration, tackles variable temperatures, and cures with minimal exotherm. Choosing the right marine epoxy ensures you achieve full fiber wet-out without sagging or dry spots. Most marine-grade epoxies, such as those used for hand lay-up, feature moderate pot life and a balance between flowability and non-run properties to suit vertical and curved surfaces.
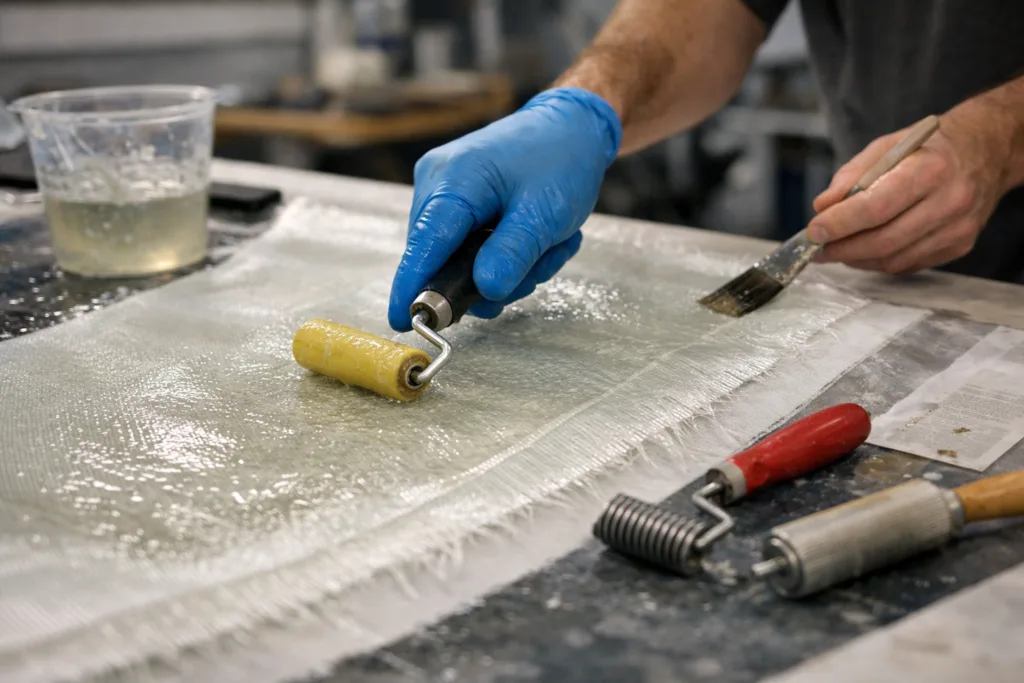
Hand Lay-Up Technique: Step-by-Step for Marine Success
The hand lay-up method relies on direct placement and physical manipulation of fiberglass and resin. This technique is preferred in marine applications for its simplicity and control, especially with complex shapes. Here’s the practical workflow:
- Prepare the substrate: Clean, sand, and degrease
- Cut fiberglass to fit—leave slight overlap
- Mix laminating epoxy resin marine according to its recommended ratio
- Apply a primer or initial coat if the substrate is porous or highly absorbent
- Lay fiberglass cloth onto the surface
- Wet out using rollers or brushes, ensuring all fibers are saturated
- Eliminate air bubbles with proper rolling techniques
- Complete lay-up before the resin’s cure window closes
| Step | Purpose | Tips |
|---|---|---|
| Substrate Prep | Ensures bond & long-term durability | Use 80-grit sanding, avoid residue |
| Fiberglass Cut | Custom fit, avoids stretching | Scissors or rotary tools |
| Resin Mix | Activates chemical cure | Mix slowly; avoid aeration |
| Lay-Up | Builds laminate strength | Work in manageable sections |
Choosing the Right Marine Epoxy: Viscosity & Pot Life
The two main parameters of laminating epoxy resin marine are viscosity and pot life. Viscosity affects how well the resin flows through the fiberglass and coats the substrate. For hand lay-up:
- Low to moderate viscosity (<700 cps): Ideal for wet-out but not too runny
- Pot Life (working time): 30–60 minutes is best for non-rushed projects
If you’re working in hot climates or need more time for large surfaces, select a slow-cure system. ZDSpoxy engineers recommend checking the batch’s actual working time and viscosity before each job, as these parameters can shift with temperature and humidity. This attention to detail prevents dry spots and reduces waste (see slow cure epoxy application tips).
Resin-to-Fiber Ratio: How Much Epoxy Do You Need?
Determining the right resin-to-fiber ratio is essential for efficient use and optimal laminating strength. Too much resin causes brittleness, while too little leaves fibers dry and weak.
- Typical ratio: 1:1 by weight for woven cloth, 1.5:1 for chopped mat
- Estimate fiber area and multiply by recommended resin consumption
- Account for overlap and waste—plan an extra 10% for safety
ZDSpoxy’s marine systems often include detailed datasheets listing expected resin values per square meter, which helps eliminate guesswork and budget overruns.
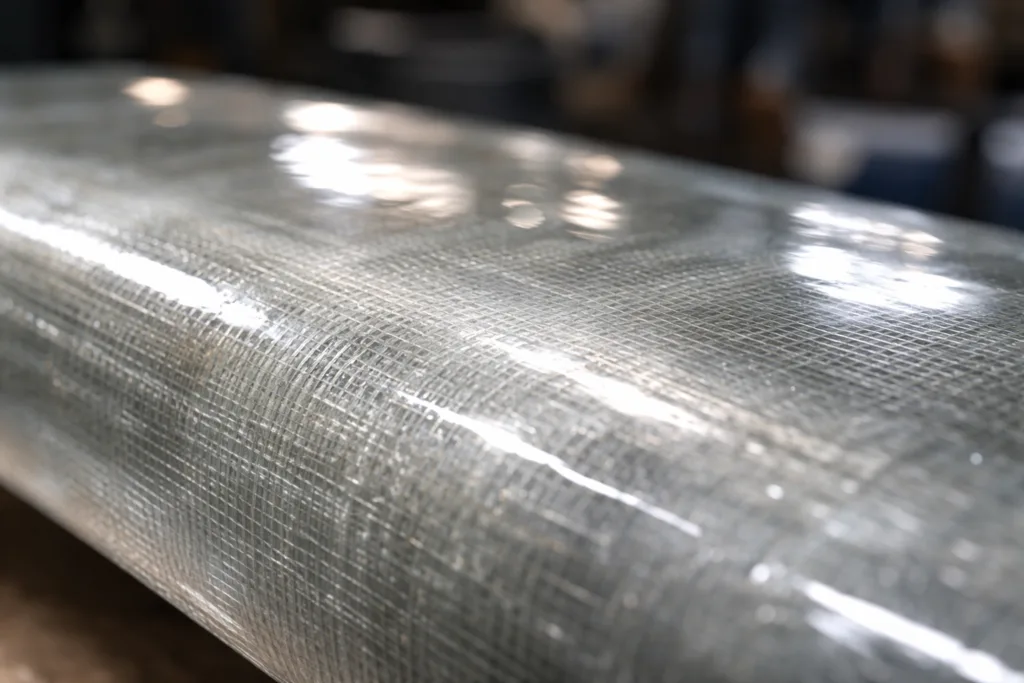
Wet-Out Technique: Achieving Full Fiber Saturation
Wet-out means thoroughly saturating the fiberglass with resin. Proper wet-out prevents dry spots, delamination, and weak areas. Here’s how to achieve it:
- Pour or brush resin evenly over the fabric
- Use a laminating roller to push resin through the weave
- Monitor for dark, fully transparent fabric (indicates saturation)
- Avoid over-brushing, which can pull fibers and reduce structural integrity
Laminators sometimes use bubble busters or specialty rollers, especially on large flat panels. For critical applications like hull repairs, repeating wet-out checks is standard site practice. For systems with higher viscosity or colder conditions, warm the resin slightly (never above manufacturer limits).
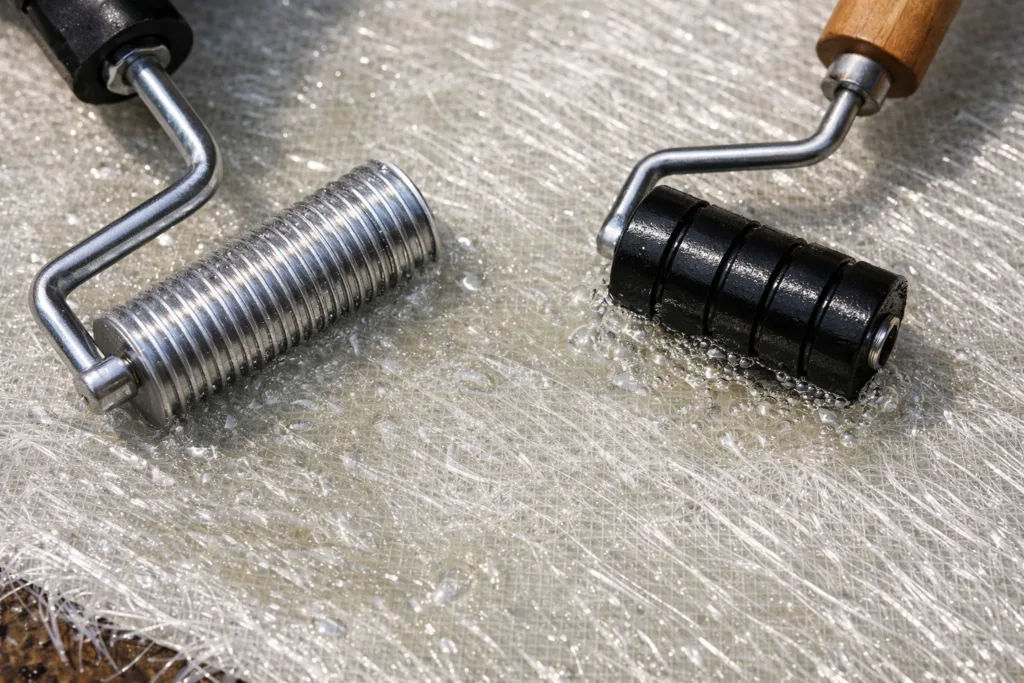
Roller Selection: Which Tools Work Best?
Rollers aren’t just for paint—they are essential for even resin distribution and air removal in laminating epoxy resin marine. Common types include:
- Bristle rollers: Ideal for tight curves and initial wet-out
- Paddle rollers: For thick lay-ups and high-volume wet-outs
- Aluminum rollers: Flat layers, promote air release
Selecting the right roller increases speed and reduces chances of trapped air. Always clean rollers between batches to prevent contamination and surface defects. For small jobs, foam rollers can suffice but tend to break down with prolonged use.
Air Removal: Preventing Bubbles and Pores
Bubbles are the enemy of structural integrity. Effective air removal is a step often missed by beginners. Techniques include:
- Use aluminum or paddle rollers directly after wet-out
- Work in overlapping passes until bubbles vanish
- Revisit critical areas as resin gels—some bubbles rise late
For thick laminates, stagger roller passes and inspect beneath the fiberglass. Some pros tap with a brush handle or use a stippling motion to chase stubborn bubbles. If bubbles persist, review resin viscosity and batch mixing speed (see bubble troubleshooting guide).
Cure Window: Timing Your Application for Strong Bonds
The cure window refers to the time after mixing when resin remains workable and bonding potential is highest. Miss this window, and layers may not bond well, resulting in weak laminates or surface tackiness.
- Begin lay-up within the first 1/3 of pot life
- Finish roller passes before gel stage starts
- Keep surfaces free from dust or moisture while curing
ZDSpoxy advises contractors to consider site temperature and humidity—both affect cure window and can shorten working time unexpectedly. If you need to layer additional fabric, wait for tacky but not fully cured resin, maximizing chemical bond (explore cure time management here).
Finishing Laminated Surfaces: Sanding, Sealing & Inspection
Once the laminate cures, you must inspect for defects, sand surfaces, and consider sealing for UV or chemical protection. Follow these finishing steps:
- Visually inspect for bubbles, dry spots, and resin-rich zones
- Sand with progressively finer grit (start around 80, finish at 220+)
- Apply additional coats of marine epoxy as a sealer or primer
- Optionally finish with a UV-resistant clear coat or marine varnish
This step solidifies surface strength and aesthetics. Marine applications sometimes require anti-slip coatings or color layers, depending on end-use.
Common Problems When Laminating Epoxy Resin Marine—and Solutions
Even experienced laminators run into issues. Here’s a troubleshooting guide:
| Problem | Cause | Solution |
|---|---|---|
| Bubbles | Insufficient air removal, fast mixing | Switch roller type, slow mixing |
| Sticky spots | Resin not fully cured | Extend cure time, mix new batch |
| Delamination | Out of cure window, wet substrate | Check substrate, keep within pot life |
| Dry fibers | Not enough resin, fast application | Increase resin/fiber ratio, slower lay-up |
Marine Safety: Handling Epoxy Resins Responsibly
Epoxy resins are generally safe if handled responsibly. Always wear nitrile gloves, safety goggles, and long sleeves. Work in well-ventilated areas and avoid skin contact. Storage conditions, especially for marine epoxies, should keep containers tightly sealed and away from extreme heat. Dispose of waste according to local regulations.
Understanding Marine Epoxy Viscosity and Batch Consistency
Batch consistency is critical in marine epoxy production and use. ZDSpoxy’s resin mixing operations emphasize viscosity checks and batch gel time testing. These measures ensure each batch matches intended flow and working time, which in turn reduces defects in hand lay-up. For field jobs, always pre-test a small sample, checking that resin wets fabric fully before committing to a full-scale application.
Environmental Factors: Temperature, Humidity, and Curing
Temperature and humidity dramatically affect the cure window and finished laminate strength. Too cold, and resin won’t flow; too hot, and pot life shrinks rapidly. Best practice:
- Work between 15°C and 27°C (60°F–80°F)
- Keep humidity below 65% for optimal cure
- Plan batch size by ambient temperature
Always refer to epoxy technical datasheets for site-specific guidance (view marine laminating options).
Packing and Storage for Marine Epoxy Resin
Marine epoxies should be kept in their original containers, stored in dry, temp-stable spaces. Always check for manufacturing date and shelf life—some resins lose performance after prolonged storage. ZDSpoxy offers packaging suited for both small and large-scale marine jobs, reducing waste and improving batch-to-batch consistency.
Comparing Laminating Epoxy Resin Marine to Other Systems
Marine laminating epoxies outperform polyester and vinyl ester in bond strength, water resistance, and cure control. However, polyaspartic or polyurethane systems may have quicker cure rates or superior UV resistance, but lack full fiber wet-out power for hand lay-up. For a deep-dive comparison of marine resin systems, refer to the marine epoxy resin manufacturer pillar.
Laminating Epoxy Resin Marine in Real-World Boat Repairs
Boat repairs often require quick action and absolute reliability. Using laminating epoxy resin marine in hand lay-up allows you to rebuild structural zones, fill cracks, and reinforce decks—all with the assurance of a chemical bond that resists saltwater and UV.
Final Checks: Inspection and Quality Assurance
Post-cure inspection is not optional. Always check for adhesion, voids, and consistent finish. Professional sites keep QC logs and may run adhesion tests before top-coating or installing hardware (see adhesion testing tips).
The Role of Primers in Marine Laminating Epoxy
Surface primers add to bond reliability where substrates are porous or contaminated. Use dedicated marine primers—never general-purpose products. Consult datasheets for primer compatibility with your chosen laminating epoxy.
Layering, Recoat Window, and Multi-Laminate Builds
When building up multiple layers, timing is critical. Lay additional fabric layers while the previous is still tacky but not fully cured, maximizing chemical bonding. If you miss the recoat window, sand thoroughly before adding more resin.
Advanced Wet-Out: Dealing with Thick Fiberglass Mats
Thicker mats require more resin, slower application, and extra rolling passes. Always follow manufacturer guidelines for maximum thickness per layer to avoid exotherm/heat buildup.
Optimizing Resin Consumption: Waste Reduction Strategies
Careful measurement, controlled batch size, and targeted roller technique reduce waste. Estimating project area and adjusting for layer overlap is critical.
Managing Exotherm and Heat Buildup
Large batches or thick laminates can overheat (exotherm). Mix smaller batches, spread resin quickly, and monitor curing. Never leave mixed resin in deep containers to avoid uncontrolled heating.
Bond Line Thickness and Structural Strength
Perfect bond lines are thin but continuous. Extra thick resin layers weaken structure. Aim for full fiber saturation but avoid pooling—roller action is key.
Resin Application: Spray vs Brush vs Roller
For hand lay-up, rollers provide best wet-out. Spraying may work for primer coats but risks uneven coverage. Brushing is good for small detail zones.
Preparing for Topcoat: Last Steps Before Painting or Varnish
After final sanding, remove all dust and check for bond failures. Apply compatible topcoat or marine varnish for UV defense and aesthetics.
Conclusion: Laminate Like a Pro with Marine Epoxy Resin
Hand lay-up with laminating epoxy resin marine gives reliable, professional results when you control every variable—viscosity, pot life, resin-to-fiber ratio, roller choice, air removal, and cure window. This technique stands as the backbone of quality marine fabrication and repair. Prepare your site, check your resin, follow each step, and inspect for lasting success.
Frequently Asked Questions
How do I calculate resin consumption for fiberglass lay-up?
Start by estimating the area and thickness of your laminate. Multiply by the recommended resin-to-fiber ratio (usually 1:1 by weight for woven cloth). Include extra for overlaps and waste.
What is the best roller for marine hand lay-up?
Aluminum and paddle rollers are excellent for air removal and even wet-out. Bristle rollers suit tight curves. Clean rollers between batches to prevent contamination.
Can I do hand lay-up in humid or cold conditions?
Use marine epoxy rated for your ambient temperature and humidity. Work between 15°C–27°C for best results. High humidity can delay cure, so plan accordingly.
How do I prevent bubbles in marine epoxy laminates?
Roll thoroughly with aluminum or paddle rollers. Mix resin slowly to avoid aeration. Inspect during lay-up and remove bubbles before curing begins.
What happens if I miss the cure window during hand lay-up?
You risk poor bonding and delamination. If resin has gelled, sand the previous layer before continuing. Always monitor pot life for your batch size and conditions.
Do I need to prime before laminating epoxy resin marine?
Priming is recommended for porous substrates. Use a compatible marine primer to ensure maximum bond strength and long-term durability.
Related Reading
- How to Prevent Yellowing and Get Glassy Finish with Marine Epoxy
- Why Slow Cure Epoxy Is Perfect for Marine and Fiberglass Laminating
- Fixing and Preventing Bubbles in Marine Epoxy Coatings: Practical Tips
- Easy Adhesion Tests Before Coating: Prevent Failures in Marine Projects
- Understanding Cure Window: Temperature and Time Factors in Marine Epoxy