Introduction: Why Spiked Roller Technique Matters in Self-Leveling Epoxy Applications
Applying self-leveling epoxy can feel straightforward, but the devil is in the details. For entry-level施工队 and site leaders, knowing the correct spiked roller technique is a game-changer. Without proper air release, tiny bubbles can ruin your finish, weaken bond strength, and even sabotage compliance on demanding jobs. What’s the secret to a flawless, smooth epoxy surface? It’s all about timing, process, and tool handling. This guide unpacks essential steps, explains the science behind air release, and highlights practical tips for elevating your next epoxy floor installation.
Understanding the Spiked Roller Technique, Self-Leveling Epoxy, and Air Release
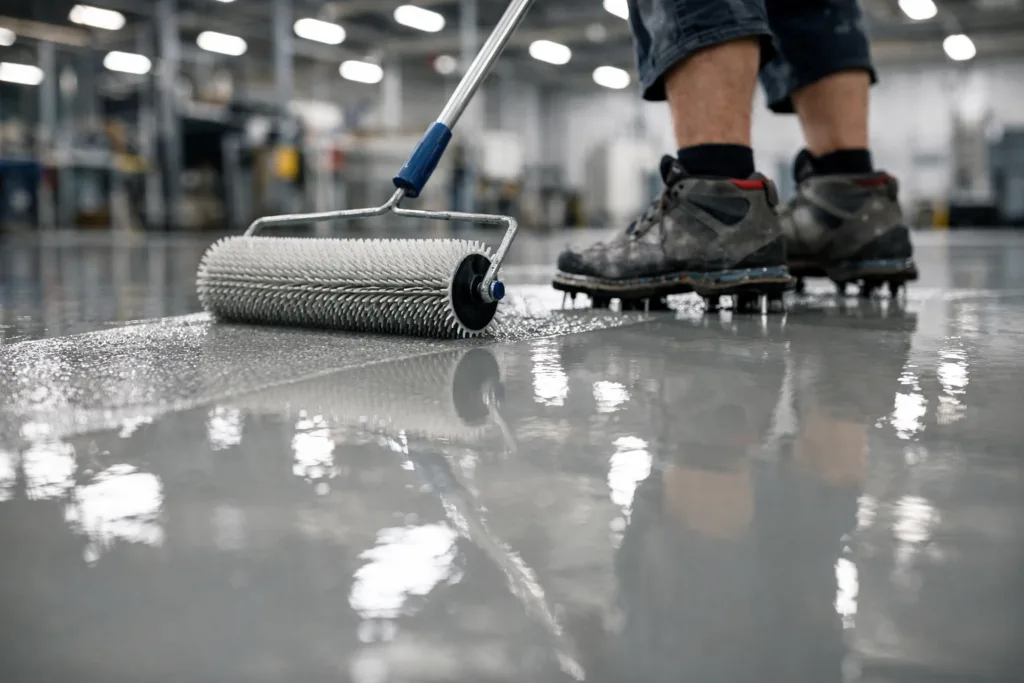
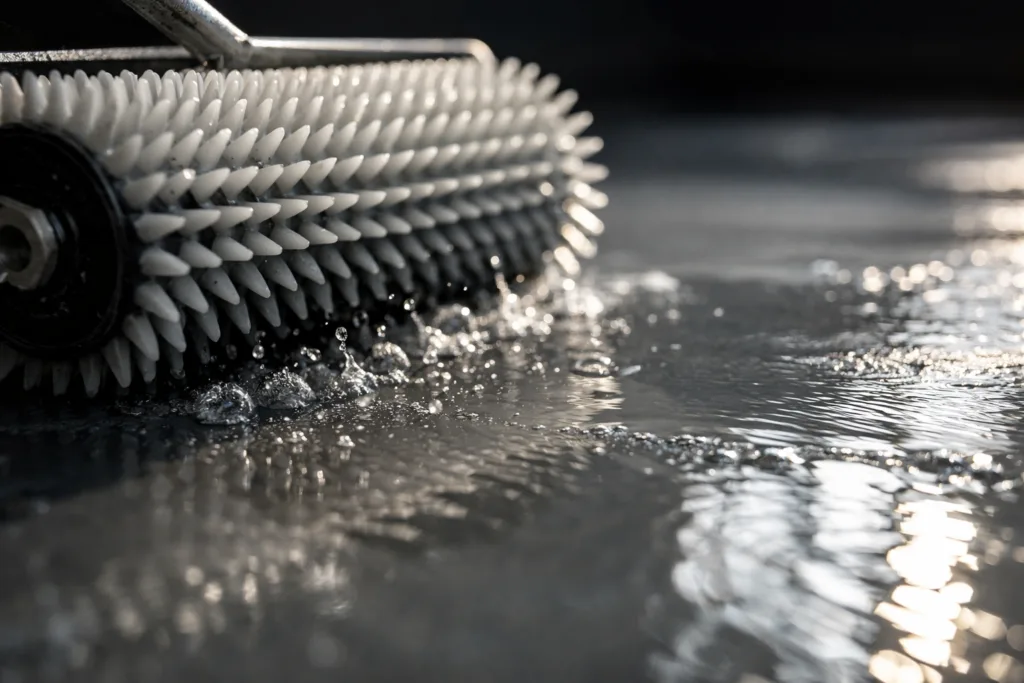
The spiked roller technique is a specific method used during self-leveling epoxy application to ensure trapped air bubbles are released and the resin flows smoothly. Spiked rollers, equipped with plastic spikes, are rolled gently over fresh epoxy, puncturing bubbles and allowing them to escape before the material cures. This simple but powerful process is vital for achieving seamless, defect-free results, especially on large surface areas such as warehouses, manufacturing plants, or commercial kitchens.
How Air Bubbles Impact Self-Leveling Epoxy Floors
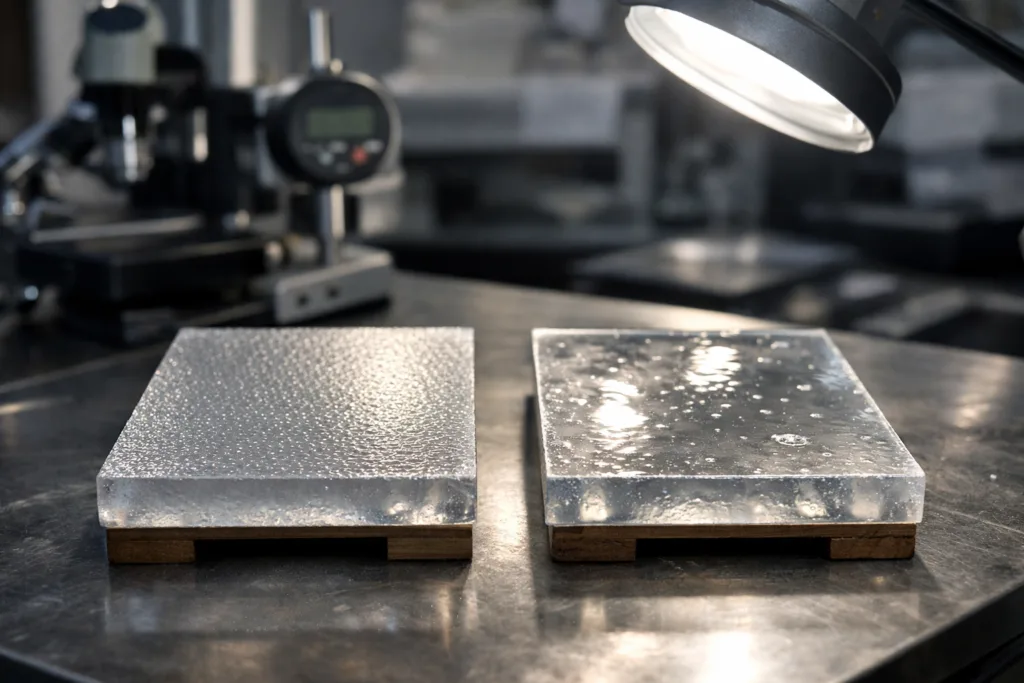
Air bubbles can creep into epoxy floors during mixing, pouring, or spreading. Left unchecked, these bubbles rise and become trapped just below the surface. Visible blisters, craters, and fish eyes reduce visual quality and compromise resilience. Over time, unchecked bubbles become weak points, where abrasion or chemical spills can accelerate damage.
Common Causes of Air Entrapment in Epoxy Systems
Understanding air entrapment helps施工队 avoid defects. Key causes include:
- Vigorous mixing without proper defoaming
- High-viscosity epoxies where bubbles can’t escape readily
- Uneven substrate with embedded air pockets
- Poor ambient conditions (low temperature increases viscosity, slowing bubble rise)
The Role of Spiked Rollers in Professional Resin Flooring
Spiked rollers serve an important dual function: (1) releasing trapped air by puncturing bubbles, and (2) assisting the self-leveling flow of the resin. Only by integrating this tool at the right stage can users achieve the glossy, mirror-like epoxy floors that manufacturing and healthcare sectors demand.
Choosing the Right Spiked Roller for Self-Leveling Epoxy
There’s no one-size-fits-all roller. Selection is based on spike length, roller width, and material compatibility. For example, a short 11mm spike is ideal for thin-build systems, while thicker pours (3–6mm) benefit from 20–25mm spikes. High-quality plastic spikes prevent reaction with resin chemicals, unlike some low-grade alternatives. Site supervisors value durable cages and easy-to-clean handles for efficient post-job maintenance. For especially large-scale floors, wide-format spiked rollers speed up the process and make stripe lines less likely.
Timing and Sequencing: When to Use the Spiked Roller
The roller must be used immediately after pouring and spreading the self-leveling epoxy, while the surface is still liquid. Wait no more than 3–5 minutes after placement—if the epoxy starts to gel, air bubbles become trapped and surface tension resists release. For multi-batch pours, stagger roller passes to overlap fresh resin zones as you work.
Step-by-Step Instructions: Mastering the Spiked Roller Technique
- Mix and prep: Combine resin and hardener according to the supplier’s ratios (e.g., as detailed on ZDS-1012ab Epoxy Primer for Concrete & Ceramic), ensuring full blend but avoiding excessive agitation.
- Pour evenly: Dump out the self-leveling epoxy across pre-primed zones. Use a notched trowel or gauge rake for rough leveling.
- Roll systematically: With spike shoes on, roll the entire surface in parallel, slightly overlapping passes. Apply light, even pressure—heavy force may disturb fill aggregates.
- Walk carefully: Move only on spike shoes to avoid foot prints. Inspect for missed spots or bubble clusters, re-roll as needed.
- Pause, assess, correct: Work progressively, especially in high-traffic or critical performance zones. If the surface starts losing wet shine, stop rolling—cured resin will only be damaged.
Essential Site Preparation for Self-Leveling Epoxy
Surface cleanliness, temperature, humidity, and substrate priming all matter. Remove dust, oil, or laitance before beginning, and ensure concrete is dry. For jobsite specifics, see guidelines in the Decorative Flooring Systems resource—a primed and sealed substrate makes bubble escape quicker and more reliable, especially with colored finish coats.
The Science Behind Air Release in Self-Leveling Epoxy
Why do bubbles rise more easily in some resins than others? It’s all about viscosity, surface tension, and cure speed. Thin, newly poured epoxy behaves much like syrup—bubbles float upward quickly during the initial 10–20 minutes if not trapped by a film. As cure progresses, viscosity rises, and bubble movement slows. Spiked rollers break this surface film, allowing bubbles to escape rather than become permanent surface blisters.
Comparing Spiked Rollers vs. Other Air Release Methods
| Method | Pros | Cons |
|---|---|---|
| Spiked Roller | Highly effective, fast, covers large areas | Requires manual effort, shoe use mandatory |
| Heat Gun/Torch | Immediate effect, spot cures surface | Risk of scorching, not scalable for big jobs |
| Air Release Additives | Works during mixing, less manual | May alter resin properties, not always sufficient |
| Longer Pot Life | More time for self-release | Slower installs, may impact productivity |
Advanced Tips for Perfecting the Spiked Roller Technique
- Always wear spike shoes for even pressure and to minimize resin disturbance
- Work in a pattern: Start closest to exits and move backward, minimizing rollback
- Practice with off-cuts or test pours to dial in pressure and speed
- Inspect lighting angles for hidden bubbles before leaving the surface to cure
- For pigmented/colored resins, extra attention is needed—bubbles are more visible
Common Spiked Roller Technique Mistakes and How to Fix Them
- Rolling too soon: Wait for the resin to flow out but don’t let it start to cure.
- Applying too much pressure: Causes uneven resin distribution and can bury bubbles deeper.
- Missing areas: Overlap each pass by half the roller width.
- Not cleaning roller: Dried resin can lead to surface rippling on the next job.
Cleaning and Caring for Your Spiked Roller
Immediate cleaning is essential. Wash in compatible solvent according to your epoxy’s technical datasheet, then rinse with water. Check spike flexibility and axle rotation before next use. For high-frequency job sites, durable rollers (see those used with ZDS-3136AB-90 Epoxy Mid Coat) minimize replacement costs.
Site Safety: PPE and Work Environment Considerations
Epoxy chemicals require safe handling: always use gloves, goggles, and ensure ventilation. Keep walkways clear of slip and trip hazards, and have a plan for waste and roller cleaning. For compliance, always consult SDS and project-specific method statements.
Ensuring Compatibility: Primers, Topcoats, and the Full Resin System
Choosing the right primer and topcoat ensures the entire system bonds well and performs long-term. For demanding environments (e.g., chemical resistant resin flooring or anti-static flooring), specialized products like ZDS-8300AB 2K Polyurethane Clear Topcoat should be considered. Otherwise, surface bubbles can become zones for chemical attack or conductivity failures.
Optimizing Results in Real-World Conditions: The ZDSpoxy Perspective
From a ZDSpoxy manufacturing and site support standpoint, it’s clear recipes must balance easy flow, air release, and final strength. For instance, plant QC focuses on viscosity checks, gel time controls, and batch repeatability to give field crews more workability. On sites with high humidity or cold slabs, experienced施工队 will often pre-warm epoxy or slow down mixing to limit bubbles and ensure that the spiked roller technique remains effective. ZDSpoxy engineers have observed that correct roller patterns can double the speed of bubble release compared to haphazard manual checks, especially on colored decorative or high-wear flooring installations.
Addressing Pain Points: What to Do If Bubbles Appear Post-Cure
Sometimes, even with excellent technique, bubbles appear after cure—a sign of underlying substrate issues, overly cold pour, or missed roller passes. Solutions include sanding and spot filling, or, for extensive defects, recoating after proper surface prep. Prevention, however, is far more efficient than repair.
Evaluating Floor Finish: Inspecting for Bubbles, Holes, and Surface Imperfections
Wait until the cure is complete, then inspect under good raking light. Look for pinholes, dimples, or cloudy zones. Document with photos for project QC and be sure batches are traceable to aid in troubleshooting and warranty discussions.
Zero-Defect Targets: Air Release Metrics and Quality Assurance
On critical jobs, air release can be tracked as a key quality metric. Contractors often use mock-ups or small sample pours to confirm both finish and roller effectiveness. Keeping projects within air bubble tolerance (typically under 1 bubble per 1000 cm²) sets sites apart, especially on projects with cleanroom or food-sector requirements.
Special Situations: Multi-Layer Flooring and Highly Filled Systems
If your project uses highly filled screeds or broadcast quartz/flake floors, more frequent rolling may be needed. Each layer should be checked for bubble entrapment before subsequent lift. In new builds and retrofits alike, layered approaches make disciplined roller application even more important.
Integrating Spiked Roller Use in Maintenance and Repair Jobs
When patching existing epoxy, use the roller to feather new resin into old and ensure repairs blend seamlessly. Attention to air release at the repair joint helps avoid visible seams and performance gaps.
Training Your Team: On-Site Demonstrations and Practice
Site supervisors should conduct rolling demonstrations before major pours. Quick, hands-on practice builds consistency and helps new施工队 members learn by doing. Feedback and visual checks (both during and after application) close the loop for ongoing improvement.
Summary Table: Spiked Roller Technique Troubleshooting
| Symptom | Possible Cause | Correction |
|---|---|---|
| Bubbles after cure | Late or missed rolling, cold resin | Roll sooner, warm resin, slower mix |
| Stripe marks or lines | Roller drying, overlap errors | Clean, overlap 50%, re-roll if wet |
| Uncured zones | Improper mixing ratio | Check batch weights/ratios, remix |
Spiked Roller Technique, Self-Leveling Epoxy, Air Release: The Complete Section
When you blend a disciplined spiked roller technique with high-performance self-leveling epoxy, the result is mirror-flat, resilient, and trouble-free floors. Proper air release ensures projects stand the test of time, reducing callbacks and complaints. For every施工队, mastering this combination means success on every job’s final inspection, better durability, and fewer costly repairs.
Conclusion: Elevating Your Workflow with Superior Technique
Perfect resin floors aren’t just the result of good materials—they need disciplined execution throughout each step. By adopting the correct spiked roller technique during self-leveling epoxy projects,施工队s and supervisors can all but eliminate air release issues. This means fewer defects, resilient surfaces under heavy traffic, and happy clients. Moving forward, pairing this process with continuous skill training and close attention to site variables ensures every installation becomes a showcase of professional pride, measurable performance, and long-term value.
Frequently Asked Questions
What does a spiked roller do in self-leveling epoxy application?
The spiked roller releases trapped air bubbles and smooths the wet resin, ensuring a flawless self-leveling epoxy finish without surface blisters or pinholes.
When is the best time to use a spiked roller?
Use the spiked roller immediately after pouring and spreading the epoxy, while it’s still liquid and before it starts to gel, usually within the first 3–5 minutes.
How can I prevent bubbles from forming during application?
Mix resin gently, avoid over-agitation, pour at recommended temperatures, prime substrates well, and always use the spiked roller as instructed for efficient air release.
What should I do if I see bubbles after curing?
For small areas, sand smooth and patch with a fresh resin coat. For larger defects, sand, prep, and re-roll a new topcoat to restore the surface.
Are all spiked rollers suitable for every epoxy system?
No, spike length and material should match the epoxy’s thickness and chemistry; check the resin manufacturer’s specs to select the right roller for your project.
Is air release only a concern with clear epoxies?
No, air release is critical for all epoxy types. Pigmented and decorative floors especially require careful de-airing, since bubbles are more visible on colored surfaces.
Related Reading
- 15 Techniques to Prevent Epoxy Yellowing and Master UV Stability
- Pot Life, Working Time & Cure: Your Marine Epoxy Survival Guide
- Filler Content Ratios: Boost Floor Strength and Performance
- How Shore D Hardness Determines Epoxy Floor Longevity
- Learn the Critical Steps of Concrete Moisture Testing Before Your Next Epoxy Install