Understanding Tile Coating Peeling: Symptoms, Causes, and On-Site Tests
Tile coating peeling—or waterproof coating failure on tile—costs contractors, renovators, and facility managers both time and resources. Before blaming the coating, it’s essential to recognize that over 80% of failures actually start at the surface. Oil residues, missed sanding, dust, moisture, and mismatched primers are the real culprits. This article reveals the symptoms you’ll see, the hidden reasons behind them, and the straightforward jobsite tests you can use to spot and prevent peeling. Effective solutions—including advanced products—are also introduced in context, with internal links to kitchen bathroom tile waterproofing methods and comprehensive waterproofing renovation solutions for more details.
The 5 Most Common Peeling Symptoms for Tile Coatings
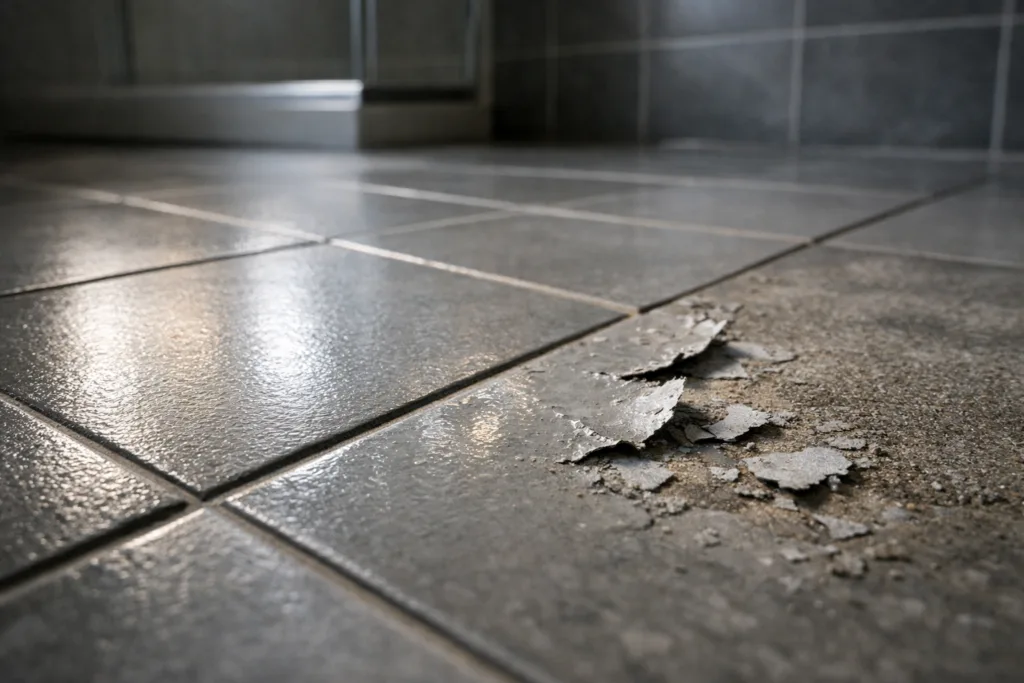
Peeling and delamination are easy to spot, but they rarely come out of nowhere. Look for these telltale signs:
- Blistering or bubbling under the coating
- Sheets or flakes of coating lifting off tiles
- Edges curling away—especially in wet or high-traffic spots
- Powdery residue on the coating’s underside
- Soft, tacky patches that never cure fully
Each symptom points to a specific jobsite condition or process mistake. Let’s dig into why they appear.
Why 80% of Tile Coating Peeling Starts from the Surface
Experts and site engineers agree: the overwhelming majority of coating failures on tile aren’t about the coating chemistry. Surface conditions are to blame. Here’s how each typical problem leads to failure:
- Oil film/grease: invisible residual film blocks adhesion even to strong epoxy or polyurethane systems
- Lack of sanding/abrading: glossy glazed tile is too smooth for coating to grip
- Dust/debris: even fine particles form a weak, friable bondline that flakes off
- Hidden moisture: water at or under tile disrupts coating cure, causing blisters and tackiness
- Poor primer compatibility: mismatching the substrate and primer leads to weak interface—primer separation is a top culprit
Tile Coating Peeling: What You’ll See on Site
If the prep or surface isn’t right, here are common real-world failure scenes:
- Bathrooms: Coating curls at edges or corners, water seeps underneath
- Kitchens: Flakes slough off around cooking zones—oil and cleaning residues to blame
- Balconies/terraces: Blistered membrane spots where moisture was trapped below
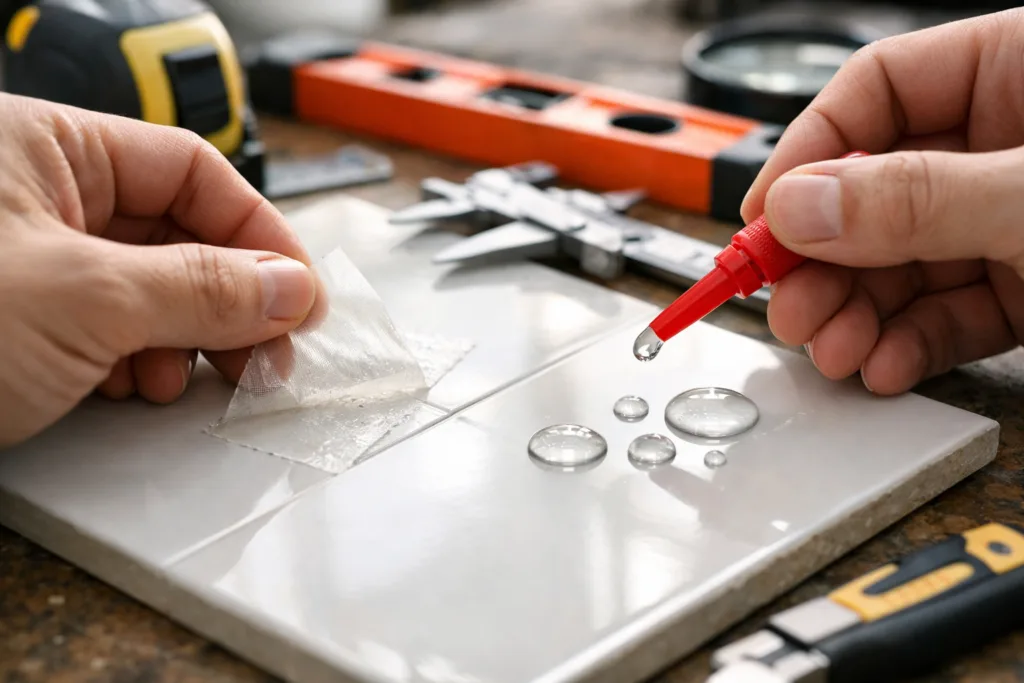
Quick Jobsite Tests: How to Diagnose Surfaces Before Coating
Simple, fast tests help prevent coating peeling. Before applying any waterproof or colored coating to tile, try these:
- Water droplet spread: Place a drop of water on the tile. If it forms a tight bead and doesn’t spread, there’s likely oil or wax present that will block adhesion.
- Tape adhesion test: Stick regular masking tape on the cleaned/test area, press firmly, and rip off. If dust or sheen comes up, further sanding or cleaning is needed.
- White cloth wipe: Rub a clean, white rag across the tile with force. Residue color or shine means oil or dust remain—continue cleaning.
These simple pre-checks save hours of repair later, especially in critical areas like kitchens and wet rooms. They’re standard practice in waterproofing renovation solutions and professional floor overlay jobs.
The Top Five Hidden Causes of Waterproof Coating Peeling on Tile
| Symptom Type | Root Cause | Corrective Action |
|---|---|---|
| Edges or corners peeling | Substrate was oily/greasy or not sanded | Degrease and sand tiles; retest surface |
| Blisters/bubbles | Trapped moisture, high humidity, wet underlayer | Dry substrate fully, retest |
| Coating lifts in sheets | Poor primer match or missing primer | Use manufacturer-matched primer for tile |
| Random flaking | Residual dust or powder from previous repairs | Vacuum and wipe; re-inspect with tape |
| Tackiness/soft spots | Cure inhibited by hidden moisture or incompatibility | Test for moisture; confirm product compatibility |
How Site Conditions & Preparation Dictate Success
Proper prep doesn’t just reduce failures—it makes or breaks the job. The “Four Clean” standard—degreased, sanded, dust-free, dry—should be confirmed visually and with on-site tests. ZDSpoxy site engineers often find peeling in areas where even small cleaning shortcuts were taken. Mixing discipline and batch traceability also help spot and prevent primer/coating mismatches.
Surface Compatibility: Why Not All Tiles Accept All Coatings
Tiles come in glazed, mosaic, porcelain, or even polymer-modified forms. A universal primer or coating is unrealistic—product selection must fit the tile chemistry and profile. For instance, high-gloss or vitrified tiles always require abrasion. The right primer, such as ZDS1271AB rapid-curing epoxy primer, optimizes bond strength—skip this and the strongest topcoat will still peel.
Waterproof Coating Peeling: The Matching System Principle
Top-quality waterproof coatings only perform when the entire system—primer, membrane, topcoat—is matched to both tile and use case. Common mistakes include using wall primers for floors (in kitchens or balconies) or exterior products indoors. Symptom patterns (blisters, edge curl, tack) reveal such mismatches.
How to Prevent Peeling: Step-by-Step Field-Proven Process
- Sweep and vacuum thoroughly; repeat white cloth test
- Degrease tile with professional degreaser; water bead test confirms removal
- Sanding or diamond-grinding to dull glossy faces
- Check moisture content with oven or hygrometer, if possible
- Apply the correct primer (matched for tile and coating chemistry)
- Allow each layer to cure in line with manufacturer spec
- Check adhesion with tape test before overcoating
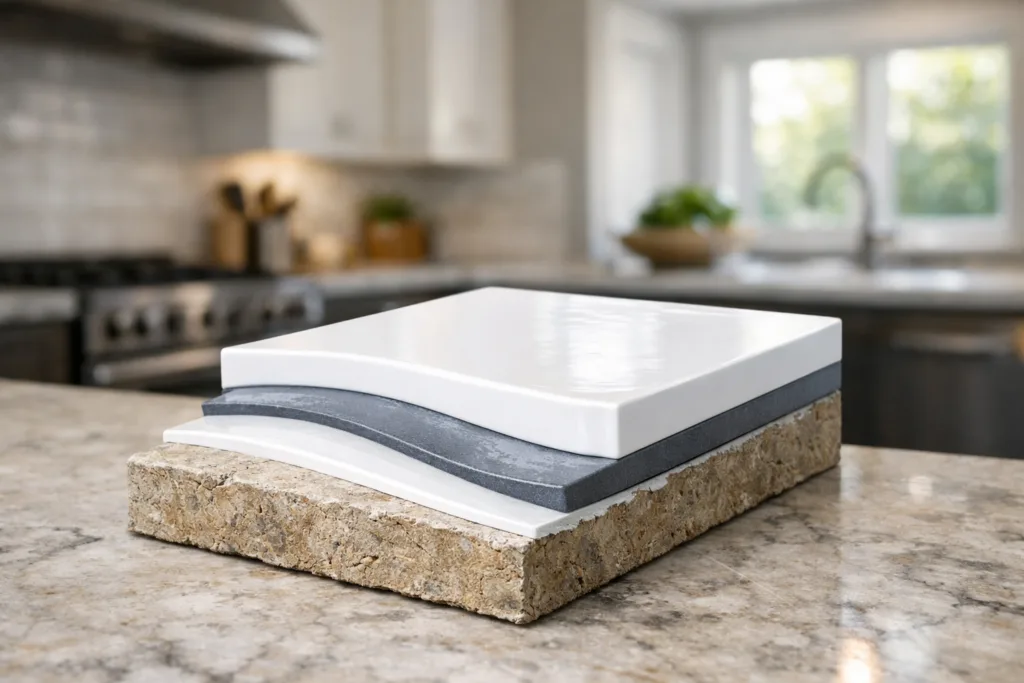
Choosing Waterproofing Systems for Existing Tile—No Demolition Needed
In many kitchen and bathroom renovation projects, fast, dust-free waterproofing over ceramic tile is possible without demolition. Surface preparation and the correct kitchen bathroom tile waterproofing system—like specialty primers and elastic membranes—are key. The right products resist alkali, tolerate some movement, and remain elastic and waterproof for years.
Tile Coating Peeling: Expert Solutions and Trusted Products
Where conditions are especially demanding (e.g., wet zones, high-traffic, outdoor), consider advanced epoxy or polyaspartic-polyurea coatings formulated for tile. Products like ZDS1271AB deliver rapid cure and high bond even on tricky substrates. Pairing with a full system from surface prep through topcoat is always the expert path.
How Moisture and Ambient Conditions Affect Coating Success
Temperature swings, site humidity, and “hidden” moisture under tiles all undermine coating bond and cure. For instance, heavy rain before application can drive humidity up—moisture meters or overnight drying help confirm levels are safe. Only coat when jobsite air and substrates meet spec. ZDSpoxy recommends checking ambient and substrate moisture as standard step.
Adhesion Testing: How to Know You Got It Right
Both simple tape pull and more advanced cross-hatch methods check adhesion reliability after coat application. It’s worth sacrificing a small area to destructive testing before pulling the trigger on a full floor or wall.
Typical Tile Types: How They React to Waterproof Coatings
- Glazed porcelain: Needs aggressive abrasion and matched primer
- Cement-based decorative tile: Porous and oil-attractive; must be deeply cleaned
- Mosaic tile: Gap and grout lines need filling before membrane application
Technical Solution Table: Symptom-Driven Fix Strategies
| Symptom | Quick Test | Most Reliable Solution |
|---|---|---|
| Edge curl/blister | Water bead; tape pull | Resand, degrease, use rapid primer |
| Widespread lift | Crosshatch adhesion test | Correct primer, check cure, match topcoat |
| Spotty powdering | White rag wipe, tape pull | Deep vacuum, vacuum again, repeat test |
ZDSpoxy’s Perspective: What the Lab Misses, the Field Reveals
From a manufacturing and technical service viewpoint, ZDSpoxy often uncovers that sites with failed coatings passed lab testing but failed real-world prep, especially humidity, or used mismatch primers. Field batch consistency checks, small patch testing, and clearly documented cleaning steps all help close this gap.
Key Recap: Critical Do’s and Don’ts for Lasting Tile Coatings
- Do – Clean, degrease, and abrade; always confirm with a physical test
- Don’t – Apply waterproof or tile coating over unknown or dusty surfaces
- Do – Use matched primer and coating systems for tile and location
- Don’t – Ignore site moisture, ambient temperature, and cure times
- Do – Test adhesion on site before full job
Conclusion: The Path to Reliable, Peel-Free Waterproof Tile Coatings
The fastest way to fail at tile waterproofing is to ignore your surface. Over 80% of tile coating peeling and waterproof coating peeling on tile is preventable by disciplined cleaning, abrasion, compatibility checks, and real surface testing. Reliable waterproofing on tile requires matched primers, careful environmental prep, and jobsite verification—shortcuts simply don’t hold up. Internal links to expert pages on waterproofing renovation solutions and practical kitchen bathroom tile waterproofing arm you with actionable know-how for confident renovation. Stay methodical, and peeling issues stay out of your future projects.
Frequently Asked Questions
What’s the fastest way to check if tile is ready for coating?
Use the white cloth wipe: Rubbing hard with a clean rag rapidly reveals grease, dust, or shine that signals more prep is needed.
Can I avoid sanding glazed tile before applying waterproof coating?
No—sanding or mechanical abrading is essential for most glazed or high-gloss tiles to ensure the coating bonds well and resists peeling.
Is primer always needed when coating old tile?
Yes, a compatible primer ensures the coating sticks and prevents delamination, especially on non-porous tile surfaces.
How can moisture cause tile coating peeling?
Moisture below or in the tile disrupts curing, bubbles the coating, and weakens adhesion, producing blisters or soft, sticky spots.
Which on-site test best detects oil residue?
The water drop test: If water beads and doesn’t spread or sheet, you likely have an oil or wax film blocking adhesion.
Are all waterproof coatings compatible with all tile types?
No, coating and primer choice must suit both tile chemistry and location, so always check product documentation and match the system.
Related Reading
- 9 Steps for Flawless Waterproofing Renovation: Downloadable Checklist
- Clear vs Colored Waterproof Coatings: How to Choose for Lasting Results
- No-Demolition Waterproofing: The Proven Over-Tile Methods Explained
- Balcony & Exterior Wall Waterproofing: Top 5 UV-Resistant Solutions
- Avoid Delamination: 7 Rules for Picking the Right Epoxy Primer