Kitchen & Bathroom Tile Waterproofing (No Demolition)
Waterproof Over Tile Solutions
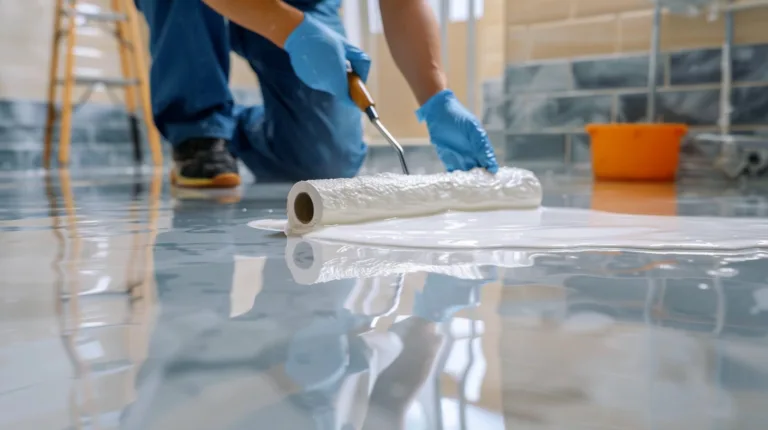
Waterproof Over Existing Tiles With a Simple System
- No middlemen
- Fast prototyping
- Private label available
Quick Check: Is “Waterproof Over Tile” Right for You?
This method works best when:
- Tiles are solid (no hollow sound, no loose corners)
- The surface can be cleaned and sanded
- You want a fast renovation with less downtime
You may need repair first if:
- Many tiles are loose or hollow
- Grout lines are broken and deep
- There are wide gaps and cracks moving over time
If you’re unsure, send a photo of the tile surface + grout lines.
Recommended System (2 Steps + Key Prep)
Step 1 — Handle Tile Gaps and Prep (Most Important)
If grout/tile gaps are about 3–5 mm, use an oil-based solvent-free epoxy primer and sand it as part of prep.
Also do these basics:
- Degrease and clean (kitchens often have oil film)
- Sand the tile surface (so the coating can bond)
- Vacuum dust completely
- Dry check (no standing water)
Step 2 — Apply a 2K Transparent Polyaspartic Coating
Recommended Products
| Product Model | Key Benefits | Typical Use | View More |
| ZDS1271AB | Solvent-free epoxy primer; strong adhesion & sealing; next step can be done after ~2 hours | Primer for tiles / dense surfaces; helps bonding and durability before topcoat | View ZDS1271AB |
| ZDS1990AB | 2K clear polyaspartic waterproof coating; cures in 2–4 hours; good tear resistance on tiles | Clear waterproof topcoat for kitchen/bathroom tile renovation | View ZDS1990AB |
| ZDS1235AB (matte option) | 2K matte clear polyaspartic; abrasion & scratch resistant; low VOC ≤50 g/L | Matte clear waterproof finish for kitchens/bathrooms; lower glare | View ZDS1235AB |
| ZDS1340AB (repair, optional) | Hydrophobic repair mortar; strong repair base; suitable for humid areas like bathrooms/kitchens | Patch weak spots, pits, and damaged grout/edges before primer | View ZDS1340AB |
| ZDS1090AB (alternate primer) | Epoxy primer for concrete/ceramic flooring; sealing & adhesion (PDF shows “ZDS1090 ab”) | Use when substrate is more porous or dusty (after proper prep) | View ZDS1090AB |
Note on SKU format: This page uses full SKUs (e.g., ZDS1271AB). Ask us for a complete kit list and mixing guidance.
Clear vs Matte: How to Choose
Choose Clear Glossy
- You like the original tile look
- You want a “wet look” finish
- The base tiles are clean and even
Choose Matte Clear
- You want less glare
- You want to hide small marks and uneven reflection
- You prefer a softer, modern finish
Installation Overview (Easy Checklist)
Most failures come from skipping prep. Follow this order:
- Clean & degrease (very important in kitchens)
- Sand the tile surface (create bonding profile)
- Vacuum dust (don’t trap dust under coating)
- Repair weak spots if needed
- Prime (thin and even)
- Topcoat (even coat; don’t flood it)
- Cure before water exposure
Tip: Two even coats are safer than one thick coat.
Typical Timeline (What to Expect)
Timeline depends on site conditions and chosen finish:
- Prep + sanding: same day
- Primer: can be followed by next step after ~2 hours for ZDS1271AB
- Clear/matte polyaspartic topcoat: cures in ~2–4 hours at 25°C (product dependent)
For fast projects (hotel/public restrooms), tell us your time window and we’ll match the system.

Common Mistakes (Avoid These)

- Coating over oil film (kitchen tiles)
- Skipping sanding because “it looks clean”
- Leaving dust in grout lines
- Applying too thick in one pass (can trap bubbles)
- Using the bathroom too soon (before full cure)
FAQs
Can I waterproof a balcony without removing tiles?
What coating is best for outdoor UV?
Will the coating be slippery when wet?
Do you support wholesale and custom orders?
Get a Balcony Waterproofing Recommendation
Tell us these 5 details, and we’ll reply with a complete system and a quote:
- Surface type (concrete / tile / stone)
- Area size (sqm or sqft)
- Indoor or outdoor (balcony is outdoor)
- Finish (clear / matte / colored)
- Photos of cracks (close-up + wide shot)
We’ll recommend a custom system (repair + primer + topcoat) and offer manufacturer-direct wholesale pricing.