Introduction: Protecting Hulls with the Right Osmosis Barrier Coat Epoxy
Osmosis is a persistent threat to fiberglass boat hulls, causing blisters, delamination, and long-term structural issues. For any vessel that spends significant time in the water, nothing matters more below the waterline than preventing this gradual water ingress. The answer? A carefully engineered osmosis barrier coat epoxy system. But achieving true blister prevention is not as simple as brushing on layers. Site factors, prep routines, film build targets, and compatibility with antifouling make or break success. In this comprehensive guide, we’ll cover how to select, prep, and apply a marine-grade epoxy osmosis barrier with a systematic, evidence-driven approach focused on durability and practical, repeatable results. We’ll also share industry best practices for dryness checks, recoat windows, film build, and crucial surface tests, featuring insights gained from ZDSpoxy’s hands-on R&D and field support teams.
Understanding Osmosis and Blister Formation
Osmosis on boat hulls happens when water molecules migrate into the laminating resin, collecting soluble contaminants and forming osmotic blisters. Fiberglass hulls are especially vulnerable if the gelcoat is compromised, the original layup has voids or unreacted sites, or previous barrier systems have failed or are absent. Proper awareness of how water, resin, and hull interact is vital before undertaking any barrier coat project.
| Factor | Risk | Prevention Tactic |
|---|---|---|
| Poor surface prep | Water ingress under epoxy | Thorough grinding and moisture testing |
| Incorrect epoxy | Inadequate film, poor adhesion | Marine-grade, solvent-free system |
| Skewed recoat intervals | Poor interlayer adhesion | Follow resin recoat window guidelines |
Prerequisites: Why Dryness and Cleanliness Drive Results
If you want long-lasting osmotic protection under the waterline, start with a dry and absolutely clean hull. Don’t trust your eyes alone—comprehensive pre-coating moisture checks are mandatory, as any trace moisture will be trapped and compromise the epoxy barrier system. Using a quality electronic moisture meter (such as those used by professional surveyors) helps you determine if hull readings are at or below 3%—the accepted threshold for barrier coating. In addition, a surface free from oils, dust, and loose fibers guarantees the best bond.
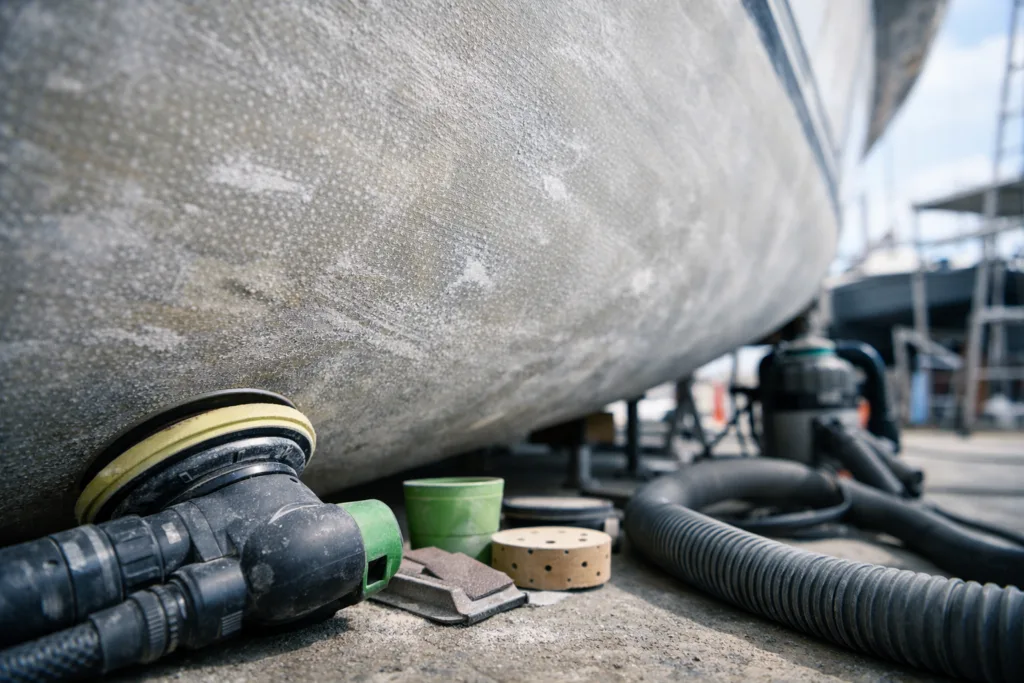
Step-by-Step Guide: Surface Preparation for Osmosis Barrier Coat Epoxy
Proper surface prep is the cornerstone of a successful osmosis barrier system. Here’s a practical workflow:
- Remove old paints, coatings, and all antifouling layers using wet sanding or controlled grinding, stopping only with sound, clean substrate.
- De-wax the hull thoroughly using a solvent wipe, followed by detergent wash boots and ample rinsing.
- Grind away any gelcoat blisters and open up all suspect voids. This may expose raw laminate—necessary for effective drying.
- Dry-out phase: Leave hull ventilated (or actively heated for severe cases) for at least a week, moisture-checking daily until readings are stable and within acceptable range.
- Final check: Immediately before priming, vacuum and wipe down to remove all dust and debris.
Moisture Testing: Techniques and Acceptance Criteria
Testing hull moisture isn’t just for older boats. All hulls—old or new—should be tested before applying an osmosis barrier coat epoxy. Choose a marine-grade, calibrated meter, and take readings at multiple depths and locations, including any previous blister repair sites. Readings should consistently fall in the “dry” zone as defined by your meter’s guidelines. If they don’t, extend drying time and retest, or consult a specialist for persistent damp areas. Skipping this step often voids warranties and nearly always results in under-film blistering down the line.
Choosing the Right Osmosis Barrier Coat Epoxy System
The ideal osmosis barrier coat epoxy must offer high impermeability, excellent inter-coat bonding, minimal solvent content, and optimal film build per coat. Two-component, solvent-free marine epoxies, designed for below-waterline use, are industry standards. For system guidance—such as selecting specific ZDSpoxy resin formulations or comparable options—refer to Marine Epoxy Resin Manufacturer where fundamental system selection and application nuances are covered in detail.
Understanding Film Build: Thickness Matters
Achieving the specified minimum dry film thickness (DFT) is key for creating an effective moisture barrier. Most manufacturers target at least 300–400 microns (12–16 mils) total, applied over multiple layers for best protection. Always check both the wet film thickness (WFT) during application and confirm DFT once cured using a calibrated gauge. Insufficient thickness (too thin per coat or total) allows water vapor transmission, while overly thick coats risk solvent entrapment and poor adhesion.
Application Conditions: Temperature, Humidity, and Substrate Factors
Barrier coat epoxies must be applied within prescribed environmental conditions. For most systems, optimal air and substrate temperatures range from 10°C to 30°C (50°F – 86°F), with relative humidity below 85%. Avoid coating if condensation or surface “sweating” is present, which can occur if the hull temperature drops below the dew point. Low temperatures often lengthen cure times—consult resin-specific guidelines for cold or hot weather tactics. For more on this, see Curing Tactics and Application Safety: 10 Strategies for Applying Coating in Cold and Hot Weather.
Mixing and Pot Life: Why Discipline Counts
Careful two-component mixing is required for osmosis barrier coat epoxy systems. Inconsistent mixing or incorrect ratios cause soft, under-cured layers and coating failure. Always decant one unit at a time, mix for the specified duration, and allow for a short “sweat-in” period to release trapped air. Observe the manufacturer’s stated pot life; do not use material once viscosity and workability shift, as this will impact bonding and finish.
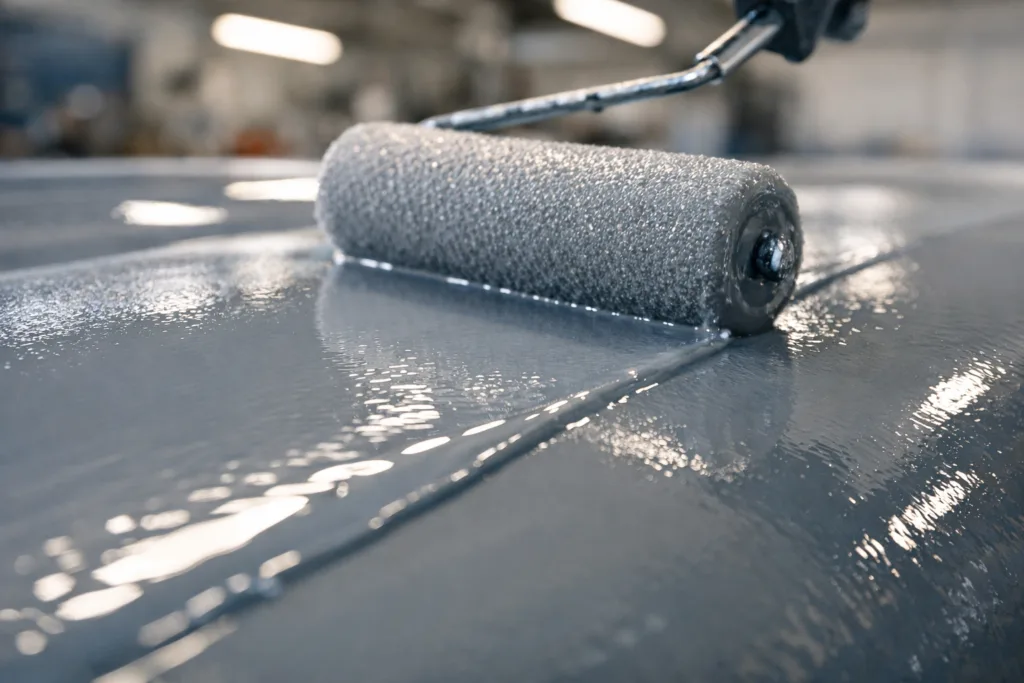
Application Tools, Coverage Rates, and Technique
Use a short-nap roller or squeegee for even application and target the manufacturer’s stated coverage rates (typically 0.3–0.5 kg/m² per coat or as directed). Thin, even coats help achieve proper air release and reduce risk of amine blush. When using a roller, change direction between coats for best film integrity. Pay careful attention to voids, lap marks, and high-relief areas to avoid thin spots.
The Complete Coat Schedule: Layer Counts, Timing, and Cure Windows
A robust osmosis barrier system typically calls for a minimum of 3–5 coats, each applied within the manufacturer’s recommended recoat window—neither too soon (soft substrate) nor too late (weak inter-coat bonds). For most marine epoxies, apply the next coat as soon as the previous is touch-dry but within the maximum cure window (often 24-48 hours). Delays outside this window require surface abrasion or light sanding to reinstate mechanical tooth for proper adhesion.
Spotting and Preventing Amine Blush
Amine blush is a common, greasy residue that forms on epoxy surfaces in humid conditions. It must be fully removed by water and scotch pad scrub (not solvent) before overcoating or between layers—even in multi-coat schedules—to prevent adhesion problems and clouded finishes. Skipping this step will compromise the barrier and may cause localized delamination later.
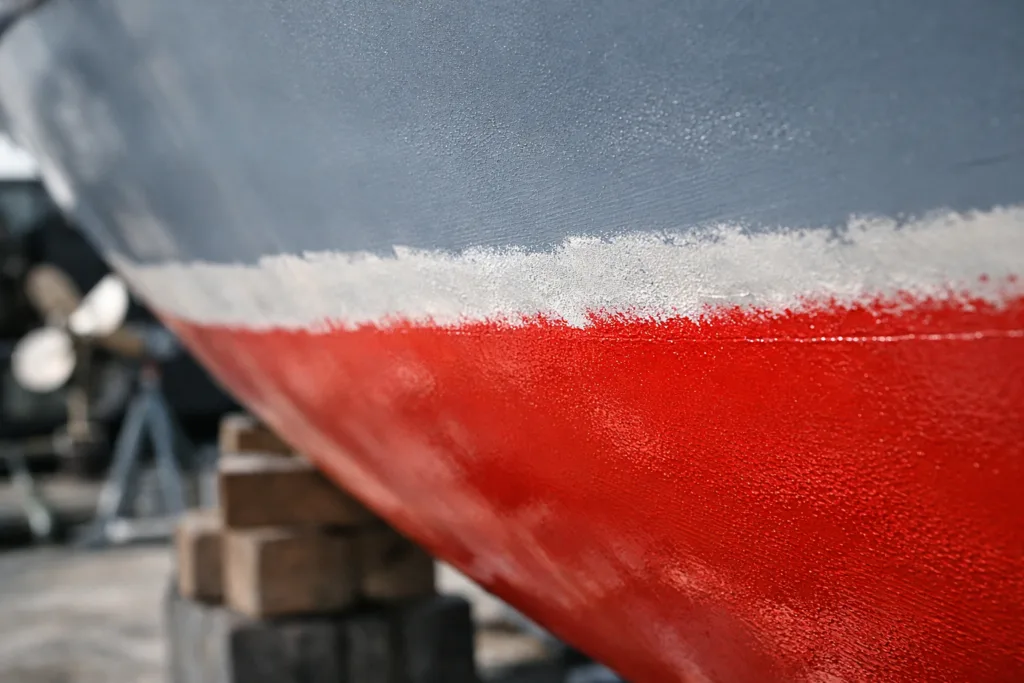
Edge Detailing, Hardware Masking, and Critical Areas
Pay special attention to through-hull fittings, corners, and waterline transitions. Mask hardware meticulously and feather tape edges for clean transitions. Use small brushes for detail work. Areas with existing repairs or patches should get an extra skim for uniform protection and to accommodate any substrate irregularities.
Dry Film Testing and Quality Control Checks
Once the final coat is cured, use a film thickness gauge to check dry film build across various points of the hull—especially near lap joints, keel, and high-traffic areas. Inconsistencies signal missed spots or errors in rolling technique. Where thickness is low, tactically add another thin, even coat. For full-system recommendations, examine ZDS-2060AB, which offers solvent-free, low-odor performance for rot risk mitigation within marine environments.
Compatibility with Antifouling Coatings
Not all antifouling paints are suited for direct application over fresh epoxy. Most require the barrier coat be fully cured, thoroughly abraded, and amine blush-free. Some antifoulings specify an epoxy tie-coat or adhesion promoter to ensure a durable bond. Always consult both epoxy and antifouling technical sheets for recommended overcoat intervals—failure to do so leads to flaking or patchy protection across hull sections.
Common Pitfalls: What Causes Barrier Coat Failures?
Despite best intentions, some common mistakes persist in the field:
- Trapped hull moisture resulting in blisters under new epoxy
- Poorly abraded or contaminated surfaces
- Mixing errors causing uneven cures
- Insufficient film build in high-stress or difficult-to-reach areas
- Mismatch between epoxy and antifouling systems
Remember: A top-quality resin system can’t offset poor preparation or skipped steps.
Advanced Barrier Layer Strategies for High-Risk Hulls
On high-risk vessels (poor layup history, past repairs), a double-barrier technique may be advisable: first, seal with solvent-free primer, followed by several coats of moisture-impermeable barrier epoxy. This adds redundancy and extends hull service intervals. Seek out systems with published third-party water vapor transmission rates (WVT) and real world references.
Safety, Ventilation, and Personal Protection Essentials
Coating boat hulls in confined spaces can create hazardous vapors. Wear suitable gloves, goggles, coveralls, and, if indoors or in poor airflow, use an approved respirator. Solvent-free systems have much lower VOCs but always check the safety data sheet (SDS) for the specific product. Store unmixed materials in a dry, temperature-controlled location and minimize open containers during application.
Real-World Prep and Prevention: A ZDSpoxy Insight
ZDSproxy’s technical teams have observed that up to 70% of barrier coat failures are prep-related, not product-driven. Consistent success comes from measured moisture testing, controlled mixing (batch size discipline), and recoat window adherence. Even veteran applicators use checklists and log sheets at each phase. Where possible, maintain formal documentation—this builds trust with customers, surveyors, and insurers if future questions arise.
Troubleshooting Barrier System Issues
If problems arise post-application—such as tacky zones, blush, or bubbling—do not immediately attempt spot fixes. First, identify root causes: Was the surface prematurely coated? Was humidity or condensation present? Were there mixing errors? Evaluate small test patches before wide-scale sanding or recoating, and consult manufacturers or trusted marine coating experts for non-obvious problems.
Practical Timelines: From Prep to Splash
A typical project—start to finish—follows this sequence:
- Prep and dry-out: 1-3 weeks, dependent on hull and climate
- Barrier coat application: 2-3 days for multi-coat schedule (including overcoat intervals)
- Cure before antifouling: 2-5 days, varying by epoxy system and ambient temp
Patience in each phase pays off with smoother finishes and long-term, blister-free protection.
Osmosis Barrier Coat Epoxy: When and Why to Use
Osmosis barrier coat epoxy systems are indispensable for vessels with previous blister history, suspect layup, or after repair of hull blisters/voids. Even new hulls benefit from a factory-applied system, as the incremental cost is small compared to future repair. Remember: no barrier system promises absolute blister elimination in the absence of proper substrate dryness and preparation—honest assessment and best practice remain the only proven path to moisture security below the waterline.
Maintenance and Periodic Inspection
Once the barrier system is cured and antifouling is applied, annual inspection is advised—especially after extended haul-outs or hard impacts. Look for patchy antifouling wear, fine cracks, or surface changes that may signal the need for spot touch-ups or recoating between seasons. Timely repairs avoid repeat blistering and extend hull life efficiently.
Conclusion: Confidence in Every Layer
Building a successful osmosis barrier coat epoxy system below the waterline is a science—part material, part process, and all about detail. Proper substrate dryness, deliberate prep, discipline in mixing and application, and a respect for system compatibility together guarantee years of trouble-free boating. By following a rigorous routine, consulting reliable manufacturer resources, and focusing on the fundamentals—like film build and recoat timing—you can trust your hull’s shield is ready for every season’s challenges.
Frequently Asked Questions
Can I apply osmosis barrier coat epoxy over slightly damp hulls?
No. All moisture must be below specified thresholds before coating, or trapped water will lead to blisters even under quality epoxies.
How do I check for amine blush and what if I find it?
Amine blush appears as a greasy, waxy residue on epoxy surfaces. Remove it with water and a scouring pad, never solvent, before recoating.
What if I miss the recoat window between barrier layers?
If you miss the manufacturer’s recoat window, thoroughly sand the surface to reestablish tooth for mechanical adhesion before applying the next coat.
How thick should the total osmosis barrier coat be?
Most systems require a minimum 300–400 microns (12–16 mils) total dry film thickness, measured at various hull points with a calibrated gauge.
How do I ensure compatibility with my chosen antifouling paint?
Check both epoxy and antifoul manufacturer specs. Usually, the barrier coat must be fully cured, abraded, and blush-free before antifouling goes on.
Is there a one-coat solution for osmosis protection?
No. Effective protection always requires multiple coats, applied according to film build specs and within the correct recoat intervals for the system.