
Epoxy grout colors are not just an appearance choice. In commercial projects, the color affects how a surface reads under site lighting, how quickly contamination is noticed, how easily repairs blend in, and how well the finished installation supports the project’s maintenance plan. White, black, and custom shades all behave differently once pigment chemistry, filler whiteness, joint geometry, curing conditions, and cleaning methods are taken into account.
explore epoxy grout system options and color choices
Why grout color matters for performance, maintenance, and aesthetics
Specifiers often start with visual preference, but the best color choice is usually the one that fits the full service environment. In a healthcare corridor, a lighter tone can support cleanliness perception, yet it may also reveal staining, shoe marks, and inconsistent cleaning. In an industrial floor, darker grout can reduce the visibility of dirt, but it can also show haze, bloom, or lightening if the cleaning chemistry is too aggressive. In a hotel lobby or retail interior, the grout color must sit between design intent and practical maintenance so the finish still looks coherent after repeated washing.
From a manufacturer’s perspective, color is part of the grout system, not a separate decoration layer. The same resin base can look different depending on pigment type, filler dispersion, substrate porosity, and cure profile. That is why a color decision should be tied to the tile type, expected traffic, joint width, lighting, and approval process. The closer the project is to a public-facing or hygiene-sensitive environment, the more important that specification discipline becomes.
Quick comparison of white, black, and custom epoxy grout
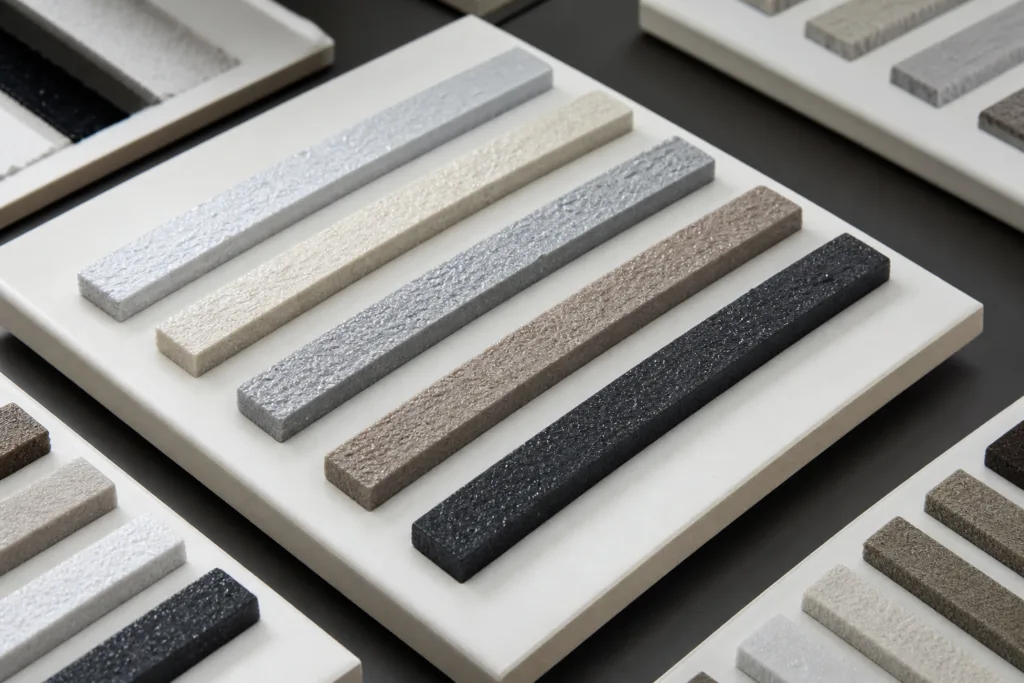
| Option | Typical uses | Strengths | Watch-outs |
|---|---|---|---|
| White | Healthcare, bright interiors, food areas, light tile layouts | High reflectance, clean visual effect, easy to match with pale finishes | Shows stains, can yellow if the formulation is weak on UV or heat stability |
| Black | Industrial floors, dark tile joints, accent layouts, concealment-focused spaces | Hides dirt well, strong contrast, useful for darker design schemes | Can show haze, residue, or fading if cure and cleaning control are poor |
| Custom | Hotel lobbies, brand-driven interiors, restoration work, special technical specs | Best visual match to tile or branding, supports tighter design control | Needs approval samples, may require longer lead time, higher QC discipline |
How epoxy grout colors are created
Color in epoxy grout comes from several parts of the formulation working together. Pigments provide the base hue, fillers influence brightness and opacity, and the resin binder affects how the cured surface reflects light. Even when the target color is simple, such as white or black, the final result can move slightly warmer, cooler, duller, or glossier depending on how the formulation is balanced. That is why two products with the same name can still look different on the floor.
Pigments, fillers, and transparency
White systems often rely on titanium dioxide, but not all grades behave the same. Particle size, surface treatment, and dispersion quality influence brightness and coverage. Black systems usually depend on carbon black, and small changes in loading can noticeably alter depth, grayness, or undertone. Custom shades may combine organic and inorganic pigments, which improves color range but also increases the importance of dispersion control and batch traceability. Fillers matter as well because a bright filler can help a white grout read cleaner, while a darker filler can mute a color that should feel crisp.
Curing, gloss, and the final visual effect
The cured resin changes how color is perceived. A glossier surface often looks deeper and slightly darker, while a matte or textured surface can scatter light and soften contrast. Heat during cure, especially in larger batches, may also shift the final appearance if the pigment package is sensitive to temperature. In practical terms, a good color match is not only about the wet mix. It is about what the grout looks like after full cure under the same light that the owner will see every day.
White epoxy grout colors and where they work best
White epoxy grout is common in areas where cleanliness, brightness, and visual openness are part of the design goal. Healthcare rooms, laboratories, commercial kitchens, food preparation zones, bright retail interiors, and some sanitary wall systems often use white or near-white joints because they make the tile layout read clearly and support easy inspection. The trade-off is that any stain, residue, or uneven cleaning tends to stand out quickly.
At ZDSpoxy, we treat white grout as a system decision rather than a simple pigment choice. We look at pigment grade, filler whiteness, UV stability, and the environment where the floor or wall will live. If a white grout is used in a space with strong sunlight, elevated temperatures, or frequent chemical cleaning, the spec should address yellowing resistance and the cleaning chemistry before the project starts.
- Useful in bright spaces where visual cleanliness matters.
- Helpful when the project needs a light, uniform field around pale tiles.
- Best when the maintenance team can keep cleaning routines consistent.
- Needs careful control of UV exposure, heat, and detergent compatibility.
The main specification points for white are usually titanium dioxide grade, filler whiteness, UV stabilizer package, and acceptable post-cure color shift. If the installation is in a wet or disinfected area, it is worth asking how the color behaves after repeated cleaning. White can be very successful, but it should be approved on a real tile mock-up, not only on a small cured chip.
Black epoxy grout colors and where they work best
Black epoxy grout is often selected when the design wants a stronger contrast or when the owner prefers joints that visually hide dirt and wear. It can be effective in industrial floors, dark porcelain tile systems, service corridors, and accent applications where the grout should disappear into the layout. In practice, black can look rich and stable when the formulation is well controlled, but it can also show surface bloom, uneven cleaning residue, or a chalky change in tone if the job is not managed carefully.
One technical point is that black usually depends on carbon black dispersion. If dispersion is incomplete, the result may look slightly gray, muddy, or patchy from tile to tile. Another issue is that cleaning agents can leave a visible film on darker surfaces even when the grout itself is sound. For that reason, black should always be tested with the actual cleaner, scrubber pad, and maintenance schedule expected on site.
- Suitable for industrial and back-of-house areas where dirt concealment matters.
- Strong choice when the tile layout needs a pronounced visual frame.
- Can make surface residue easier to notice if the cleaning process changes.
- Needs confirmation that the color will not lighten or haze under the planned wash cycle.
For black systems, the most useful technical questions are carbon black grade, pigment loading, anti-migration control, and whether the formulation changes exotherm during cure. Higher pigment loading can alter heat generation and handling, so a color choice should never be separated from the mechanical and processing targets of the grout.
Why shade variation happens between factory and site
Most color complaints do not come from one single failure. They come from a chain of small differences. In manufacturing, the pigment lot may vary slightly, the dispenser may have a narrow tolerance window, or the mixing sequence may not fully wet the colorant. On site, a crew may add material in the wrong ratio, mix for too short a time, or clean at a different point in the pot life than the test panel assumed. Each of those small differences can change the way the joint reflects light.
Substrate and environment also matter. Tile porosity can pull at the joint face differently from one area to another. Wider joints may read darker because of depth, while narrow seams can look lighter or more uniform depending on the angle of light. Sealers, coatings, and even the color temperature of the lighting can make the same grout appear different from the mock-up. In narrow seams, a low-viscosity system such as ZDS-3382AB grey low-viscosity grout for tight joints and shade control shows why flow behavior and visual consistency need to be specified together.
| Cause of variation | What it looks like | How to reduce it |
|---|---|---|
| Pigment batch variation | Slightly warmer, cooler, or duller color than the reference | Require lot traceability and retained control samples |
| Incorrect mix ratio | Uneven tone, soft surface, or patchy appearance | Use pre-measured kits and verify site mixing procedures |
| Incomplete dispersion | Specks, streaks, or gray cast in darker colors | Control mixing time and sequence during production |
| Temperature and humidity | Color shift, surface haze, or cure inconsistency | Record jobsite conditions and protect the cure window |
| Lighting and substrate | Color appears different from the sample tile | Approve mock-ups under the actual site lighting |
Batch consistency and manufacturer quality controls
When color matters, batch consistency matters just as much. Manufacturers control this through master batches, pigment dispersion checks, retained standards, and final visual review under controlled lighting. Some teams also use spectral measurement so a new lot can be compared with an approved reference. The goal is not only to produce a shade that looks right once, but to keep the same shade repeatable over multiple production runs and later replenishment orders.
For fine seams, a product family like ZDS-4131AB low-viscosity epoxy grout for fine seam filling and consistent color illustrates why flow and pigment dispersion have to be designed together. If a formulation flows too slowly, it may trap air or create visible texturing that changes the perceived color. If it flows too freely, the installer may lose control of the joint face. Color control is strongest when the product is engineered for both handling and appearance.
- Color standard: RAL, Pantone, or an agreed physical sample.
- Measured tolerance: define the acceptable Delta E range for the project.
- Lot traceability: record production batch, pigment lot, and pack date.
- Reference samples: keep a cured swatch from the approved batch.
- Storage guidance: protect pigment systems from heat, moisture, and contamination.
| Quality control item | Why it matters | What to request from the manufacturer |
|---|---|---|
| Color certificate | Shows the product was checked against a defined standard | Written color reference and approval record |
| Lot number | Supports traceability for later repairs or extensions | Batch code on every carton or kit |
| Sample tile | Shows the final look on the actual substrate | Lab-cured and on-tile references |
| Storage instructions | Protects shelf life and mixing behavior | Temperature range and handling guidance |
For procurement teams, this is where the specification becomes commercial as well as technical. A lower-cost grout that has weak batch control can create expensive rework later. A more carefully controlled formulation can reduce variation, speed approval, and make repairs simpler because the original reference is reliable.
Custom color options and the practical limits of matching
Custom epoxy grout colors are often needed for branded interiors, restoration work, high-end hospitality, and projects where the tile supplier has already defined a narrow palette. The normal workflow is straightforward: collect a physical reference, confirm the tile body and glaze color, create a laboratory match, produce a trial batch, and then approve the result on actual tile. Digital matching can help, but it should never replace a physical mock-up because the same color can look different once it is inside a joint.
There are also practical constraints. Custom pigments may require a minimum order quantity, a longer lead time, or a separate storage plan. Very special effects such as metallic, pearlescent, or translucent tinted clear grout can be achieved in some cases, but they may trade away opacity, hideability, or chemical robustness. In a food area or pool environment, the spec should also confirm whether the custom system preserves the required resistance to water, cleaners, and UV exposure. The color is only acceptable if the performance package still fits the use case.
- Use a physical reference sample, not a phone photo, whenever possible.
- Define whether the match must be exact, close, or visually compatible.
- Ask for a trial batch on the actual tile and under site lighting.
- Confirm lead time, minimum order, and re-order consistency before approval.
- Check whether the custom color changes cure speed, viscosity, or chemical resistance.
Pigment impact on epoxy grout performance
Color does not exist in isolation. Pigments can influence cure behavior, heat generation, hardness development, and final handling. In most well-designed systems, these changes are small and controlled. Still, heavy loading of certain pigments can make the grout more difficult to disperse, slightly alter working time, or affect the surface finish after cure. This is one reason we review pigment choice with the same seriousness as resin and filler selection.

Maximum pigment loading should be balanced against mechanical performance. If the color package becomes too aggressive, the product can lose flow uniformity or become harder to clean from the tile face. If the filler package is chosen poorly, the grout may appear chalky or uneven. In high-load industrial areas, the color package must still support compressive strength, abrasion resistance, and the installation method. A color that looks good but weakens the system is not a real solution.
For projects with severe service conditions, it is useful to test not only appearance but also hardness, surface cure, and chemical resistance after the same cure window expected on site. That approach keeps the visual choice aligned with the durability target.
How to specify grout color on projects
The cleanest specifications are the ones that remove guessing. A good color spec should define the color reference, the approval method, the acceptance range, the lighting condition, and the process for later replacements. If the project is large, add a lot-control requirement so new material can be verified against the approved sample before it goes on the floor.
| Specification field | Example wording | Why it helps |
|---|---|---|
| Color reference | Approved physical sample or named standard | Gives the installer and supplier the same target |
| Acceptance range | Visual match under site lighting or Delta E limit | Defines what counts as acceptable variation |
| Mock-up | Full-size tile panel to be signed off before production | Reduces disputes after installation starts |
| Repair rule | Replacement or touch-up method for later maintenance | Makes future work easier to plan |
We recommend that the approval package include cured lab swatches, on-tile mock-ups, and, where needed, accelerated exposure or chemical testing. If the grout will live in a disinfected kitchen, wet area, or sunlit lobby, the color approval should reflect those conditions rather than a neutral indoor bench sample.
Installation best practices to minimize color variation
Even a well-controlled product can look inconsistent if the installation process is loose. The first rule is to keep the mixing ratio exact and the mixing sequence consistent from batch to batch. The second is to hold temperature and humidity as close as practical to the approved mock-up. A third rule is to control the cleaning window so the installer does not wash one area early and another area late. Those timing differences can change surface texture and therefore the visual color.
On jobs with colder ambient conditions, using a formulation designed for that environment can help the cure behave more predictably. ZDS-3315AB low-temperature grey grout — curing and batch consistency notes is a useful example of why temperature belongs in the color discussion. If the grout cures too slowly or too quickly for the site, the surface finish can change enough to affect the appearance of the joint, even when the pigment package is correct.
- Record each kit or cartridge by lot number before installation starts.
- Mix only the amount that can be placed within the intended pot life.
- Keep the substrate dry, clean, and within the approved temperature range.
- Use the same cleaning method that was used on the approved mock-up.
- Protect the cure from foot traffic, washing, and chemical exposure until fully ready.
When the color is critical, pre-dosed kits and cartridges usually reduce variation better than hand-dosed field mixing because they remove a common source of ratio error. That does not eliminate the need for training, but it does simplify control and improve repeatability on larger projects.
On-site QC checklist and acceptance sign-off
A practical acceptance process saves time later. The site team should verify that the grout matches the approved sample under the actual lighting, that the lot numbers align with the submittal, and that the final joint face is uniform across the visible field. If an instrument is available, Delta E readings can support the visual check, but the final decision should still be based on the approved method defined in the spec.
- Confirm the approved sample is on site before work starts.
- Check that the delivered lot numbers match the approved submittal.
- Review ambient temperature, substrate temperature, and humidity.
- Inspect the first completed area before full production continues.
- Document any color drift, haze, or surface residue immediately.
- Obtain sign-off from the contractor, owner representative, or consultant as required.
Repair, touch-up, and long-term maintenance
Color matching becomes harder after the original installation ages. Cleaning habits change, light exposure accumulates, and adjacent materials may shift tone. For small repairs, the best outcome usually comes from using the original batch if it is still within shelf life and stored correctly. If that batch is no longer available, compare the repair area against a retained sample or a less visible section of the installation.
Routine maintenance should also be reviewed against the color choice. Strong alkaline cleaners, abrasive pads, or incompatible disinfectants can alter the look of white, black, and custom grouts over time. The safest approach is to approve the cleaning chemistry during the specification stage rather than treating it as a separate issue. If the maintenance plan is clear, the color is much more likely to stay close to the approved appearance.
Short use cases from the field
Healthcare facility: A bright corridor may use white epoxy grout to support visibility and a clean visual finish, but the spec should require UV and cleaning compatibility testing because routine disinfection can shift the appearance if the formula is not balanced.
Commercial kitchen: A darker joint can reduce the visibility of routine dirt, but the team should confirm that the chosen black remains stable after repeated wash-downs and does not show a chalky surface film under task lighting.
Hotel lobby: A custom color can align the grout with the tile body or brand palette, but only if the mock-up is approved on the actual surface and the procurement team defines re-order consistency in advance.
Conclusion

Choosing epoxy grout colors well is a specification exercise, not a guess. White, black, and custom options each solve different project problems, and each one has its own risks around pigment stability, batch consistency, maintenance, and repair. The best results usually come from defining the color reference early, approving a real mock-up, writing acceptance criteria into the submittal, and keeping the manufacturing and installation controls aligned from the start. When that process is followed, epoxy grout colors can support both the visual design and the long-term performance of the project.
For decision-makers, the simplest checklist is this: confirm the use case, compare white versus black versus custom options, verify the substrate and cleaning regime, request batch controls, and approve the color on a real tile sample before production. That is the most reliable path to a finish that looks right on day one and stays consistent after the project is handed over.
FAQ
What is the most stable epoxy grout color for a busy commercial space?
The most stable choice is usually the one that matches the maintenance reality of the site rather than the showroom sample. Medium or balanced shades often hide wear better than very bright white or very deep black, but the real answer depends on the tile, the lighting, and the cleaning schedule. A full mock-up is the safest way to confirm the final look.
Why does white epoxy grout sometimes yellow?
White systems can shift if the pigment grade, filler whiteness, UV resistance, or cleaning chemistry is not well balanced. Heat, sunlight, and harsh cleaners can also change the surface appearance over time. For critical projects, ask for UV-stable ingredients, approved cleaners, and a cured sample checked under the actual site lighting.
How do we keep black epoxy grout from looking patchy?
Black grout needs strong pigment dispersion, an accurate mix ratio, and the same cleaning method used on the approved sample. Patchiness often comes from surface residue, incomplete mixing, or inconsistent cure conditions rather than from the color itself. A full tile mock-up is the best way to confirm the visual result before installation starts.
Can custom epoxy grout colors be matched exactly?
Exact matching is possible in many cases, but the result depends on the reference quality, the tile body, the joint width, and the finish. The most reliable workflow is a physical sample, a lab match, a trial batch, and then an on-tile approval. For demanding jobs, define a Delta E tolerance and the lighting condition used for acceptance.
What causes color differences between batches?
Batch-to-batch changes usually come from pigment lot variation, minor dosing error, incomplete dispersion, or cure conditions that differ from the approval sample. Storage and shelf life can also affect performance. Good lot traceability and retained reference swatches make it much easier to compare new material against the original approval.
How should repairs be handled when the original color is older?
For small repairs, use the original lot if it is still available and compare the repair area under the same lighting as the rest of the installation. If the original batch is gone, check a retained sample or an adjacent area before deciding on the repair method. For larger visible sections, replacing a full contiguous area can sometimes give a cleaner visual result than trying to patch a small mismatch.
Related Reading
- Epoxy grout selection for porcelain, glass and mosaic — compatibility and color stability
- How to choose the right epoxy grout system for your project
- Waterproof epoxy grout performance, chemical resistance and color in wet areas
- Common epoxy grout applications and industry use cases
- Kitchen tile grout guide — stain resistance, cleaning and color choices