Understanding Recoat Over Old Coating: What Matters Most?
Is it possible to recoat over old coating without stripping the entire surface? This is one of the most common dilemmas faced by facility managers, contractors, and homeowners when considering a new finish or waterproofing solution. Recoat over old coating and coating over existing coating are practices that can save time, budget, and reduce downtime—if you get the process right. Before you dive in, let’s explore the crucial flow for assessing old layers, the do-or-die conditions, and smart ways to ensure lasting performance.
The Real Value of Renovating Existing Coatings
Choosing to recoat over old coatings, rather than remove everything, often minimizes waste, lowers costs, and rapidly restores site usability. Especially in floor renovation projects, this approach appeals when the substrate is structurally sound and the old layer remains strongly bonded. But skipping proper surface preparation can lead to adhesion failure, blistering, or premature wear—making smart evaluation the true key.
How to Assess Old Coating for Recoat Suitability
Proper assessment is the foundation of all successful recoating jobs. Start here every time:
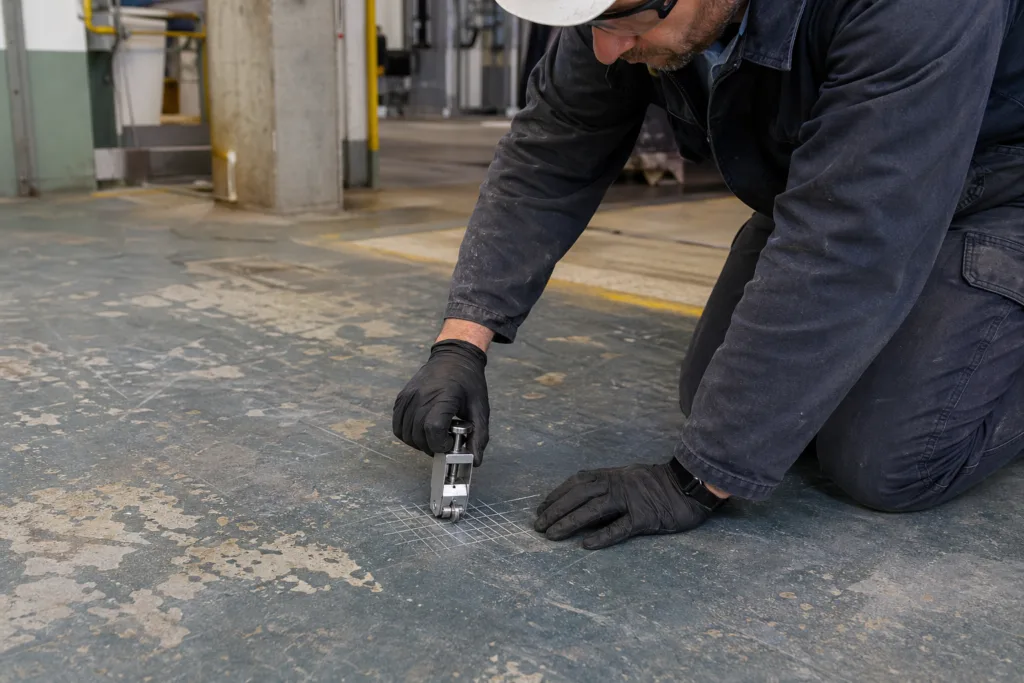
- Bond Strength—Is the old coating tightly bonded? Check by grid-cut (cross hatch), hammer tapping, and examining edges for peeling.
- Contamination—Are oils, dust, or chemical residues present? Stains weaken adhesion and might demand removal.
- Powdering & Chalkiness—Has the surface become friable, powdery, or dusty? This points to degradation and poor recoat performance.
For more advice specific to floors, see floor renovation.
Practical Methods: Grid Cut Test, Hammer, Edge Inspection
Paint industry veterans often start with a physical check. Grid-cut testing uses a sharp blade to score a cross-hatch—peeling tape pulls away loose fragments. Hammer tapping sounds out hollow pockets or delaminated spots. Edge inspection reveals bubbling, lifting, or flaking paint, especially near corners and trims.
When You Can Directly Recoat: Minimum Criteria
Recoat over old coating is allowed under these conditions:
- Old layer is tightly bonded, no peeling under grid-cut or hammer checks
- No visible signs of oil, grease, or chemical contamination
- Coating shows no powdering or chalkiness; it is strongly consolidated
- Surface is clean, dry, and roughened for mechanical keying
The waterproofing renovation solutions offered by ZDSpoxy have been engineered for compatibility with intact, properly cleaned coatings.
Cleaning and Surface Preparation for Direct Recoat
Even the strongest old layer must be cleaned thoroughly—pressure washing, degreasing agents, and abrasion (sanding) often produce the best results. For tile, concrete, or stone, care should be taken to address both surface microtexture and deep stains. Proper vacuuming helps remove dust after sanding or grinding.
When Must You Grind Down to Substrate?
Grinding or complete removal is mandatory if:
- Old coating is loose, peeling, or easily lifted by hand
- Grid-cut test or hammer tapping reveals hollow, delaminated spots
- Edges are flaky, and large sections easily peel away
- There is oil, deep chemical contamination, or old curing compounds present
- Surface is chalky, powdery, or cannot be cleaned to a solid finish
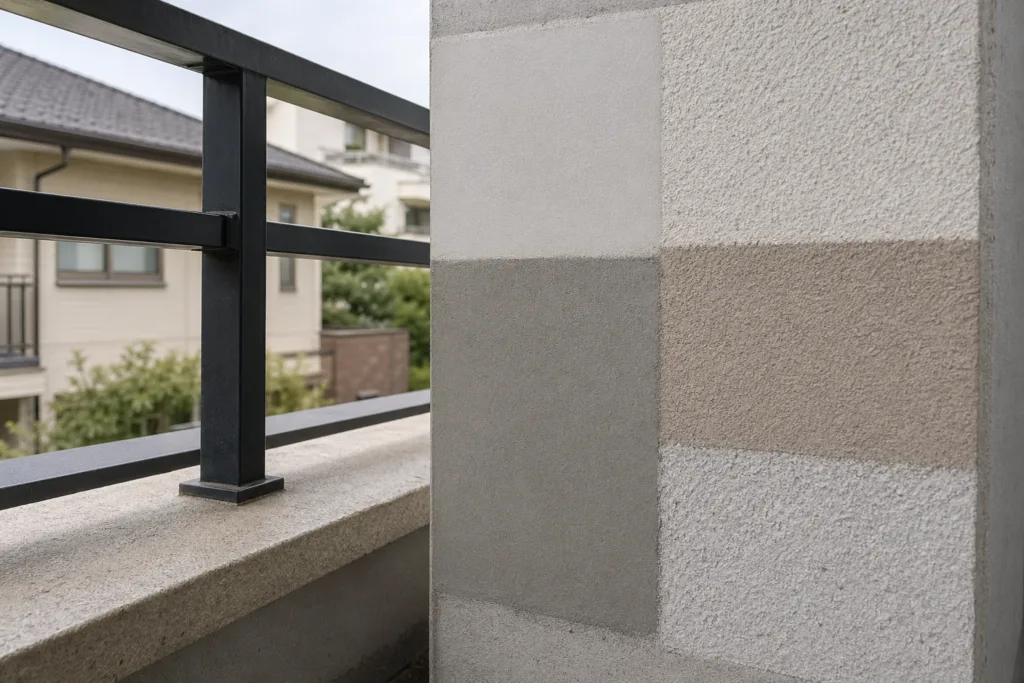
For outdoor jobs where weathered walls or balcony floors show peeling, refer to exterior wall renovation.
Common Triggers for Full Removal
Heavy traffic, UV breakdown, water infiltration, or failed expansion joints often destroy old coatings. If you see widespread salt deposits, rust stains, or microbial growth (especially in wet areas), grinding becomes necessary for lasting results.
Coating Over Existing Coating: Step-by-Step Flowchart
Want to know whether you can recoat or must remove first? Here’s a typical on-site decision flow:
| Step | Criteria | Action |
|---|---|---|
| Bond Test | No peeling, sound edges, grid-cut passes | Continue |
| Contamination Check | No oil, dust, or chemical stains | Continue |
| Powdering Check | Solid surface, no friable dust | Continue |
| Failed Any Test? | Loose/contaminated/calcified areas | Remove and grind to substrate |
| Passed All? | Clean, roughen, recoat | Proceed with primer or finish coat |
Always use a primer that matches both the existing coating and the new topcoat. Compatibility is critical for bond strength.
Choosing the Right Coating System When Recoating
Not all coatings react the same. Epoxy primers are excellent for bonding over intact, roughened surfaces, while polyaspartic topcoats provide superior UV resistance. Check datasheets for chemical compatibility and always confirm via a sample patch first.
Sample Patch Trials: Mandatory Before Full Recoat
Before recoating large areas, apply a “small sample patch” (typically 0.5–1 m²) in a representative zone. This enables real-world checks for:
- Adhesion (after full cure/7 days)
- Chemical/physical compatibility
- Appearance and uniformity
Monitoring a small area helps prevent costly failures across the entire floor, balcony, or wall.

How to Conduct Sample Patch Trials
Clean the area, apply the intended primer/topcoat, and wait for full cure. Check for peeling, blistering, color change, or edge lift. If successful, proceed with scaling up the process. Otherwise, re-evaluate surface prep or product selection.
Real-World Considerations: Moisture, Temperature, and Working Time
Coating over existing coatings is influenced not only by surface chemistry but also jobsite conditions. Damp substrates, low/high temperature, and short working times require adjustments in mixing, batch size, and cure monitoring. ZDSpoxy engineers stress the importance of matching the primer’s working time with ambient conditions for both adhesion and safety.
Critical Factors in Epoxy and Polyaspartic Coating Recoats
Epoxy and polyaspartic coatings perform differently. Epoxy is more forgiving for recoats, but less resistant to sunlight. Polyaspartic is fast-curing and UV stable—however, rapid set can trap moisture or air bubbles if the substrate isn’t fully dry. Experienced applicators weigh flowability, pot life, cure time, and batch size to avoid mishaps.
Role of Primers: Bonding New to Old
Primers are the bridge between old and new layers. Always use a primer designed to penetrate and lock into the substrate and previous coating. For high-traffic areas, rapid-curing epoxy primers (such as ZDSpoxy’s specialty blends) optimize both adhesion and turnaround time.
Why a Primer is Essential in Renovation
Primers fill micro-defects, promote wetting, and minimize risk of pinholes or air entrainment. They are especially critical if the old surface has been abraded or chemically cleaned.
Health & Safety Essentials in Renovation Works
Recoating work often releases dust, volatile organic compounds (VOCs), and exposes workers to chemicals. Proper personal protective equipment (PPE), ventilation, and site hygiene are musts. Storage and shelf life should be monitored, especially for high-performance resins.
Sustainable Practices and Disposal
Dispose of grinding dust, spent solvents, and contaminated waste according to local regulations. Sustainable renovation minimizes environmental risk while optimizing material use.
Common Pitfalls in Coating Over Existing Layers
Avoid these trapdoors:
- Recoating on contaminated, oily, or powdery surfaces
- Ignoring compatibility between old/new resins
- Skipping sample patch trials
- Rushing prep or cure under poor conditions
- Using improper primer or finish types
How to Prevent Failure: The ZDSpoxy Approach
ZDSpoxy emphasizes strict mixing ratio control, thorough surface prep, and batch record tracking for recoat jobs. Quality checks—like gel time measurement and viscosity control—help ensure reliable application, especially for rapid-setting products.
Recoat Over Old Coating: When to Call an Expert
If uncertainty exists about the substrate, layer compatibility, or site conditions (humidity, salt spray, thermal cycles), professional evaluation helps avoid costly mistakes. Complex areas like swimming pools, exterior facades, or high-traffic commercial floors may benefit from expert design for both waterproofing and renovation durability.
Coating Over Existing Coating vs. Complete Removal: Pros and Cons
| Approach | Pros | Cons |
|---|---|---|
| Direct Recoat | Quick, less waste, cost saving, minimal downtime | Risk of poor bond, needs sound substrate |
| Grind to Substrate | Guaranteed adhesion, improved aesthetics, higher durability | Labor-intensive, noisy, costly, generates dust |
Best Practices for Durable Renovation Results
- Thorough site inspection (bond, contamination, powdering checks)
- Careful surface prep, including mechanical abrasion
- Sample patch testing for compatibility and strength
- Adopt rapid-curing primer and waterproofing solutions where possible
- Use internal resources for detailed guidance: waterproofing renovation solutions, floor renovation, and exterior wall renovation
Conclusion: Smart Renovation Begins With the Right Assessment
Recoat over old coating is a practical strategy—when the existing layer is sound, clean, and properly prepared. Reliable results depend on careful grid-cut, contamination, and powdering checks. If failures are spotted, full removal is the only safe option. Always make a small sample patch before large-scale application, and rely on primers that guarantee compatibility and bond strength. Site conditions, product selection, and disciplined application are the true keys to lasting renovation success.
Frequently Asked Questions
Is it safe to recoat over old coating without removal?
Yes, it is safe if the old layer passes adhesion, contamination, and powdering checks, and you perform a sample patch test first.
How do you test bond strength before recoating?
Use grid-cut, hammer tapping, and edge peeling inspection to ensure the old coating is tightly bonded and not loose or flaky.
Can I recoat over contaminated surfaces?
No, surfaces with oil, grease, or deep stains must be cleaned thoroughly or ground down to substrate before recoating.
Why is a sample patch required before full recoat?
A sample patch helps check real-world adhesion and compatibility, preventing widespread failure across the project surface.
What primer is best for coating over existing coatings?
Choose a rapid-curing epoxy primer for most jobs, ensuring it matches the chemistry of both the old coating and the new topcoat.
What if the old coating is powdery or chalky?
If powdering is present, grind down to the substrate. Recoating on friable surfaces leads to premature peel and failure.