Epoxy grout for bathroom tiles is usually the right choice when the project priority is low water absorption, easier stain cleanup, stronger chemical resistance, and better long-term hygiene than standard cement grout. For contractors, specifiers, and informed homeowners, the decision is less about whether epoxy is premium and more about whether the bathroom exposure, tile type, joint width, schedule, and installation skill justify it. In our manufacturing perspective, epoxy grout performs best where repeated wetting, soap residue, body oils, cleaning chemicals, and mold risk make cement-based joints harder to maintain over time.
review epoxy grout system options for bathroom waterproofing and mold resistance
What matters most is selecting the right epoxy chemistry and installing it within its working window. A well-matched product can improve waterproofing support, reduce staining, and simplify maintenance. A poorly matched product can create cleanup difficulty, color inconsistency, haze, or repair challenges. This guide explains how we evaluate bathroom grout systems, what to compare in technical data, where epoxy is most suitable, and when another joint material is the better specification.
What epoxy grout is and why it behaves differently
Epoxy grout is a resin-based joint filler that hardens through a chemical reaction between resin and hardener, often combined with graded fillers and pigments. Unlike cementitious grout, it does not rely on hydration and evaporation in the same way. That difference is why cured epoxy grout generally shows much lower water absorption, better stain resistance, and stronger resistance to many household cleaning chemicals.
There are important product categories to separate. A true 100% epoxy system typically delivers the strongest moisture and chemical performance, but it can also be less forgiving during installation. Epoxy-modified or hybrid systems may improve ease of use, but performance can vary widely. For bathroom specification work, we recommend reading technical data carefully instead of assuming every product sold as epoxy grout behaves the same.
Viscosity is one of the first selection filters. For mosaics, narrow grout lines, or dense porcelain layouts, a lower-viscosity material may pack joints more completely and reduce trapped voids. In narrow-joint work, products such as ZDS-4131AB low-viscosity grout for fine tile joints illustrate why flow behavior matters as much as cured strength.
Bathroom performance summary
Waterproofing support
Epoxy grout is often described as waterproof, but the practical interpretation matters. The grout itself can have very low water absorption, which helps limit water entry through the joint surface. However, grout is not a substitute for a correctly installed waterproof membrane behind the tile. In showers, steam rooms, and tub surrounds, the membrane remains the primary waterproofing layer, while epoxy grout improves surface resistance and reduces moisture uptake at the joints.
Mold and mildew resistance
Epoxy grout does not feed mold the way porous, dirt-retaining joints can over time. Its denser surface makes it harder for moisture and organic residue to remain inside the joint. Still, mold can develop on surface contamination such as soap film, shampoo residue, skin oils, and poor-ventilation condensation. In other words, epoxy improves resistance, but cleaning and ventilation still determine whether mold regrowth happens.
Stain and hygiene benefits
Bathrooms expose grout to dyes, cosmetics, hard-water deposits, surfactants, and cleaning chemicals. Epoxy handles these conditions better than typical unsealed or poorly maintained cement grout. For hospitality bathrooms, multi-family projects, and high-use family showers, this performance difference often justifies the higher installation effort.
Durability in service
When installed correctly over a stable substrate, epoxy grout usually offers strong abrasion resistance, good compressive strength, and better long-term appearance retention. It is especially useful on shower floors, niches, vanity backsplashes, and wall areas that need frequent cleaning. We typically advise buyers to view epoxy as a system durability choice rather than just a grout color choice.
Key drawbacks and practical limitations
The biggest limitation is installation sensitivity. Pot life, spread area, cleanup timing, and temperature all matter. Once the material starts to build viscosity, packing and washing become harder, and haze risk increases. Labor cost is often higher because installers need tighter process control.
Movement tolerance is another limit. Epoxy grout is not the correct material for movement joints at changes of plane, perimeter gaps, or dynamic transitions. Those locations usually require a compatible flexible sealant. Using rigid grout where movement should be accommodated is a common cause of cracking or debonding.
Appearance can also be a deciding factor. Some epoxy systems show a slight sheen that differs from the flatter look of cement grout. Light colors may be more sensitive to ambering, residue, or uneven cleanup, while dark colors can emphasize soap film or hard-water spotting. Repairs are possible, but seamless blending is more difficult than many expect.
In very tight layouts or decorative surfaces where workability is critical, installers often compare flow-focused systems such as ZDS-3382AB low-viscosity grout for tight bathroom joints to standard-bodied materials before final specification.
Types of epoxy grout and formulation variants
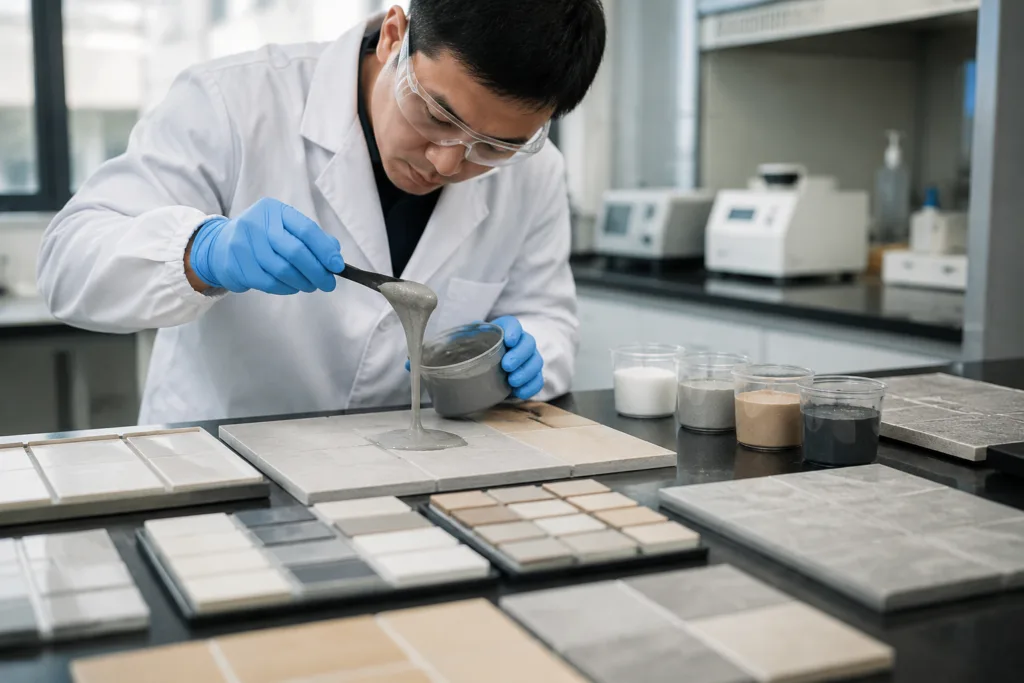
Not all bathroom grout projects need the same epoxy chemistry. A true 100% solids epoxy grout is commonly selected where stain resistance, low water absorption, and heavy cleaning cycles are priorities. Waterborne epoxy variants may offer easier washability and lower odor, but they should be checked carefully for cure profile and wet-service readiness. Urethane-epoxy hybrids may provide a different balance of flexibility and usability, though they are not direct equivalents to every pure epoxy system.
Formulation details matter in bathroom settings. Low-viscosity systems help with narrow joints and dense mosaic packing. Anti-yellowing packages can help protect very light gray, beige, or white shades from visible color drift. Filler grading affects joint finish, washability, and how well the material bridges fine gaps without slumping.
From our formulation work, the best product choice is often driven by joint width, tile absorbency, surface texture, room temperature, and cleanup window rather than by brand category alone.
What to specify and compare before choosing a product
| Criterion | Why it matters in bathrooms | What to ask for |
|---|---|---|
| Pot life | Controls usable mixing time before thickening | Measured pot life at stated temperature |
| Working time | Affects spread area and cleaning schedule | Recommended application window on wall and floor |
| Cure schedule | Determines time to foot traffic and wet service | Light traffic time and shower-use time |
| Viscosity | Influences packing of narrow or deep joints | Low, medium, or high viscosity range |
| Water absorption | Supports waterproofing and stain control | Low absorption performance statement |
| Hardness | Affects scratch resistance and feel in service | Shore hardness after full cure |
| Chemical resistance | Important for bathroom cleaners and soaps | Resistance list for household chemicals |
| Allowable joint width | Prevents poor packing or cracking | Minimum and maximum joint size |
For bathrooms, cure schedule is often decisive. A grout that performs well in theory but cannot reach wet service within the job timeline can disrupt sequencing. Cooler or poorly ventilated bathrooms may need systems designed for lower-temperature cure behavior. Where that condition exists, installers may evaluate options such as ZDS-3315AB low-temperature grout with 24h cure for cooler bathrooms rather than forcing a standard system outside its ideal range.
We also encourage comparing solids content and post-cure hardness alongside cleanability. Very hard systems can be desirable, but if they shorten cleanup time too aggressively for the crew and tile surface, the project risk can increase.
Tile and substrate compatibility
Porcelain and glazed ceramic are usually straightforward with epoxy grout because the tile face is relatively non-absorbent and easier to wash clean. Glass mosaics can also perform well, but transparency and edge visibility make uniform packing and color consistency more critical. Large-format tiles reduce joint count, so any color mismatch or haze can stand out more strongly.
Natural stone requires caution. Some stones can stain, darken, or show edge shadowing when exposed to resin or aggressive wash methods. Textured stone surfaces may also trap residue. A mockup is the safest route, especially for pale limestone, marble, or other resin-sensitive materials.
Substrate stability matters just as much as tile type. Epoxy grout bonds well, but it cannot solve deflection, movement, or moisture issues below the tile. Backer boards, membranes, and substrate preparation should already meet bathroom requirements before grout is considered final protection.
Where epoxy grout works best in a bathroom
Shower floors
This is one of the strongest use cases. Repeated wetting, body oils, soap exposure, and cleaning cycles make low-absorption grout valuable. Small-format tile shower floors especially benefit from stain resistance and easier maintenance.
Shower walls and tub surrounds
Epoxy performs well on walls where mildew control and color retention matter. Installers should manage spread size carefully because vertical surfaces can make wash timing more sensitive.
Steam rooms
Steam environments raise the bar. The full tile assembly, not just the grout, must be designed for high vapor and moisture exposure. Cure-before-wetting times should be conservative, and compatibility with the waterproofing membrane should be confirmed.
Dry-zone bathroom walls
Epoxy may still be useful for decorative walls, backsplashes, and vanity areas where stain resistance is desired, though the performance advantage over other grouts is less dramatic than in a shower base.
Waterproofing system integration
Epoxy grout should be viewed as the exposed joint layer within a larger assembly that includes tile, thinset, backer board, membrane, and detailing at penetrations. It supports the assembly by reducing surface water entry and improving cleanability, but it does not replace membrane continuity at corners, niches, drains, thresholds, and transitions.
At changes of plane, use a flexible sealant rather than rigid grout. At drains, confirm the drain detail allows complete joint filling without voids or standing pockets that trap residue. On membrane-based systems, always check that the thinset, grout, and sealant sequence are compatible and that the membrane is fully cured before grouting.
For teams developing broader wet-area standards, our advice at ZDSpoxy is to review the full assembly logic rather than isolating grout as a standalone fix for waterproofing problems.
Where project teams need a broader overview beyond bathrooms alone, it helps to review epoxy grout applications for wet areas and bathroom installations as part of system-level planning.
Mold, mildew, and hygiene in real use
Epoxy grout resists mold mainly because it absorbs less water and offers fewer pores for contamination to anchor. That gives surface cleaners a better chance of removing soap film and organic residue before growth becomes established. The benefit is real, but it is not absolute. Bathrooms with chronic condensation, poor fan performance, or persistent standing water can still develop surface biofilm.
The practical cleaning protocol is simple: remove residue before it accumulates, rinse cleaner thoroughly, and dry high-moisture zones as part of routine maintenance. If a project owner expects epoxy alone to eliminate all mildew under poor ventilation, expectations should be corrected before installation.
Color selection and appearance management
Light colors make bathrooms feel brighter and often suit contemporary tile palettes, but they demand cleaner installation and stronger yellowing control. Dark colors hide some residue and aging effects better, yet they can highlight mineral spotting and create more visual contrast if joints vary slightly in width.
Mockups are worth the time. Evaluate color under warm and cool lighting, in both dry and recently cleaned conditions. Joint depth influences perceived shade, and textured tiles can change how residue frames the grout line. For white and very pale tones, ask whether the formulation includes anti-yellowing design considerations and whether the bathroom receives sunlight that may affect appearance over time.
Tinting should be handled carefully and consistently, ideally under controlled manufacturing conditions. On-site improvisation creates avoidable batch variation.
Pre-installation planning and bathroom checklist
- Confirm tile and substrate are fully set, stable, and ready for grouting.
- Check that waterproofing and detailing are complete before grout work starts.
- Verify room temperature and humidity are within the product’s application range.
- Stage wash water, pads, sponges, gloves, and mixing tools before opening units.
- Test a small area on textured, porous, or natural stone surfaces.
- Plan spread size around pot life and crew speed, not around room size.
- Protect drains and fixtures from residue during cleanup.
- Agree on cure-before-use timing with the owner or project manager.
Installation best practices for bathrooms
Mixing and measuring
Use the manufacturer-specified ratio exactly. Incomplete mixing or ratio drift can leave soft joints, gloss variation, or cure inconsistency. Partial kits should only be split when precise measurement is practical.
Application and packing
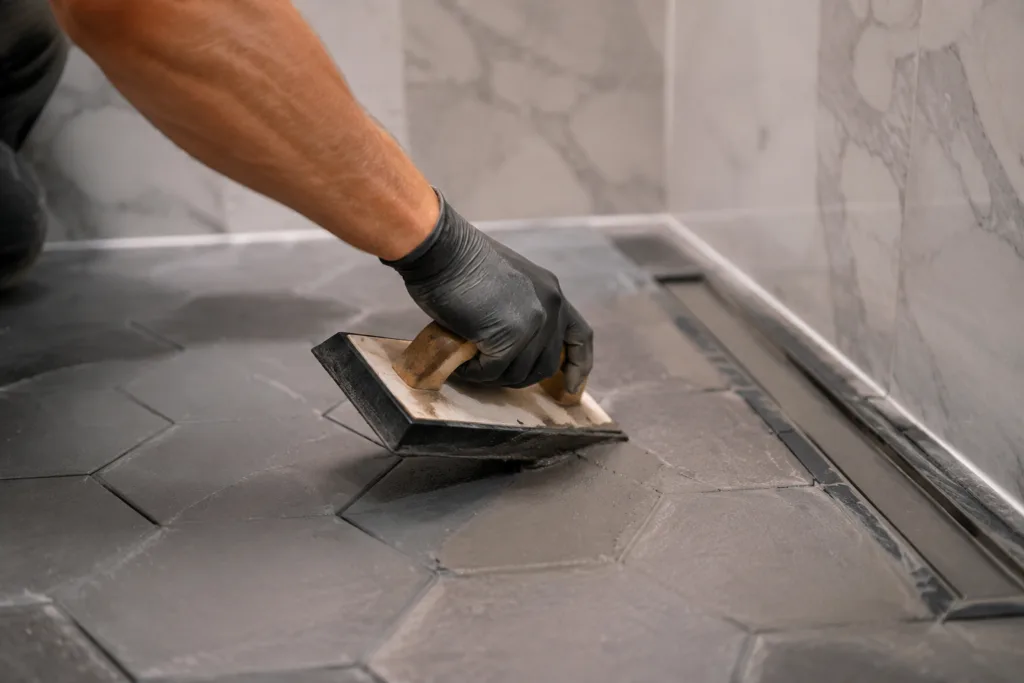
Use a firm grout float and push material diagonally across joints to fully pack them. Avoid skimming the surface and leaving hidden voids, especially on shower floors where voids can trap moisture and residue.
Initial cleaning
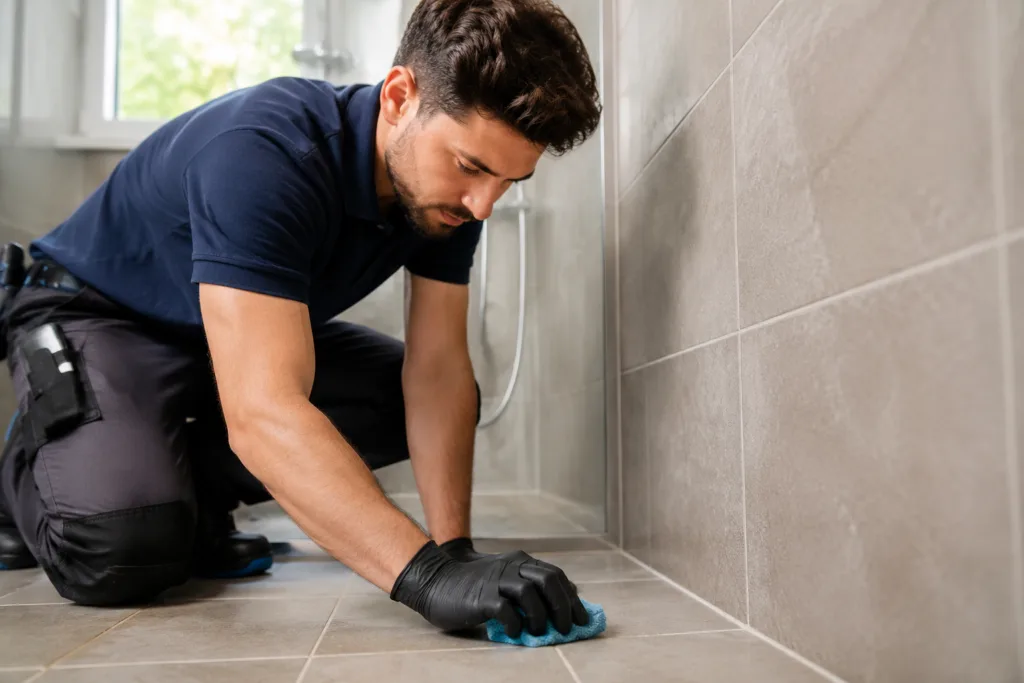
Start cleanup within the recommended window. Too early can pull material from the joint; too late can create haze and increase labor. Use the recommended wash media and change rinse water often enough to avoid smearing residue back onto the tile.
Final cleaning and haze control
Most epoxy grout problems are cleanup-timing problems. The goal is a full joint with a clean tile face, not aggressive over-washing. On textured tiles, a test area helps establish the correct wash sequence before the full bathroom begins.
Cure before wet service
Even when the grout is hard enough for light foot traffic, that does not always mean it is ready for shower use. Wet-service cure time should be observed strictly. Rushing this step can compromise early performance.
Safety, ventilation, and waste handling
Bathrooms are confined spaces, so ventilation matters during mixing and application. Installers should use gloves, eye protection, and any respiratory protection recommended by the product safety documentation. Mixed epoxy waste should not be left in large masses because heat buildup can accelerate reaction. Spread waste safely in accordance with handling guidance so it can cure more predictably before disposal.
Low-odor does not mean no precautions. Good airflow and organized staging improve both safety and finish quality.
Cleaning, maintenance, and long-term care
Routine cleaning is usually straightforward: use pH-appropriate bathroom cleaners that are compatible with epoxy surfaces, remove soap film regularly, and rinse thoroughly. Avoid harsh abrasives that can dull the finish and avoid strong acids unless the product documentation specifically permits them.
For hard-water areas, consistent light maintenance is better than infrequent aggressive cleaning. Surface deposits are easier to remove before they build into visible scale. Professional deep cleaning may make sense when mineral deposits, body oil residues, or neglected corners no longer respond to standard maintenance.
Common problems and troubleshooting
Pinholes or voids
Usually caused by incomplete packing, air entrapment, or trying to cover too much area too fast. Correct by removing weak material locally and repacking after confirming the joint is clean and dry.
Blistering or bond loss
Often linked to contamination, moisture issues, movement, or substrate instability. Investigate the assembly before repairing only the joint surface.
Color inconsistency
Can result from poor mix uniformity, inconsistent cleanup timing, residue film, or batch variation. Always compare dry cured color after full cleanup before deciding that replacement is necessary.
Yellowing
More visible in white or very light shades. Causes may include resin chemistry, UV exposure, heat, or chemical contact. If appearance stability is critical, specify a system designed with light-color performance in mind and validate by mockup.
Epoxy haze
Usually a timing and cleaning-process issue. Start with the least aggressive approved removal method and test on the tile finish first.
Repair, touch-up, and replacement strategy
Localized repair can work when the defect is clearly limited and the surrounding grout is sound. The challenge is not only adhesion but also visual blending. Existing joints must be cleaned, sound edges exposed, and replacement material matched closely enough in color and sheen.
For widespread staining, cure failure, or multiple bond defects, full-joint removal may be more reliable than patching. Homeowner spot fixes can be acceptable for cosmetic issues in low-visibility areas, but critical shower zones usually benefit from professional assessment because the underlying cause may be moisture, movement, or installation error.
Specification language and procurement tips
When writing specifications, focus on measurable decision points: pot life at stated temperature, working time, cure to light traffic, cure to wet service, allowable joint width, water absorption behavior, resistance to common bathroom cleaners, and color control requirements. Require mockups for sensitive stones, textured tiles, or critical light colors.
Batch control is also important. For larger projects, align purchase lots where possible and define acceptance criteria for color consistency, cleanup residue, and complete joint fill. We find that clear preconstruction expectations prevent many disputes that are later mislabeled as product problems.
Cost comparison and lifecycle thinking
Epoxy grout usually costs more in material and labor than standard cement grout, especially when installer experience is limited. But lifecycle cost can favor epoxy in bathrooms with heavy wet use, frequent cleaning, or high appearance expectations. Reduced sealing needs, lower stain risk, and easier maintenance can offset some of the upfront premium.
The cost logic is strongest in shower floors, hospitality bathrooms, rental units, and family bathrooms where grout joints see repeated moisture and cleaning exposure. In a low-use powder room, the economics may be less compelling.
When not to use epoxy grout
Do not use epoxy grout in movement joints, perimeter joints, or changes of plane where flexibility is required. Be cautious with resin-sensitive natural stone unless a mockup confirms appearance and cleanup safety. On highly flexible or poorly stabilized substrates, a rigid grout will not solve underlying movement. In UV-exposed areas, use only products whose color stability fits the exposure conditions.
There are also jobs where installer constraints matter. If the crew lacks epoxy experience, the tile surface is highly textured, and the schedule allows no mockup or cleanup testing, a more forgiving system may reduce risk.
Quick decision checklist
- Choose epoxy when the bathroom has repeated wet service, stain risk, or high hygiene expectations.
- Confirm the waterproofing membrane is already doing the primary waterproofing work.
- Match grout viscosity to joint width and tile geometry.
- Check pot life and cure schedule against room temperature and project timing.
- Use mockups for natural stone, textured surfaces, and very light colors.
- Keep rigid grout out of movement joints and use flexible sealants there.
- Do not shorten cure-before-shower time, even if the surface feels hard.
- Specify cleaning and acceptance criteria before the job starts.
Conclusion
Epoxy grout for bathroom tiles is the right specification when the goal is a denser, lower-absorption, more stain-resistant joint that supports waterproof bathroom assemblies and simplifies long-term cleaning. The decision should be based on exposure, tile type, joint design, installation conditions, and crew capability, not on price alone. From our manufacturer viewpoint, the most successful projects are the ones that combine the right formulation, a realistic cure schedule, mockup-based appearance approval, and disciplined installation practice.
If the bathroom includes narrow joints, cooler application conditions, or demanding wet-service timelines, reviewing technical data before procurement is essential. That is usually the difference between epoxy grout performing as intended and epoxy grout becoming a cleanup problem.
Frequently Asked Questions
How long should epoxy grout cure before using a shower?
It depends on the specific formulation and room conditions, but installers should follow the stated wet-service cure time rather than judging by surface hardness alone. Cooler temperatures, high humidity, and limited ventilation can extend the practical wait time.
Is epoxy grout suitable for natural stone bathroom tile?
Sometimes, but it should not be assumed safe for every stone. Resin-sensitive, porous, or textured stone should be tested with a mockup first to check for staining, darkening, edge shadowing, or cleanup difficulty.
Can epoxy grout stop mold completely?
No. It can reduce mold risk because it absorbs less water and retains less contamination than porous grout, but surface mold can still grow if soap film, body oils, and condensation are left in place.
Can a homeowner install epoxy grout in a bathroom?
Yes, but small bathrooms with simple tile surfaces are much better candidates than large showers, textured tile, or natural stone. The key challenge is timing, because mixing, packing, and cleanup all have to happen within the product’s working window.
Can cured epoxy grout be sanded or reshaped easily?
No. Once fully cured, epoxy grout is hard and difficult to reshape cleanly. If joint profile or appearance is unacceptable, removal and replacement of the affected section is usually more practical than trying to sand it in place.
What performance points should a bathroom epoxy grout specification include?
Focus on pot life, working time, cure to light traffic, cure to wet service, allowable joint width, water absorption behavior, chemical resistance to bathroom cleaners, color consistency expectations, and mockup requirements for sensitive tile finishes.