
For distributors, OEMs, and private-label buyers, a marine epoxy resin kit is not just a bottle pair in a box. It is a repair system that must help boat owners complete a clean, durable repair with limited tools, variable weather, and mixed substrates such as fiberglass, timber, and filled laminates. The box should reduce mistakes, not create them.
From a manufacturer perspective, the most successful kits are designed around the repair task first and the resin second. That means the pack size, mix ratio, accessories, cure speed, label language, and quality checks all need to fit the way a customer actually repairs a boat.
If you are scoping an OEM line or comparing suppliers, you can explore marine epoxy resin options for private-label kits and boat repair before you settle the pack architecture and label copy.
The rest of this guide focuses on specification decisions that matter in the field: what to include, how to size the pack, how to handle 5:1 ratios, which accessories reduce returns, and what documentation and QC should sit behind the label.
Why a purpose-built marine epoxy resin kit matters
Boat repair customers are usually working with a damaged surface, a short maintenance window, and only one chance to mix and apply the product correctly. A generic epoxy bundle often leaves gaps in the user journey. The resin may be fine, but the customer still fails because the kit did not explain surface preparation, did not include the right dosing method, or did not match the repair size.
For distributors, the kit is a way to turn technical complexity into a repeatable purchase. For private-label buyers, it is also a way to control the customer experience. A well-built kit can reduce support calls, improve first-time success, and make the product line easier to merchandise across small repair, wood repair, and fiberglass maintenance use cases.
- It should make the correct repair easier than the wrong one.
- It should guide the user on mix ratio, pot life, and cure time without forcing them to guess.
- It should include the small items that often cause failure, such as mixing cups, gloves, and spreaders.
- It should communicate limits clearly so the end user does not expect one kit to cover every marine problem.
Match the kit to the repair scenario
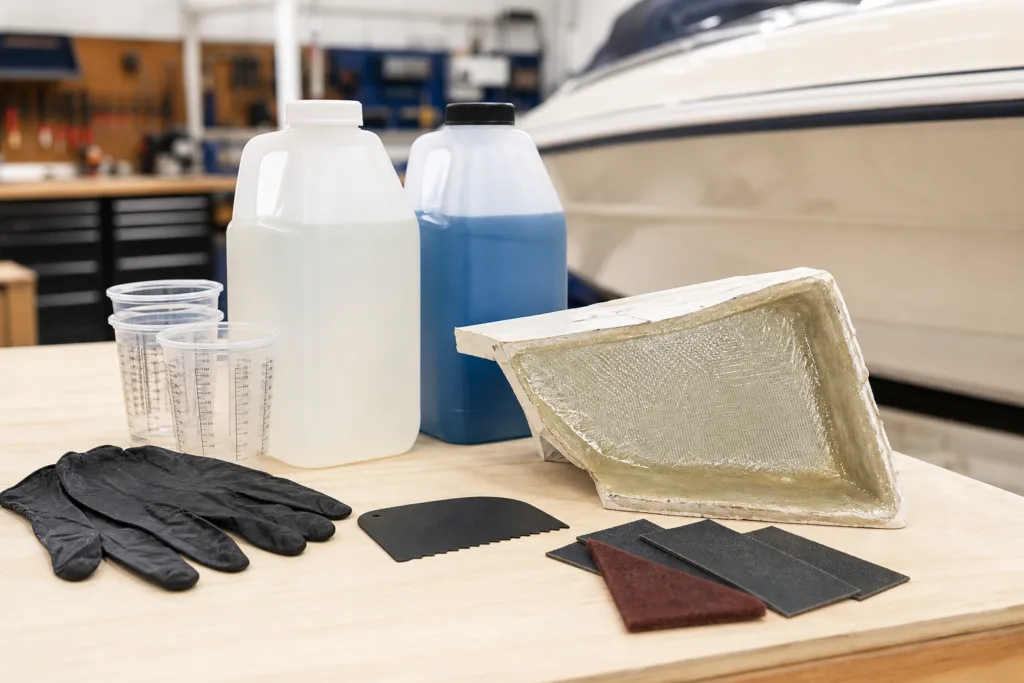
The best marine epoxy resin kit is always matched to a likely repair scenario. A small patch kit for a scratched toerail does not need the same pack structure as a structural repair kit for a transom or a lamination kit for wet-out work. The product decision becomes easier when you map the kit to the job first.
| Repair scenario | Suggested kit type | Core contents | What to clarify on pack |
|---|---|---|---|
| Small gelcoat or cosmetic scratch | Spot repair kit | Resin, hardener, filler, stir stick, sanding pads, gloves | Limited coverage and cosmetic only guidance |
| Through-hull or structural repair | Structural repair kit | Resin, slower hardener, mixing cups, spreader, reinforcement guidance | Surface prep, cure window, and the need for proper laminate design |
| Fiberglass wet-out and lamination | Lamination kit | Low-viscosity resin, hardener, rollers, squeegee, brush | Working time, ambient temperature, and wet-out technique |
| Teak or timber repair | Wood repair kit | Primer, filler, putty knife, sanding pads, gloves | Moisture limits and wood preparation steps |
| Osmosis blister repair | Blister repair kit | Resin, filler, abrasives, cleaning guidance, recoat notes | Drying, contamination control, and patience during cure |
For wooden boat repairs that begin with softened or stained timber, a solvent-free primer such as ZDS-2060AB solvent-free rot-repair primer for wooden boat repairs is a useful reference point for how to frame the prep stage in a kit or upgraded bundle.
That same logic applies to cosmetic trim work. For dents and scratches on wood surfaces, a small add-on filler can keep the repair moving without requiring a separate trip for materials, which is why a product such as ZDS-189 wood repair putty for filling dents and scratches on boats can be positioned as a convenience component in a boat repair line.
Core components every kit must include
Base resin
The base resin should be selected for the repair task, not just for catalog availability. For most boat repair kits, buyers need to pay attention to viscosity, epoxy equivalent weight, solids content, and how well the resin flows into damaged edges or porous substrate. A lower-viscosity resin is usually easier for wet-out and penetration, while a slightly higher-viscosity system may hold shape better for vertical repairs and gap filling.
From a packaging standpoint, the resin should also be stable enough for retail storage and transport. If the resin settles, crystallizes, or becomes difficult to dispense in a cold warehouse, the end user experience will suffer before the repair even starts.
Hardener
The hardener controls cure speed, pot life, and practical use temperature. Most marine kits need at least two speed choices across the product line, often standard and slow, with a fast option reserved for small emergency repairs. A fast hardener can be useful for a quick patch, but it is a poor fit for a large wet-out job where the user needs more working time.
Good labeling should explain what the hardener is meant to do. Instead of saying only fast or slow, specify the use case: small repair, general repair, or extended working time for larger sections. That wording helps distributors sell the right SKU and helps customers avoid choosing by guesswork.
Fillers and additives
Fillers make the kit more useful, but they should be included intentionally. Reinforcing fillers improve body and sag resistance. Thixotropes help the product stay where it is placed on vertical or overhead surfaces. Microballoons can improve sandability for fairing work. Anti-osmotic or moisture-management additives may be relevant in certain repair systems, but any claim should be backed by your formulation and test data.
UV stability should also be considered if the kit is likely to remain exposed before overcoating. Epoxy itself is not a final outdoor finish in most marine use cases, so the kit should make clear whether a topcoat, paint, or varnish is expected after cure.
Optional topcoats and primers
Optional primer or topcoat components can add value, especially in wood repair and refinish kits. The important point is compatibility. If the kit includes a primer, the instructions should say when to apply it, what surface it bonds to, and what the recoat window is. If it relies on polyurethane, varnish, or another finish, the label should state that the user must follow the coating maker’s compatibility and overcoat instructions.
5:1 ratio design and mix calculations
Many distributors prefer a 5:1 marine epoxy resin kit because it is familiar, scalable, and often easier to standardize across retail and contractor packaging. The ratio can work well, but only if the kit makes the measuring method obvious. Volume ratio and weight ratio are not the same unless the densities have been engineered to match. That is one of the most common setup errors in the field.
For readers who want a deeper breakdown of dosing discipline, cure behavior, and ratio handling, our guide on mix ratios, pot life and kit guidance for 2-part marine epoxy (including 5:1) is a useful companion when you are building a specification sheet or reviewing an RFQ.
| Total kit size | 5 parts resin | 1 part hardener | What it means in practice |
|---|---|---|---|
| 250 mL total | About 208 mL | About 42 mL | Good for spot repairs, but not for large wet-out work |
| 1 L total | About 833 mL | About 167 mL | Useful for repeat retail sales and small-to-medium repairs |
| 4 L total | About 3.33 L | About 0.67 L | Better for contractors, but the pack must support partial use and reclosure |
When you write the instructions, explain the ratio in the same units the customer will use. If the ratio is by volume, say so plainly. If the ratio is by weight, say so plainly. If you expect customers to measure by cup, include a calibrated cup or printed conversion chart. If you expect them to use pumps, specify the pump stroke or dose count and test it against real viscosity.
Pot life and exotherm also become a packaging issue. A small, shallow mix spreads heat better than a deep cup, so the same batch can behave differently depending on how it is mixed and applied. That is why the label should tell the user to spread mixed material quickly after blending and never leave a large mass sitting in a deep container.
Pack size strategy and SKU ladder
Distributors usually need a clear ladder of pack sizes rather than a single universal box. The small pack drives impulse purchases and emergency use. The mid-size pack supports repeat retail sales. The larger contractor pack suits maintenance teams and yards that need more material per job.
| SKU type | Suggested pack size | Best for | Packaging note |
|---|---|---|---|
| Emergency repair kit | 150 mL to 250 mL | Quick patching, tool box storage, onboard repair | Keep the instructions short and visual |
| Standard repair kit | 500 mL to 1 L | Retail shelf sales, weekend repairs, small contractors | Include better dosing tools and a fuller guide |
| Contractor kit | 2 L to 4 L | Boat yards, maintenance crews, repeat trade users | Use robust closures and a reclose system |
| Lamination kit | 1 L to 4 L with accessories | Fiberglass wet-out and coating jobs | Prioritize flow, pot life, and brush or roller compatibility |
For private-label buyers, the SKU ladder should also reflect channel behavior. A 250 mL kit works well as a low-risk trial item. A 1 L kit often becomes the repeat-order item because it gives enough product to finish more than one job. Larger packs can deliver better unit economics, but only if your customer base actually needs that volume and can store it correctly.
Accessories and consumables that reduce returns
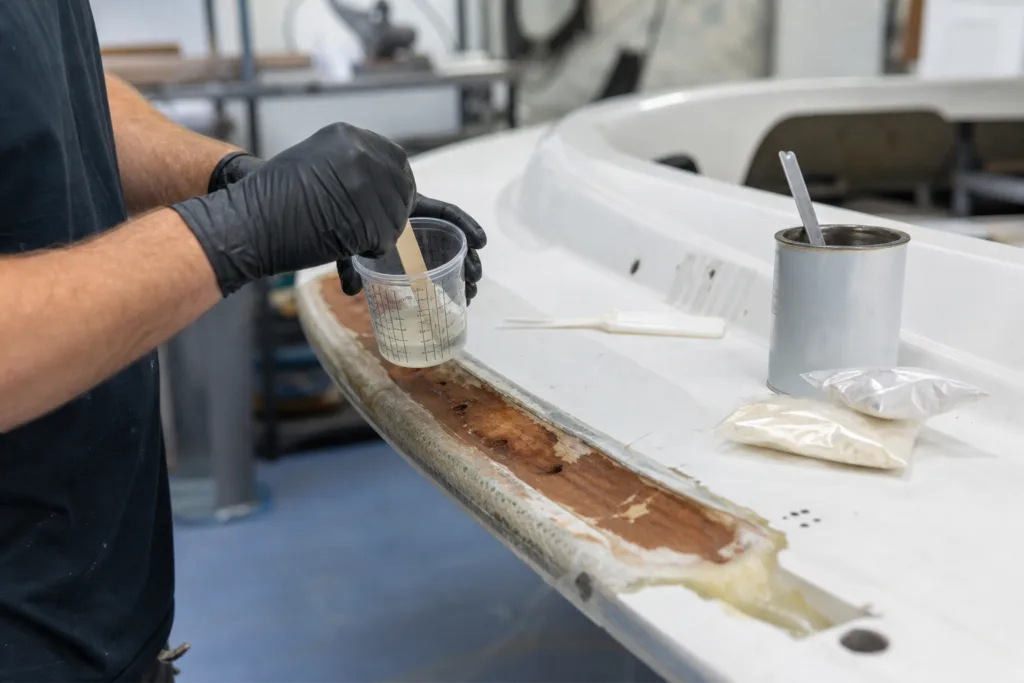
The most overlooked part of a marine repair kit is the small stuff. A good resin system can still be returned if the user has no way to measure, mix, apply, or clean up the product properly. Accessories are not just add-ons; they are support tools that improve first-time success.
- Measuring cups with clear markings for the intended ratio
- Pre-calibrated dosing pumps for repeat use and lower mixing error
- Disposable mixing cups and stir sticks
- Chip brushes, spreaders, and small rollers for application
- Sanding pads or paper in a practical grit range
- Nitrile gloves and a short PPE reminder card
- Cleaning cloths or solvent guidance where the system allows it
For shallow dents and scratches on boat trim, a compact filler option can make the bundle more complete without changing the core chemistry. That is why an add-on such as ZDS-189 wood repair putty for filling dents and scratches on boats is often easier to sell than sending the user to find a separate filler after opening the kit.
Instructions, labeling, and documentation
A marine epoxy resin kit should arrive with more than a label. The user needs a clear sequence. The box should tell them what to do first, what to avoid, and when to stop and wait. For distributors, this is one of the best ways to cut support requests. For private-label buyers, it is also one of the best ways to protect the brand experience.
- SDS for every component
- Technical data sheet with cure, viscosity, and storage information
- Quick-start guide with numbered steps
- Mix-ratio table in both volume and weight if needed
- Temperature guidance and pot life reminder
- PPE list and ventilation reminder
- Curing timeline and recoat window
- Troubleshooting flowchart for under-mix, over-mix, and cold-weather issues
- QR code to a short video showing measurement, mixing, and application
- Simple conversion table for 5:1 pack sizes
A copy-ready line that often works well on the instruction card is: Mix 5 parts resin to 1 part hardener by volume, stir thoroughly, transfer to a clean cup, stir again, and apply within the stated pot life. That wording is simple enough for a retail customer, but still accurate enough for a technical buyer reviewing the pack.
Regulatory, safety, and transport details
Marine kits move through retail, e-commerce, warehouse, and export channels, so the pack has to support hazard communication and shipping realities. The exact transport classification, restricted substance checks, and regional compliance obligations will depend on the formula and destination market, but the label and documents should always be complete enough for the next handler in the chain.
At minimum, your pack should show the storage temperature range, batch code, shelf-life mark, and the safety statements required in the target market. If the formula has VOC limitations or ingredient restrictions, the claims on the carton should match the approved documentation. Avoid broad claims that are not backed by the tested system.
- Hazard communication that matches the actual components
- Transport wording suitable for your market’s rules and shipping channel
- Restricted substance review for each destination market
- Clear storage temperature and shelf-life marking
- Batch code and traceability on every outer pack
Packaging, shelf life, and storage
Packaging affects performance more than many buyers expect. Moisture control matters because contamination during storage can damage the user experience. Barrier packaging, tight closures, and clear separation of resin and hardener help reduce the chance of leakage, contamination, or early reaction. If one component is sensitive to light or air, the bottle or pouch selection should reflect that.
Shelf life should be validated under the intended storage conditions, not guessed from a generic formula family. For private-label buyers, this means asking for stability data, batch coding practice, and the release window used by the factory. The most useful shelf-life documentation is practical: what happens to viscosity, color, and cure behavior over time, and how the supplier knows the product is still in spec.
Storage instructions on the pack should be short and readable. Keep the product sealed, store in the stated temperature range, protect from moisture, and use older stock first. That is usually enough for a retail customer. For trade buyers, add traceability and first-in, first-out warehouse guidance.
Quality control and testing protocols
Private-label and OEM buyers should not approve a marine repair kit on label artwork alone. The kit needs release checks that show the chemistry, the pack fill, and the user experience are repeatable. In our manufacturing work, the goal is to confirm not only that the material meets specification, but also that the pack format does not create avoidable user error.
| QC checkpoint | What to verify | Why it matters |
|---|---|---|
| Incoming material check | Identity, appearance, viscosity, and lot traceability | Prevents variation before batching starts |
| In-process fill check | Component weight or volume, closure integrity, and label match | Reduces pack-out errors and leakage risk |
| Mix-ratio verification | Measured ratio accuracy with the intended cup or pump | Reduces user dosing errors in the field |
| Gel-time or working-time check | Behavior at the reference temperature | Confirms the kit can be used as described |
| Cure consistency | Hardness, tack-free state, and cure progression | Shows whether the end user will get a predictable finish |
| Adhesion screening | Bond performance on the intended substrate family | Supports the repair claim and lowers support issues |
| Water or salt exposure check | Resistance data where marine claims are made | Supports the wording on the pack and in the datasheet |
| Final pack audit | All components, instructions, QR code, and batch code | Prevents incomplete kits from reaching the customer |
Ask for a certificate of analysis and batch documentation for every private-label run. That record should tie the finished pack back to the raw material lots and the release test results. If a field issue appears later, traceability is what allows the problem to be narrowed quickly.
Private-label and OEM considerations
Private-label buyers usually want more than a standard carton with a logo. They want a kit that behaves the way their channel expects. That may mean a faster cure for emergency repair sales, a slower cure for trade use, a more forgiving viscosity for vertical work, or a softer filler package for cosmetic repairs. These choices should be discussed at the formulation stage, not after the label has been approved.
If you are building an OEM line, ZDSpoxy can support the resin selection and kit architecture process by aligning cure speed, viscosity, and pack format with the repair use case. The important part is not the brand name itself; it is the ability to match product behavior to the buyer’s channel and the end user’s working conditions.
Custom formulation often comes down to a few practical variables: cure speed, viscosity, flexibility, and UV or yellowing resistance. Stability testing should confirm that the formulation stays in spec through the intended shelf life, packaging format, and transit conditions. Label approval should also happen before production, not after, because claim wording on marine repair products can create liability if it is too broad.
Pricing, margin, and inventory planning
For distributors, the price of a marine epoxy resin kit is driven by more than raw material cost. The filler system, the number of components, the type of closure, the dosing system, the instruction pack, and the QC burden all affect the landed cost. A small kit with a premium dispenser may cost more per gram than a larger bulk kit, but it can still deliver better margin if it reduces support and improves shelf conversion.
Unit economics also depend on the channel. A 250 mL emergency kit may move quickly because it solves an immediate problem. A 1 L kit may sell better in retail because it looks like a more complete purchase. A contractor pack may carry a better gross margin but turn more slowly. Inventory planning should reflect real sell-through, not only carton appeal.
- Higher formulation complexity usually raises both raw material and QC cost
- Pre-calibrated pumps and static mixers improve usability but add pack cost
- Small kits often carry more packaging cost per unit of resin
- Bundles with accessories can improve conversion if the add-ons are genuinely useful
- Stock the size that fits the repair frequency, not only the size that looks cheapest
Common application mistakes and in-kit warnings
The most common user errors are predictable, so the kit should warn against them directly. Under-mixing, over-mixing too much material at once, using the wrong ratio, and applying to a cold or contaminated substrate are all avoidable if the instructions are plain enough.
- Do not guess the ratio. Use the supplied cup or pump.
- Do not mix in a deep mass if the batch is larger than the repair needs.
- Do not apply to wet, oily, or badly abraded surfaces.
- Do not assume the product can cure the same way in cold weather and warm weather.
- Do not use solvent unless the technical data sheet allows it.
- Do not hide pot life information in small print.
Cold-weather curing failures are especially important for marine customers who work in sheds, marinas, or unheated storage areas. The pack should explain that cure time changes with temperature and that the user may need more working time, better mixing discipline, or a warmer space before application. The message should be practical, not alarmist.
Decision matrix for approving a marine repair kit
| Buyer priority | What to specify | Why it helps |
|---|---|---|
| Fewer support calls | Pre-calibrated cups or pumps, quick-start guide, QR demo | Reduces dosing and mixing confusion |
| Better retail conversion | Clear use-case labeling and compact pack sizes | Makes the kit easier to understand on shelf |
| More contractor appeal | Larger pack, longer working time, stronger reclose system | Fits larger repair jobs and repeat use |
| Wood repair focus | Primer, filler, and moisture guidance | Improves performance on timber and transom work |
| Private-label differentiation | Custom cure speed, label copy, and accessory bundle | Creates a channel-specific product rather than a generic clone |
When you review a sample, ask one simple question: will the box help the user finish the repair correctly on the first attempt? If the answer is unclear, the kit needs more work on pack design, not just on chemistry.
Conclusion
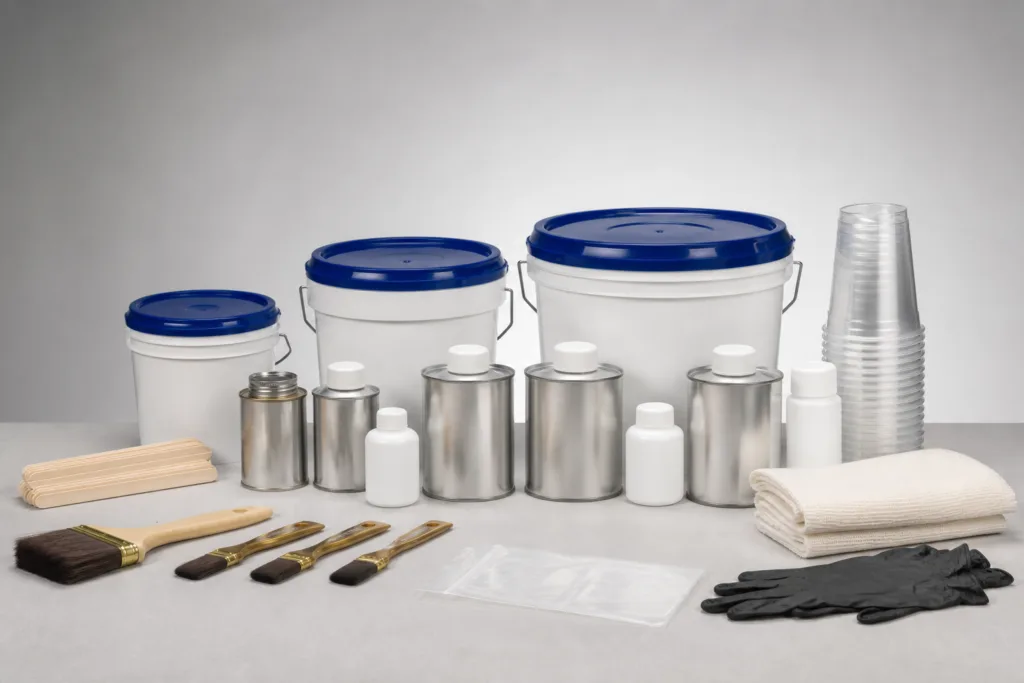
A strong marine epoxy resin kit is built around the repair task, the measuring method, and the user experience. For distributors and private-label buyers, the winning specification usually combines the right resin viscosity, a clear 5:1 or other approved ratio, practical accessories, readable instructions, and a QC process that protects every carton leaving the factory.
If you are preparing an RFQ or a pilot run, start with the intended repair scenario, define the pack size ladder, verify the mix method, and approve the label language before mass production. A short pilot run of 5 to 10 sample units can reveal whether the pack is easy to use, easy to explain, and easy to support. That step is often cheaper than fixing returns after launch.
FAQs
What should a marine epoxy resin kit include for boat repair customers?
A practical kit should include resin, hardener, clear mix-ratio instructions, basic application tools, filler options for fairing or gap filling, PPE guidance, and cure-time information. For wood repair or rot-prone areas, a primer or separate filler may also be needed, but only if the label explains when to use it.
Should a marine epoxy resin kit use a 5:1 ratio by volume or by weight?
Both can work, but the pack and instructions must state one primary measuring method and explain the other if needed. If the density of the two parts differs, volume and weight will not match, so a kit should be tested and labeled for the exact method the user will follow, with calibrated cups or pumps if the goal is to reduce dosing errors.
Which kit size works best for small boat repairs and retail shelves?
A 250 mL or similar emergency kit usually fits quick patch work, while a 1 L kit is often better for repeat retail sales because it gives enough material for more than one repair. Larger 4 L kits can work for contractors, but only if the packaging, instructions, and shelf life support partial use and reclosure.
What documents should be inside the box for distributors and private-label buyers?
At minimum, include an SDS, a technical data sheet, a quick-start guide, a mix-ratio table, safety PPE notes, temperature guidance, cure timelines, and recoat windows. A QR code to a short demo video and a troubleshooting sheet usually lowers support calls and improves customer confidence.
Can one kit cover wood, fiberglass, and transom repairs?
One base kit can cover multiple boat repair types if the resin viscosity, cure speed, and filler system are chosen carefully, but the label should state the limits. Heavy structural transom work, wet timber, cosmetic fairing, and fiberglass wet-out do not all need the same package, so optional add-on fillers or primers are often smarter than forcing one universal claim.
What QC tests should a supplier provide before private-label release?
Ask for incoming material checks, mix-ratio verification, gel-time checks at the reference temperature, cure consistency, basic adhesion screening, and water or salt exposure data when marine claims are made. Private-label buyers should also request batch codes, certificates of analysis, and release records so each shipment can be traced back if a field issue appears.
Related Reading
- buyer’s checklist for marine epoxy suppliers, private-label and bulk orders
- cost drivers for marine epoxy resin gallons, kits and private-label pricing
- how marine-grade epoxy differs for real-world marine use
- choosing fiberglass epoxy for hull repairs, wet-out and coating compatibility
- sealing and bonding guidance for marine plywood and transoms