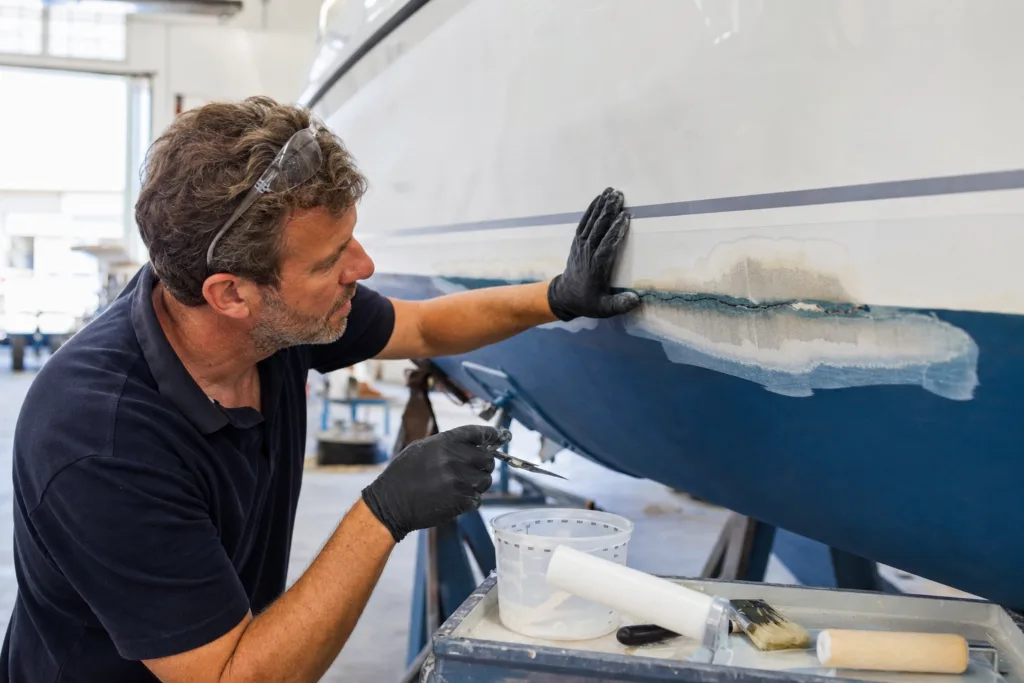
Marine fiberglass epoxy resin is usually selected when a boat hull repair needs more than a cosmetic patch. For contractors, surveyors, OEM teams, and repair yards, the real question is not simply whether to use epoxy, but which epoxy system fits the failure mode, laminate design, cure conditions, and finishing plan. In hull work, cracks, wet core edges, delamination, tabbing failures, and coating rework all place different demands on viscosity, pot life, toughness, adhesion, and post-cure stability. From our manufacturing perspective, better repair outcomes come from matching resin type to the defect, controlling moisture and mix accuracy, and verifying that the cured surface is compatible with sanding, primers, gelcoat, or antifouling layers.
Explore epoxy systems for boat repair and marine applications if you are comparing resin families for hull restoration, reinforcement, barrier work, or marine maintenance programs.
Who this guide is for and what it helps you decide
This guide is written for readers making real repair decisions: boatyards deciding between penetrating resin and laminating epoxy, procurement teams comparing specification sheets, surveyors reviewing structural repairs, and applicators planning layup and fairing workflows. It is most useful when the repair goes beyond a quick filler job and requires confidence in bond strength, water resistance, curing behavior, or coating compatibility.
In practice, most hull repairs fall into a few repeating scenarios:
- Hairline or star cracks in outer laminate or gelcoat
- Structural cracks that need grinding, rebuilding, and reinforcement
- Delamination between laminate layers or between skin and core
- Tabbing repairs at bulkheads, stringers, and interior joints
- Wet-out of new glass fabrics during localized relamination
- Fairing and sanding before primer, paint, or gelcoat restoration
- Core edge sealing and timber or plywood tie-in areas
Each of these scenarios benefits from a different resin behavior. A low-viscosity system helps with penetration and injection. A medium-viscosity laminating system improves fabric wet-out and controlled film build. A thixotropic paste is better for fillets, overhead gaps, and vertical voids. Using one generic resin for all stages often creates avoidable problems such as resin starvation, sagging, poor wetting, hard sanding, or coating adhesion issues.
Why epoxy is often chosen for fiberglass hull repairs
Compared with polyester or vinyl ester in field repairs, epoxy is often preferred because it bonds more reliably to prepared cured laminates, absorbs less water, and can be tailored for different cure speeds and viscosities. That matters when the old hull is already in service, the substrate includes mixed materials, or the repair has to restore structural continuity rather than simply rebuild thickness.
In boat repair, epoxy usually offers three major advantages:
- Higher secondary bonding performance to cured fiberglass when the surface is properly abraded and clean
- Better moisture resistance, which helps reduce future water ingress and supports barrier strategies
- Broader formulation flexibility for penetration, wet-out, fairing, adhesive bonding, or core work
There are also limitations. Epoxy is not automatically compatible with every finishing schedule. Direct polyester gelcoat application over cured epoxy can require a barrier or tie-coat strategy, aggressive surface preparation, and a test patch. Some epoxies can blush during cure, which affects intercoat adhesion if not removed. UV exposure can yellow or chalk unprotected cured epoxy, so exterior hull repairs generally need a proper coating system.
When buyers ask us whether epoxy is always the right answer, our response is usually more specific: epoxy is often the right structural repair material, but the full system must be chosen around the defect, substrate condition, and final coating plan.
How to choose marine fiberglass epoxy resin by repair type
The fastest way to narrow options is to classify the repair by what the resin must do first. Is it mainly penetrating into a crack network? Wetting reinforcement cloth? Holding shape in a vertical joint? Filling a core gap? Or serving as the sandable fairing stage before topcoat? That logic is more useful than selecting by marketing name alone.
| Repair scenario | Preferred resin behavior | Typical viscosity target | Main watchpoints |
|---|---|---|---|
| Hairline crack sealing | Low-viscosity penetrating or injection resin | 200-1,200 cP | Must be dry, clean, and opened enough for entry |
| Structural crack rebuild | Laminating resin plus reinforcement | 1,000-5,000 cP | Grind back fully, rebuild laminate schedule |
| Delamination injection | Low-viscosity resin with controlled pot life | 300-1,500 cP | Need moisture control and consolidation pressure |
| Tabbing and joint reinforcement | Medium-viscosity laminating epoxy | 1,500-4,000 cP | Need strong wet-out, corner fillets, peel-ply where useful |
| Void filling and fillets | Pre-thickened paste or filled epoxy | Non-sag thixotropic | Avoid brittle filler-heavy mixes in dynamic areas |
| Fairing before coating | Lightweight sandable fairing compound | Paste | Low density helps sanding but reduces strength |
If a hull repair includes timber inserts, backing blocks, or plywood around stringers and transoms, surrounding materials matter too. In those mixed-substrate zones, products such as ZDS-2060AB solvent-free rot-repair primer for marine plywood and timber illustrate the kind of low-odor priming approach buyers may consider for stabilizing absorbent wood before structural rebuilding.
Property ranges that matter in hull repair decisions
Viscosity and penetration
For injection, crack sealing, or edge wetting, lower viscosity improves penetration, but only if the defect is dry and open enough to receive the resin. A practical range for penetrating systems is often about 200 to 1,200 cP. For hand lamination and fabric control on vertical or curved hull surfaces, 1,000 to 5,000 cP is more typical. Below that, drainage and resin loss can become difficult to manage; above that, full wet-out may require extra pressure or slower work.
Pot life and working time
Pot life should match the repair scale, ambient temperature, and crew size. A common working range is 20 to 90 minutes at 20°C, but that number changes sharply with mass and temperature. Small cup tests do not predict the heat rise in a large mixed batch. For tabbing or larger relamination repairs, longer pot life often improves process control and reduces exotherm risk.
Cure speed and service temperature
For marine use, the cured network should have a glass transition temperature above the expected service temperature, with a margin of at least 10 to 20°C. If the vessel will see dark hull surfaces, enclosed compartments, engine room heat, or warm-climate deck exposure, a higher-Tg system or post-cure schedule is often justified.
Mechanical balance
Strength alone does not define a good marine repair. Tensile and flexural properties matter, but so do elongation and toughness. A very hard, brittle system may machine cleanly yet perform poorly in impact-prone zones or along joints that see movement. For hull repairs, buyers should look for a practical balance between stiffness and crack resistance rather than chasing a single headline number.
Water uptake and adhesion
Low water absorption helps long-term durability, especially near waterlines, through-hull details, and repaired laminate edges. Adhesion should be evaluated not only to fiberglass but also to foam core, timber inserts, fillers, and any primer or coating layers used later. At ZDSpoxy, we generally advise buyers to review cured adhesion logic as a system, not a single resin value in isolation.
Typical target specifications for common repair workflows
| Parameter | Typical target | Why it matters |
|---|---|---|
| Penetrating resin viscosity | 200-1,200 cP | Supports crack entry and delamination injection |
| Laminating resin viscosity | 1,000-5,000 cP | Supports glass wet-out and film control |
| Pot life at 20°C | 20-90 min | Allows staged work without excessive exotherm |
| Mix ratio accuracy | Within supplier tolerance, ideally by weight | Reduces soft cure and incomplete crosslinking |
| Tg target | Above service temp by 10-20°C | Preserves stability under heat exposure |
| Surface hardness before sanding | Fully cured, not fingernail-marking | Prevents clogging and smear during fairing |
| VOC and solids | High solids or solvent-free where possible | Supports build, lower shrinkage, and marine compliance goals |
These are selection ranges, not universal approvals. The final choice still depends on laminate architecture, filler loading, ambient conditions, and finishing schedule.
Fillers, thixotropes, and reinforcement choices
Most hull repairs are not completed with neat resin alone. Fillers change viscosity, sanding behavior, density, and final mechanical performance. The wrong filler package can turn a sound laminating resin into a weak fairing compound or an unsandable paste.
- Microballoons or phenolic microspheres: used for lightweight fairing; easier sanding, lower density, but lower compressive strength
- Colloidal or fumed silica: increases thixotropy and anti-sag behavior; useful in fillets and vertical joints, but can make sanding difficult if overloaded
- Milled glass or chopped fiber: improves gap-filling strength and crack bridging; less suitable for cosmetic fairing
- Blend systems: commonly combine lightweight filler and silica for a fairing mix that holds shape without slumping
As a practical starting point, fairing mixes should be adjusted until they hold a spreader ridge without running, while structural fillet mixes should hold a radius on a vertical surface without drooping. Because filler loading changes wetting and cure heat, applicators should always trial the blend in small batches before committing to a larger hull area.
For touch-up fairing and non-primary contour work around mixed-material repairs, options such as ZDS-189 wood repair putty for fairing, dent repair and tabbing touch-ups represent the type of pre-thickened repair compound some yards use where sanding behavior and shape retention are more important than deep laminate penetration.
Surface inspection and preparation before any resin is mixed
Preparation determines whether the epoxy has a sound substrate to bond to. In marine repair, many failures blamed on resin quality actually begin with retained moisture, contaminated surfaces, or delaminated laminate left in place.
Inspection checklist
- Map the damage area visually and by tap testing
- Identify whether the issue is cosmetic, structural, or core-related
- Check for active water ingress or signs of osmotic blistering
- Measure moisture where possible, especially in cored hull sections
- Define the full extent of cracked or detached laminate before grinding
Preparation checklist
- Remove gelcoat and weathered laminate beyond the visible defect
- Feather edges to allow a stepped laminate rebuild
- Excavate all loose, chalky, or contaminated material
- Dry the area thoroughly; use heated drying, dehumidification, or desiccant support if needed
- Vacuum dust and wipe only with a compatible cleaner when allowed by the process sheet
When repairs connect to wood-backed zones, voids, or edge gaps near stringers and fastener lines, a thicker compound such as ZDS-1240 epoxy wood gap filler for structural tabbing and void filling shows the type of material logic used where non-sag body and void stability are more important than low-viscosity penetration.
Step-by-step workflow for small crack repair
Hairline cracks are often underestimated. Some are only in gelcoat, while others indicate localized laminate stress or moisture pathways. The repair sequence should confirm which type you are dealing with.
Recommended workflow
- Open the crack with a small grinder, burr, or V-groove tool so the defect is visible and accessible
- Inspect for branching, darkened laminate, moisture, or movement beyond the visible line
- Dry completely before resin use
- Apply low-viscosity epoxy by injection, brushing, or controlled wet-out as appropriate
- Add glass reinforcement if the crack extends into the structural laminate
- Fair the area with a compatible compound after cure
- Sand through a staged grit progression such as 80 to 120 to 220, then finer if the coating system requires it
- Run a test patch before final topcoat or gelcoat restoration
Acceptance should include no visible reopening, no hollow sound on local tap test, and no uncured or gummy areas at the groove edges.
Step-by-step workflow for delamination repair
Delamination can appear as a dull tap response, skin movement under pressure, or print distortion. The repair method depends on whether the detached zone is narrow and dry enough for injection or large enough to justify peel-back and relamination.
Injection-style approach
- Map the delaminated boundary by tapping or scanning
- Drill or slot access points in a controlled pattern
- Confirm dryness before injection
- Use a low-viscosity resin with enough pot life to travel through the void network
- Apply vacuum or pressure carefully to assist distribution and consolidation
- Maintain clamping or bag pressure until the bond line is stable
Relamination approach
- Remove detached outer skin where needed
- Strip all weak interfaces and contaminated material
- Rebuild with the correct ply sequence and orientation
- Wet out each reinforcement layer fully without excess resin pooling
- Use peel-ply or consolidation rollers to improve surface texture and air release
For crews working through mixing discipline and cure timing, our separate guide on 2-Part marine epoxy resin: mix ratios, pot life and cure control is a useful companion reference because off-ratio mixing and oversized batches are common causes of delamination repair failure.
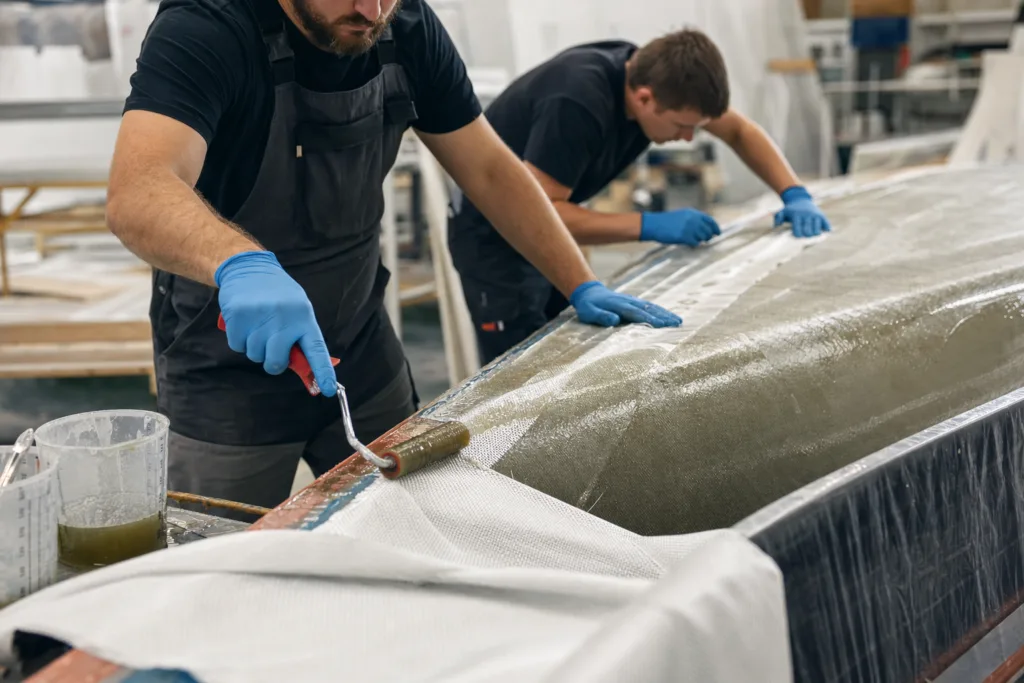
Tabbing, wet-out, and structural reinforcement strategy
Bulkhead tabbing, stringer repairs, and secondary structural joints place greater emphasis on wet-out consistency, reinforcement schedule, and corner geometry. A good resin choice here is usually a laminating epoxy with moderate viscosity, reliable open time, and enough toughness for cyclic loading.
Practical tabbing rules
- Create smooth radiused fillets before laying fabric into inside corners
- Cut reinforcement pieces in sequence from smallest to largest or vice versa based on the planned laminate geometry
- Pre-stage all fabrics and rollers before mixing
- Apply enough resin to achieve full fiber transparency, but avoid flooding the laminate
- Consolidate with rollers to remove trapped air and improve bond line contact
- Use peel-ply where later bonding or fairing is expected
A common field error is trying to make the laminate look glossy by adding too much resin. Structural laminate quality depends on fiber wetting and consolidation, not surplus resin content. Resin-rich zones can add weight, shrink differently, and print through after coating.
Mixing, batch control, and temperature management
Even the right resin can fail if the mix is off ratio or the batch is too large for the ambient temperature. For marine work, weighing components is usually more reliable than estimating by eye or relying on inconsistent volume marks.
- Use clean, dedicated containers and calibrated scales or metering pumps
- Mix for the full recommended time, scraping walls and base
- Transfer to a second container for critical laminating work when the process demands it
- Keep batch size aligned with pot life and crew speed
- Spread mixed resin into trays when safe to reduce exotherm and extend working time
- Do not add unapproved solvent to thin the system
Temperature strongly affects cure. Lower temperatures raise viscosity and slow conversion. Higher temperatures improve flow but shorten pot life sharply. A practical lamination window is often around 18 to 28°C, although specialized systems can be formulated for colder conditions. If work must proceed in cooler weather, warm the substrate and materials gradually rather than overheating a mixed batch.
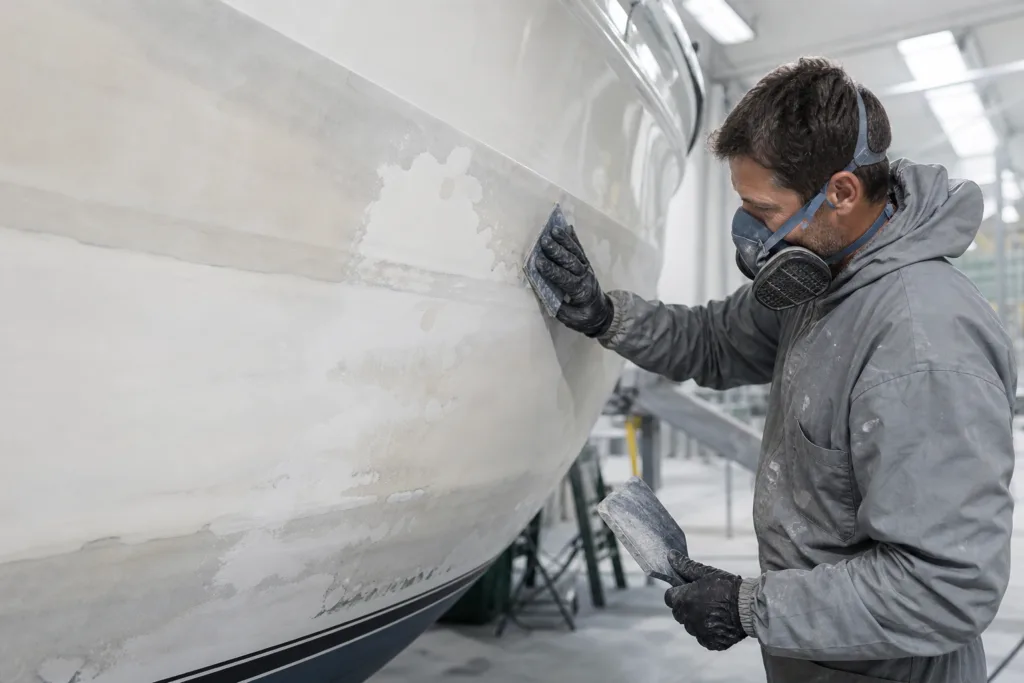
Sanding, fairing, and coating compatibility
After structural repair, the finishing steps determine how invisible and durable the repair becomes. Sand too early and the surface may smear or clog abrasives. Sand too aggressively and you risk cutting into reinforcement. Apply coating over blush or dust and adhesion can fail later.
Practical finishing sequence
- Confirm full cure before fairing or heavy sanding
- Wash or abrade off any blush according to system requirements
- Fair with a lightweight, sandable compound where contour control matters
- Sand in a progression such as 80 to 120 to 220 to 320 when the coating system requires finer preparation
- Vacuum and inspect between grit changes
- Apply primer or barrier coat suitable for the final topcoat or antifouling system
Coating compatibility deserves special attention where epoxy repair must be finished with polyester gelcoat. In many cases, a barrier or tie-coat approach is safer than direct application. A small adhesion test patch is worth the time, especially when working across old laminate, fairing compound, and fresh repair edges in the same zone.
Curing strategy, common problems, and quality checks
Ambient cure may be enough for small repairs, but larger or heat-exposed hull sections can benefit from controlled post-cure to raise Tg and improve dimensional stability. Multi-day repair planning should account for overnight temperatures, dew point, and the point at which the surface is ready for the next layer without contamination.
Common problems and likely causes
| Problem | Likely cause | Corrective action |
|---|---|---|
| Tacky or soft cure | Off-ratio mix, poor blending, low temperature | Remove weak material, re-prepare, remix accurately |
| Blush on surface | Amine reaction with moisture or CO2 | Wash, dry, abrade before recoating |
| Dry spots in laminate | Insufficient wet-out or high viscosity | Rebuild affected area, improve wetting process |
| Sags or runs | Low viscosity on vertical surface | Use thixotropic system or reduce application thickness |
| Recurring delamination | Moisture retained or weak substrate left in place | Remove fully, dry thoroughly, rebuild laminate |
| Paint or coating crazing | Incomplete cure or compatibility mismatch | Allow cure, sand properly, verify primer strategy |
Quality acceptance should be scaled to the repair purpose. Cosmetic repairs may rely on visual smoothness, hardness, and coating adhesion. Structural repairs should also include tap testing, moisture verification where relevant, and, when the specification calls for it, local bond or pull-off checks on representative areas. If the hull section is safety-critical or the damage pattern suggests wider laminate distress, a structural marine surveyor or naval specialist should review the repair plan before production work begins.
When custom or industrial-grade formulations make sense
Standard marine epoxies do not solve every repair environment. Some yards need low-temperature cure behavior for seasonal work. Others need higher Tg because of dark hull heat gain, fuel exposure resistance around tanks and machinery spaces, or a private-label repair line with controlled viscosity and mix ratio targets. From our formulation work, custom systems are most justified when the repair program is repetitive, quality documentation matters, or the yard is trying to reduce process variation across crews and vessel types.
When evaluating a resin manufacturer, ask for complete data sheets, realistic viscosity and pot life windows, cure schedule guidance, storage conditions, sample support, and traceability. For OEM or recurring marine repair programs, it is also reasonable to ask about pilot runs, filler compatibility, and whether the supplier can tune cure speed, thixotropy, or final hardness around your workflow.
Decision checklist for procurement and repair planning
- Define the failure mode: crack, delamination, tabbing, wet-out, fairing, or mixed-substrate rebuild
- Confirm whether the area is dry enough for epoxy bonding
- Select the resin class: penetrating, laminating, or thickened paste
- Verify target viscosity, pot life, cure temperature, and Tg margin
- Choose fillers based on whether strength or sanding is the priority
- Check compatibility with primer, gelcoat, paint, or antifouling system
- Run a small sample repair or test patch before scaling up
- Document mix ratio, ambient conditions, and cure checkpoints for repeatability
Marine fiberglass epoxy resin performs well when the repair plan is disciplined. The most reliable results come from identifying the actual defect, selecting the right viscosity and cure window, keeping the substrate dry and clean, and treating finishing compatibility as part of the repair rather than an afterthought. For procurement teams and repair yards, a short sample trial under real shop conditions is often the most efficient way to validate resin fit before larger hull work begins.
FAQs
When should I use a low-viscosity marine fiberglass epoxy resin instead of a laminating epoxy?
Use a low-viscosity system when the main goal is penetration into narrow cracks, porous edges, or delaminated interfaces, and use a laminating epoxy when you need controlled wet-out of fiberglass cloth or biaxial fabrics without excessive drainage. The decision depends on whether penetration or fabric handling is the first priority.
Can epoxy be used under gelcoat on a repaired boat hull?
Yes, but the surface must be fully cured, properly cleaned, and mechanically prepared, and many repair schedules benefit from a barrier or tie-coat approach before gelcoat. Because compatibility varies by system and process, a small test patch is a practical safeguard before full application.
What pot life is practical for boat hull repairs?
A practical pot life for many hull repairs is around 20 to 90 minutes at 20°C, but the right value depends on repair size, crew speed, and ambient temperature. Larger mixed batches build heat faster, so the safe working time can be much shorter than the stated pot life in a technical sheet.
How do I know if a delaminated fiberglass area is too wet for epoxy repair?
Warning signs include dark laminate, persistent moisture readings, weeping after grinding, or condensation returning after initial drying. If the area does not stay dry after preparation, epoxy bonding should be delayed until moisture is reduced by drying, dehumidification, or more extensive material removal.
What fillers make epoxy easier to sand for fairing work?
Lightweight fillers such as microballoons or phenolic microspheres usually improve sanding and help shape control, while silica is better for anti-sag performance but makes the cured mix harder to sand. Many fairing blends use both so the compound stays in place without becoming excessively dense or brittle.
How should I evaluate a marine epoxy supplier for recurring hull repairs?
Look for clear data sheets, defined mix ratios, realistic viscosity and cure information, coating compatibility guidance, sample support, and traceability. For repeat repair programs, it is also useful to confirm whether the supplier can support pilot trials, filler recommendations, and custom cure or thixotropy adjustments.