
Sealing marine plywood with epoxy resin is a moisture-control process as much as it is a coating task. The goal is to slow water ingress, stabilize end grain, reduce the risk of delamination, and give later laminates or topcoats a reliable base. When the resin choice and job sequence are right, the panel stays more dimensionally stable and is easier to maintain over time.
explore marine epoxy resin solutions for boatbuilding and wood sealing
Who should use this process
This guide is written for contractors, shipwrights, OEMs, procurement teams, and repair crews who need a repeatable method rather than a generic coating tip. It applies to small boats, tenders, plywood cores in composite decks, dock repairs, cabin panels, hatch covers, transoms, furniture exposed to splash zones, and any build where plywood needs a durable moisture barrier.
- For new builds, the main objective is to seal the wood before assembly details become hard to reach.
- For repairs, the objective is to isolate sound wood, rebuild damaged edges, and stop recurring moisture entry.
- For OEM production, the objective is repeatability: controlled viscosity, predictable cure, and a finish that accepts the next process step.
From our manufacturing perspective, the best system is usually the one that fits the substrate condition, the ambient temperature, and the downstream finish schedule. A resin that is perfect for a warm indoor workshop may not be the right choice for a cool marina repair, and a very thin penetrating system may not be enough when a joint also needs gap filling.
Sealing marine plywood with epoxy resin: what the coating has to do
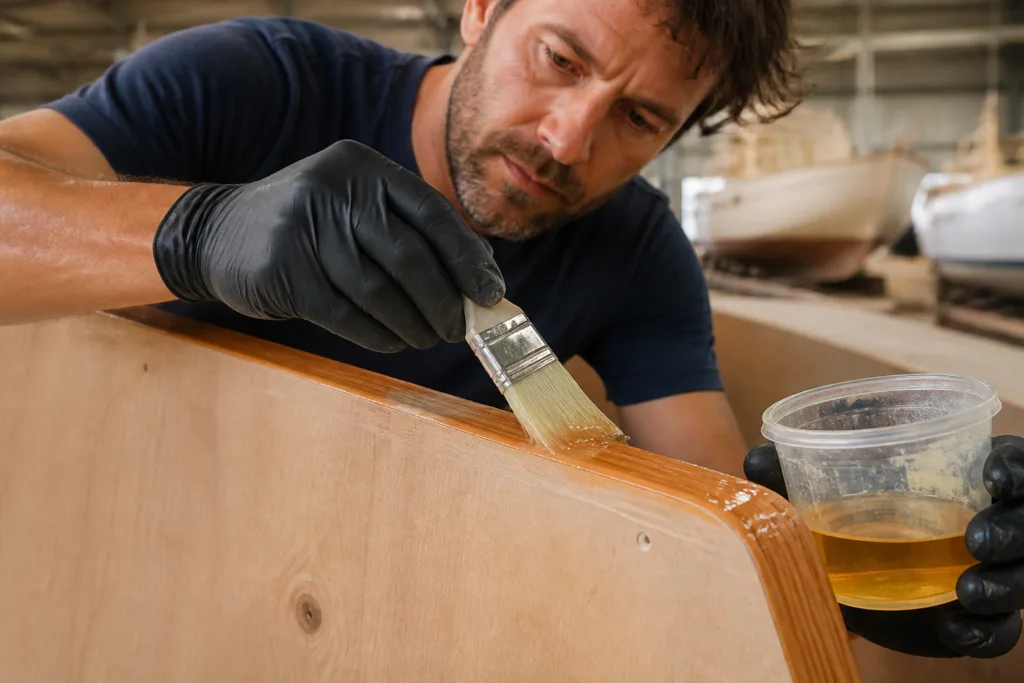
A proper epoxy seal does more than make the surface look wet. It has to penetrate the outer fibers, bridge the grain, and leave a continuous film that resists water and supports the next layer. If the panel will later receive fiberglass, the epoxy also needs to bond well to the laminate without creating a weak interface.
Penetration and grain sealing
The first coats should soak into the wood instead of sitting as a heavy skin. End grain, cut edges, and fastener holes are the most vulnerable areas because they absorb more quickly. If those zones are not fully sealed, moisture can enter there even when the broad face looks acceptable.
Film formation and bond support
Once the resin begins to cure, it should form a continuous film with enough hardness to resist abrasion, but not so brittle that it cracks when the panel flexes. Marine plywood still moves slightly with humidity and load. A balanced epoxy system should provide a barrier while staying compatible with the movement expected in service.
Compatibility with topcoats and laminates
Epoxy itself is not always the final answer for UV exposure. In most outdoor marine uses, it is part of a system that includes paint, varnish, or fiberglass reinforcement. Planning the full stack early matters because some topcoats need sanding, some can be applied in a specific recoat window, and some need a primer to improve adhesion.
Selecting the right marine epoxy resin
When buyers compare systems, they often focus only on cure speed. That is too narrow. A better comparison looks at how the resin behaves on wood, how it handles temperature, and whether it supports the next operation. The table below is the kind of selection logic we use when matching a formulation to a project.
| Data sheet item | Why it matters | Practical target |
|---|---|---|
| Viscosity | Controls penetration, brushability, and whether the resin soaks into end grain | Lower viscosity for first seal coats; thicker systems for edge build and gap work |
| Pot life and cure speed | Sets the working window and batch size | Longer in hot weather jobs; shorter only when the schedule can handle it |
| Tg and heat resistance | Helps the film stay stable in sun exposure and warm service conditions | Match the expected deck or hull temperature, not just room temperature |
| Hardness and elongation | Determines wear resistance and movement tolerance | Harder for abrasion, more elongation where the panel flexes or sees impact |
| Amine blush tendency | Affects sanding, recoating, and clean-up effort | Prefer low-blush systems when the job has tight turnaround or complex geometry |
| VOC and odor | Influences jobsite comfort and enclosed-space work | Lower odor is useful in cabins, workshops, and indoor repairs |
| Topcoat compatibility | Determines whether paint, varnish, or gel-related finishing steps bond reliably | Confirm compatibility before the first coat is mixed |
Another useful comparison is epoxy equivalent weight, because it gives chemists and technical buyers a clearer picture of crosslink density and how the system may behave after cure. In day-to-day procurement terms, though, most crews get more value from understanding viscosity, cure profile, blush behavior, and topcoat compatibility first.
For a sealer or primer-grade option, we often point buyers to ZDS-2060AB solvent-free wood primer for sealing and rot stabilization when the panel needs low-odor penetration and repair support. The reason is simple: the first coat on wood should support absorption and stabilization, not just film build.
When different resin types make sense
Not every epoxy should be treated as a universal product. A penetrating sealer, a laminating epoxy, a filleting compound, and a fairing system all solve different problems. If the panel only needs moisture exclusion, a low-viscosity sealer is the logical start. If the plywood will be glassed, the resin must also wet out fabric cleanly and hold a stable bond. If an edge or joint needs rebuilding, a thicker system is more efficient than trying to force a thin sealer to do structural work.
- Low-viscosity penetrating sealers are best for first coats on bare wood, especially on cut edges and end grain.
- Laminating or filleting epoxies are better where the joint must hold shape, carry load, or support fiberglass work.
- High-build coating epoxies help when the job needs more film thickness per pass and a smoother finish.
- Thixotropic fairing epoxies are useful when you need vertical hold, edge build, or surface correction without sagging.
In practice, the mistake is not choosing the wrong brand; it is asking one product to solve four different tasks at once. If the plywood already has dents or localized damage, ZDS-189 wood repair putty for dents, gouges and core repairs is the type of material we would use after defect removal, because it fits the repair stage better than a thin sealer does.
Pre-job planning and environmental checks
Before the first mix, check the wood, the room, and the likely cure window. A coating that behaves well in ideal conditions can fail when the substrate is too cold, too damp, or too close to the dew point. The safest rule is to measure the panel rather than assume the room tells the whole story.
| Condition | Practical target | Why it matters |
|---|---|---|
| Wood moisture | Often around 8% to 12% for sealing work, with caution above about 15% | High moisture can trap water under the film and weaken adhesion |
| Ambient and substrate temperature | Keep both within the resin’s stated working range, commonly around 18 C to 30 C for many jobs | Controls viscosity, pot life, and cure consistency |
| Dew point margin | Keep the wood at least 3 C above dew point | Reduces condensation under the epoxy film |
| Humidity | Avoid very high humidity during coating and cure | Helps limit blush and surface defects |
We also recommend storing resin and hardener near the work area before use so the mixed material is not shocked by a sudden temperature change. Cold resin is harder to wet out, while overheated resin shortens pot life and increases the risk of rushed application.
Surface preparation that actually holds up
Good preparation is usually what separates a long-service seal from a short-term patch. Start by inspecting for soft spots, discoloration, fastener corrosion, and edge breakdown. Any area that feels spongy, separates under probing, or smells persistently wet should be treated as damage, not as a surface coating problem.
- Sand the surface enough to remove glaze, weathering, and loose fibers.
- Progress through a practical grit sequence, often beginning around 80 to 100 grit and finishing around 120 to 150 grit for sealing work.
- Vacuum the dust, then wipe with a compatible cleaner only if the resin system allows it.
- Pay special attention to cut edges, fastener holes, end grain, and exposed plywood plies.
Do not over-polish the wood. A shiny, compressed surface can reduce wet-out because the resin has less fiber exposure to key into. The goal is a clean, open, dry surface with enough tooth for the first coat to penetrate.
Repairing damaged plywood before sealing
If the panel has rot, delamination, or crushed corners, repair first and seal second. Epoxy is excellent at stabilizing sound wood, but it should not be used to hide material that has already lost structural integrity. Remove all loose or contaminated wood until you reach firm substrate, then rebuild the area in a controlled way.
For localized defects, a repair schedule may include mechanical cleaning, a penetrating primer, a structural fill, and then a sealing coat over the repaired zone. If the damage is deeper, scarfing out the weakened section and fitting a sound patch usually produces a more reliable result than trying to bridge a void with coating alone. For joints and edge rebuilds, ZDS-1240 epoxy wood gap filler for joints and edge repairs fits the same planning logic because it is designed to occupy the space that a thin sealer cannot.
One practical rule is to stop and reassess whenever the repair grows beyond a small cosmetic fix. At that point, the question is no longer how to coat it; it is how to restore the panel so the seal has a sound base.
Measuring, mixing, and controlling the batch
Accurate mixing matters because even a strong formulation will fail if the ratio is off or the blend is not fully homogenized. Use the manufacturer-specified ratio by weight or by volume, but do not mix the two methods casually. Choose one method and stay consistent across the job.
For larger projects, pre-measure each component before combining them. Mix thoroughly, then transfer to a second clean container and mix again. That second mix step helps remove unmixed material from the sides and bottom of the first cup. It is a small discipline that prevents sticky zones and cure irregularities.
- Use clean, dry mixing sticks and containers.
- Keep batch sizes small enough to fit the pot life at the actual work temperature.
- Do not extend pot life with improvised thinning unless the data sheet allows it.
- Watch exotherm in deep containers; a larger mass cures faster and can overheat.
Temperature changes viscosity quickly. A resin that flows well at 25 C may feel much thicker at 15 C, which affects brush loading and penetration. If the shop is cold, it is better to warm the substrate and resin within the allowed range than to overwork a stiff mix on the panel.
Application methods and the seal-coat sequence
Brushes, short-nap rollers, squeegees, and impregnating rollers all have their place. For the first sealing pass, many crews prefer a brush or foam roller because those tools help work resin into end grain and edges. A squeegee can be useful on broad faces when the objective is to spread a controlled film before back-brushing.
The seal-coat process should be thin, even, and deliberate. Flooding the wood does not automatically create a better barrier; it often wastes material and can leave puddles that cure unevenly. The first pass should wet the surface until the grain is fully covered and the wood stops drinking resin at an obvious rate. If the panel is very porous, a second thin pass may be needed after the first has absorbed.
- Apply the first coat to all faces, starting with edges and end grain.
- Watch for dry spots that disappear into the wood and rework them immediately.
- Allow the first pass to penetrate, then apply the next coat within the recoat window or after a proper sand, depending on the system.
- Check corners, screw holes, and cutouts before moving on.
A useful sign of success is a surface that looks uniformly sealed without obvious dry fibrous patches or heavy curtains. If the wood still drinks resin aggressively in one area, that area usually needs more attention before the job moves forward.
Saturating and laminating plywood with fiberglass
When fiberglass is part of the design, the sequencing matters. Some jobs call for sealing the plywood first, then laminating after the seal coat reaches the right stage. Others allow wet-on-tacky layup if the product window is designed for it. The right answer depends on the resin chemistry, ambient conditions, and the cloth weight.
The practical objective is to avoid dry cloth, trapped air, or a starved bond line. The cloth should wet out fully with a consistent resin sheen, and the laminate should be consolidated enough to remove bubbles without squeezing out too much resin. A peel ply layer can help in some systems because it improves surface consistency and reduces aggressive sanding later.
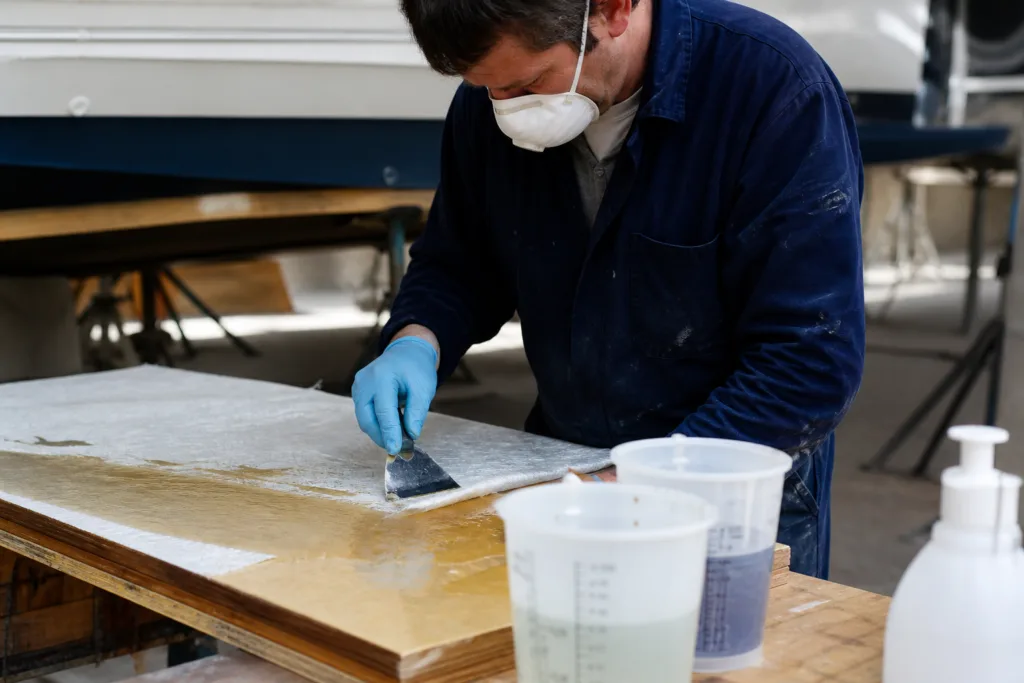
- Lay the fabric cleanly and avoid stretching it out of alignment.
- Work resin through the cloth from the center toward the edges.
- Use a squeegee to remove trapped air, not to dry the laminate.
- Keep an eye on outgassing if the substrate warms during cure.
If the plywood was sealed in the morning and glassed later in the day, the panel temperature should be stable. Rising temperature can push air out of the wood and create bubbles under the laminate. That is one reason why marine work often benefits from a steady, controlled environment.
Build coats, fairing, and surface correction
After the seal coat is established, build coats can improve barrier continuity and prepare the panel for finishing. The key is not to confuse build with repair. Build coats add continuous film; fairing compounds restore shape. They are related, but they are not the same thing.
For fairing, the filler choice matters. Microballoons make a lighter, easier-to-sand mix for cosmetic shaping, while silica increases body and sag resistance. In most marine plywood work, a fairing mix should be strong enough to hold shape but still sandable without excessive effort. Overbuilt filler is a common mistake because it makes the next sanding pass harder and can create a brittle edge if used as a structural substitute.
We suggest treating fairing as a separate step from sealing, not a shortcut inside the seal coat. If the surface needs profile correction, fill the defect, cure it, sand it fair, and then re-establish a continuous protective film over the shaped area.
For a visual model of how we think about repair-stage buildup, ZDSpoxy generally evaluates the wood condition, the expected movement, and the finishing sequence together rather than selecting a resin in isolation. That approach is especially useful when a project needs custom cure speed, low-temperature performance, or a formulation that must remain workable across different jobsite conditions.
Curing, post-cure, and when to recoat
Epoxy cure is not only about waiting for the surface to feel dry. The film must reach the stage that matches the next process step. If the next coat is applied too early, the resin can trap solvent-like byproducts or leave imprint marks. If it is applied too late without sanding, the bond can be weaker than expected.
Watch for three practical signs during cure: a glossy wet stage, a tacky stage, and a firm stage that still needs abrasion before recoating. The exact window depends on the product and temperature, so the technical data sheet always has priority. In cold conditions, cure slows down significantly; in hot conditions, the window can close quickly and force smaller batches.
Incomplete cure usually shows up as soft spots, sanding clogging, lingering tack, or a film that never develops the expected hardness. Common causes include wrong ratio, poor mixing, cold substrate, excess film thickness, or moisture interference. The fix is to identify the cause, not to add more material blindly.
UV protection, yellowing, and topcoats
Epoxy is excellent for sealing and bonding, but long-term sunlight exposure still needs to be planned. In many marine builds, the epoxy layer is protected by paint, varnish, or another compatible topcoat. That outer layer reduces UV degradation and helps preserve appearance. Without that protection, epoxy can chalk or yellow over time, especially in direct sun.
Before topcoating, confirm the sanding requirement and the recoat window. Some systems accept a well-prepared epoxy surface directly, while others need a primer to stabilize adhesion. If the surface has blush, wash it according to the resin guidance before sanding. If it has already cured fully, use a clean scuff profile that gives the next layer mechanical key.
Anti-yellowing strategy is best planned early, not after the finish has aged. A clear finish on exposed wood needs a tighter UV plan than a painted deck panel, and the coating stack should reflect that from the start.
Inspection, testing, and common failure modes
After cure, inspect the surface under angled light. The goal is to find what the eye can miss at normal viewing distance: pinholes, dry grain, brush holidays, raised fibers, fisheyes, and small edge failures. Early inspection saves rework later.
| Symptom | Likely cause | Practical correction |
|---|---|---|
| Delamination or peeling | Poor surface prep, moisture, or missed recoat window | Remove weak coating, sand soundly, dry the substrate, and rebuild the system |
| Pinholes or bubbles | Outgassing, aggressive mixing, or heavy application | Warm the panel carefully, mix more slowly, and apply thinner coats |
| Amine blush | Surface film from some cure systems in humid conditions | Wash, dry, and scuff before recoating |
| Tacky film | Wrong mix ratio, cold cure, or contamination | Verify ratio, improve temperature control, and remove contaminated material if needed |
| Visible dry grain | Under-application or excessive absorption | Add another thin sealing pass before finishing |
For QA records, document moisture readings, ambient temperature, batch numbers, coat timing, and any unusual observations. On critical jobs, a cross-cut or pull-off style check on a test coupon can help confirm that the process is behaving as expected before the full panel is released.
Troubleshooting the mistakes that cost the most
Most failures are not mysterious. They usually trace back to a few repeatable errors that can be prevented with better planning.
- Wrong mix ratio: recheck measuring tools, train the crew on one method, and discard uncertain batches.
- Cold cure: warm the panel within the allowed range and reduce batch size so the resin can be applied before it thickens.
- Trapped moisture: stop coating, dry the substrate, and inspect for hidden damage or poor storage practices.
- Insufficient sanding: if the surface has cured beyond the recoat window, give it a proper mechanical key before the next layer.
- Over-thinned resin: do not chase penetration by over-dilution unless the formulation specifically allows it.
- Edge neglect: seal end grain first and return to it after the broad faces are coated.
The repair decision is important. If the mistake only affected the surface, sanding and recoating may be enough. If the coating failed because the wood was already compromised, the panel needs real repair before the seal can be trusted.
Material estimating and job planning
Planning the job well can save more time than rushing the coating itself. Calculate surface area first, then add a wastage factor for absorption, application losses, and edge work. Marine plywood often consumes more material on the first pass than a smoother substrate, especially on cut edges and repaired zones. A practical allowance is to add a sensible surplus rather than trying to finish the job with a single exact batch.
Batch planning should also respect pot life. Large mixed volumes can kick faster than the same product in a shallow tray. If the job is spread across multiple panels, divide the work into manageable sections so the crew is not trying to apply a curing resin after the working window has narrowed.
For projects that need custom viscosity, cure speed, or private-label supply planning, the team at ZDSpoxy reviews substrate condition, ambient range, and downstream finish needs together. That kind of manufacturer-side review is useful when an OEM wants repeatability across batches or when a contractor needs a lower-risk resin choice for variable jobsite conditions.
Safety and storage guidance
Epoxy work is straightforward when the crew uses the right controls. Gloves, eye protection, and ventilation are basic requirements, especially in enclosed spaces or during repeated mixing. Keep uncured resin off skin, avoid unnecessary sanding dust, and manage spills before they spread into porous wood or tools.
Store containers tightly closed in a cool, dry place within the manufacturer’s recommended temperature range. Avoid repeated heating and cooling cycles, because they can affect consistency and reduce shelf-life confidence. Keep hardener and resin containers clearly separated, and use clean tools so contamination does not carry from one batch to the next.
For commercial buyers, shipping and storage planning matter as much as application. A resin that arrives in good condition but sits too long in the wrong storage environment can create avoidable problems on the job.
Conclusion
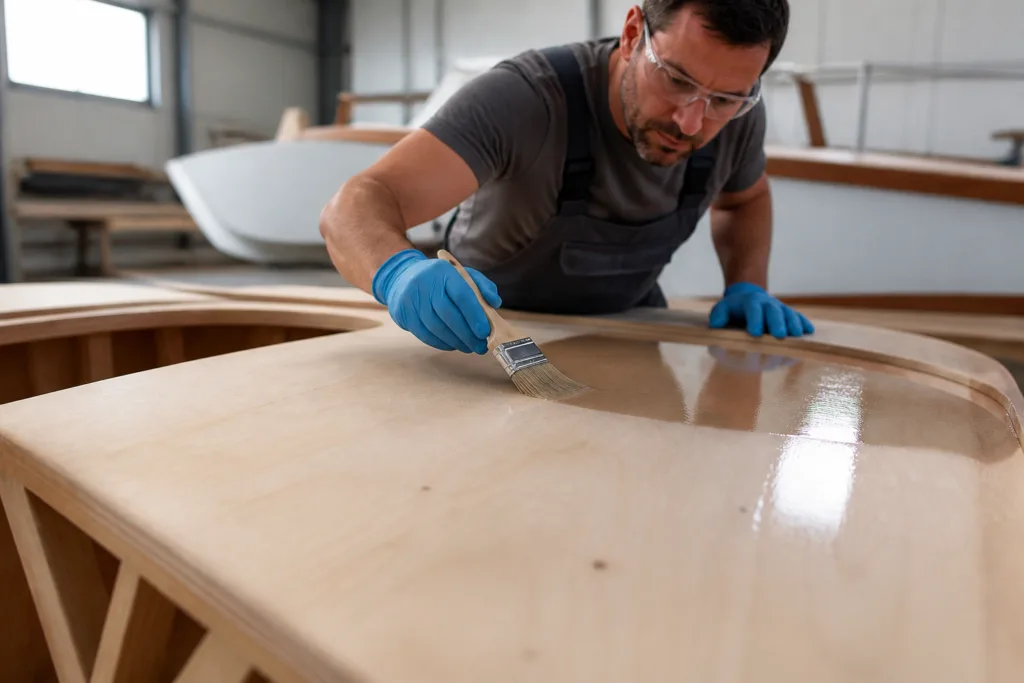
Sealing marine plywood with epoxy resin works best when the project is treated as a system: dry wood, sound substrate, the right resin type, controlled mixing, thin seal coats, and a topcoat plan that matches the service environment. The strongest results come from careful prep and disciplined application, not from overbuilding one heavy coat.
If you follow the sequence, most of the common failures become preventable. That is why we favor a step-by-step approach for contractors and procurement teams: it makes the outcome more repeatable, easier to inspect, and easier to scale across different marine jobs.
Frequently Asked Questions
Can epoxy stop plywood rot? Epoxy can slow future moisture entry and help stabilize sound wood, but it will not reverse widespread rot. Remove soft or contaminated material first, then seal the remaining sound substrate.
How many coats of epoxy on marine plywood? Most sealing jobs need at least two thin coats, and porous edges or end grain often need a third. The right answer depends on absorption, resin viscosity, and whether fiberglass or topcoat layers will follow.
Can I fiberglass directly onto sealed plywood? Yes, if the epoxy is still in its recoat window or has been sanded clean after cure. The cloth must fully wet out and the panel must be dry, clean, and free of blush.
What moisture level is safe before sealing? As a practical target, many marine wood jobs aim for roughly 8% to 12% moisture, while anything above about 15% deserves caution and a manufacturer check. Always measure multiple points, especially edges and repairs.
Why does epoxy stay tacky or blush? Tackiness usually points to wrong mix ratio, poor mixing, cold conditions, or a coat that was applied too heavily. Blush is a surface film associated with some curing systems and is usually removed with water and a non-contaminating scuff sand before recoating.
How do I repair a damaged epoxy-sealed panel? Cut back to sound material, dry the area, remove loose coating, rebuild the defect with an appropriate repair compound or laminating epoxy, and then recoat and topcoat the repair to restore continuity.
Related Reading
- What Is Marine Epoxy Resin? uses, benefits and selection basics
- Marine grade epoxy: how it differs and why it matters for boats
- 2-part marine epoxy: mix ratios, pot life and cure control
- Marine fiberglass epoxy: choosing resin for hull repairs and tabbing
- Epoxy resin safety for marinas: PPE, ventilation and handling tips