Understanding Epoxy Delamination Causes: The Real Reasons Behind Boat Repairs Gone Wrong
Epoxy delamination causes frustration, wasted time, and costly repairs for boat owners and marine contractors. When a recently repaired or coated section starts to peel, bubble, or flake, it’s tempting to blame the materials. But real-world job failures reveal something deeper: most epoxy delamination is due to surface preparation mistakes, overlooked contamination, or errors in timing and resin selection—not inherent product flaws. Learning how to prevent these failure modes can turn a single fix into lasting, seaworthy performance.
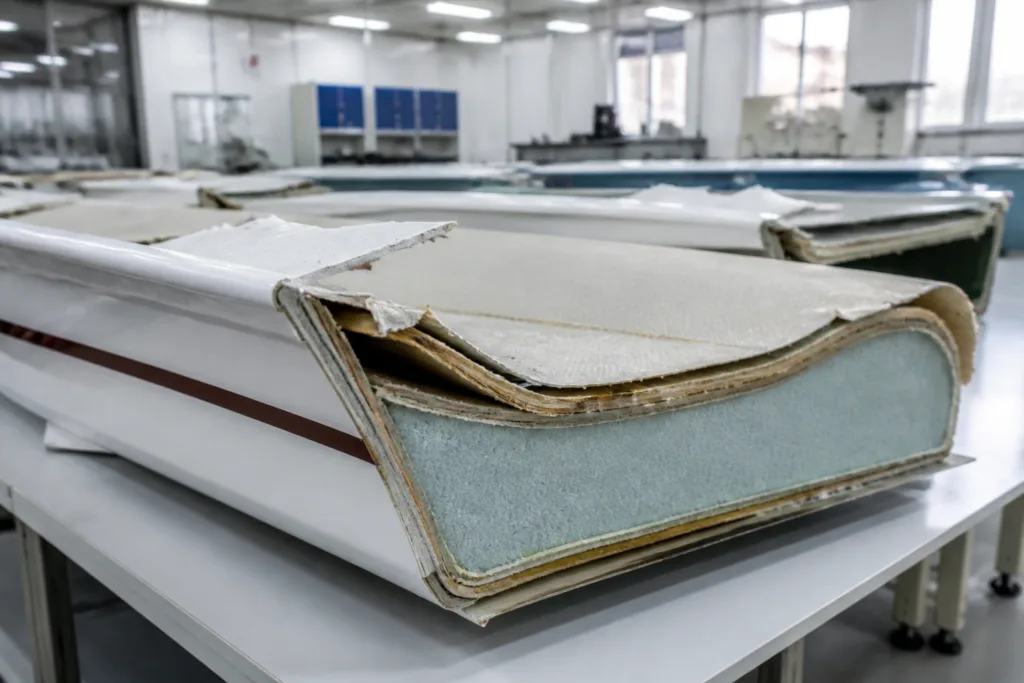
What is Epoxy Delamination?
Epoxy delamination is the separation of an epoxy system from the substrate (wood, fiberglass, or metal) or between layers within the epoxy laminate. It manifests as peeling, blisters, or flakes—essentially, the bond fails to keep the system intact under stress or over time.
Why Proper Diagnosis Matters
Many boat owners attempt repair after repair, never realizing that the root cause lies hidden in the prep stage, environmental conditions, or chemical compatibility. Each failure can teach us something—if we diagnose it methodically. Pinpointing the reason behind delamination leads to more reliable repairs and better decisions for future maintenance. If you need guidance selecting the right system, the Marine Epoxy Resin Manufacturer guide offers in-depth advice tailored for marine applications.
Common Epoxy Delamination Causes: Overview Table
| Cause | Typical Origin | What It Looks Like | Key Prevention Tip |
|---|---|---|---|
| Poor Surface Prep | Gloss, dust, oily residues left on substrate | Smooth peeling, easy to lift with knife | Sand and clean thoroughly |
| Moisture | Damp substrates, trapped humidity | Blisters, soft spots, cloudy films | Dry fully and test with moisture meter |
| Missed Recoat Window | Applying new layer after tack-free period exceeded | Poor intercoat bond, early peeling | Stay inside epoxy’s recoat window |
| Sanding Errors | Too fine grit, not wiping debris | Glossy sheen remains; poor adhesion | Sand to dullness (80–120 grit); vacuum dust |
| Salt Contamination | Sea spray, sweat, tap water rinses | Fish eyes, cratered surface, early delamination | Rinse with deionized water; air dry |
| Mechanical Stress | Thermal cycling, flex, impact, vibration | Cracking, edge lift, fracture lines | Choose flexible/strong resin for movement zones |
Epoxy Delamination Causes; Poor Surface Prep, Moisture, Recoat Window, Sanding, Salt Contamination, Mechanical Load
Let’s break down how each of these failure modes arises—and how to stop them from haunting your next repair.
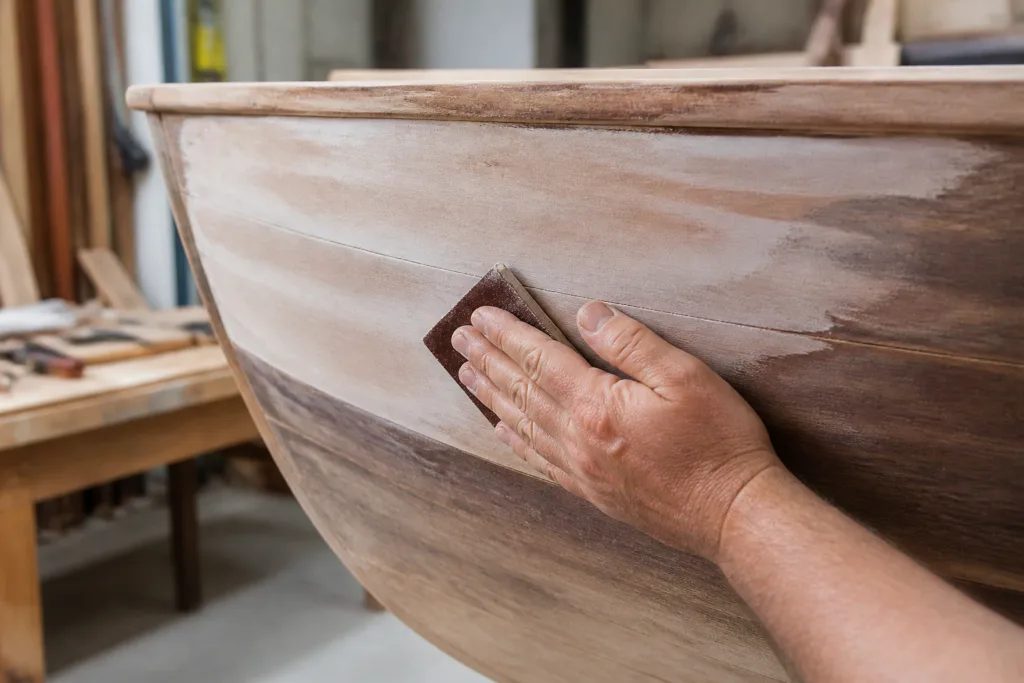
Glossy Surfaces: The Hidden Bond Killer
A shiny, glossy surface is the enemy of epoxy adhesion. Most failed repairs are due to simple oversight: sanding is underestimated or skipped entirely. Epoxy sticks best to slightly rough, “dull matte” surfaces because the microscopic texture gives resin something to grip. Sanding with 80–120 grit (not finer!) creates a mechanical “tooth”; going overboard with fine paper or burnishing restores shine and ruins the bond. Always vacuum and dry-wipe dust: loose grit behaves as a weak layer that encourages peeling. This is as true for wood, fiberglass, and previous epoxy as it is for metal.
Poor Surface Prep: Oily Residues, Dust, and More
Even after sanding, hidden contamination can sabotage a project. Typical culprits:
- Grease, waxes, or mold release from previous work
- Fingerprints (sweat contains salt!)
- Leftover tack cloth residue
- Construction dust, oil-saturated rags
Solvent-wet a clean white paper towel and see if it lifts any color or oil. On boats, surface prep is king: a pristine bond line is your best insurance. To see how moisture can impact long-term performance, you may want to review Diagnosing Mold and Damp Smell After Rain which highlights real-world site humidity challenges.
Salt Contamination: The Invisible Saboteur
Salt left behind on a substrate disrupts curing and creates “fisheyes” and craters—small areas that repel wet epoxy. These defeat adhesion at a micro-level and often lead to early delamination under stress or water exposure. Boat builders know that even domestic tap water can leave behind enough residual salts to cause big trouble—always rinse and wipe with deionized or distilled water, especially before bonding or priming hulls, decks, or critical repairs. For more on surface contaminants disrupting wetting, see Your Practical Marine Solutions Guide: Diagnosing and Fixing Fish Eyes, Craters, and Wetting Failures in Boat Epoxy.
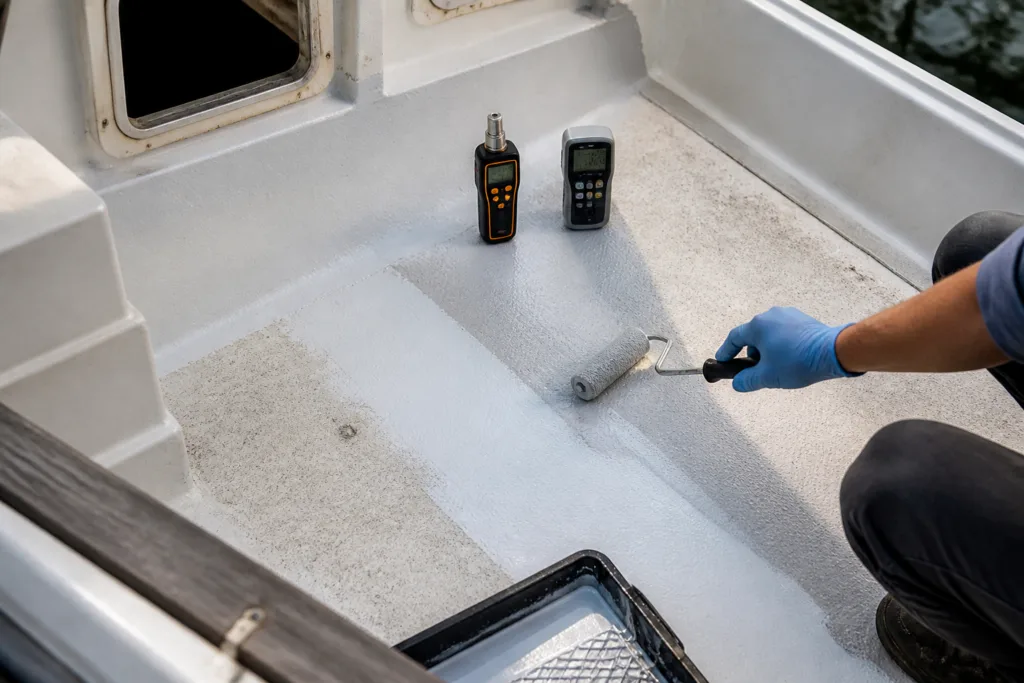
Moisture: The Hidden Enemy
Moisture in a substrate (damp wood, waterlogged GRP, humid concrete) will vaporize under a fresh epoxy coat, creating microbubbles, cloudy spot failures, or full-layer blisters. These are telltale signs that the surface wasn’t truly dry. Always use a moisture meter for wood or concrete; don’t trust “looks dry.” For concrete or metal, perform a clear plastic sheet test overnight. Never coat late in the day or after dew—surface temperatures drop at dusk, slowing cure and allowing atmospheric moisture to condense under the film.
Recoat Window: Why Timing Matters
Epoxy intercoat adhesion depends on a “chemical window” when the previous layer is dry but not fully cured (typically slightly tacky, not glossy). After this period (sometimes as low as 8–24 hours), natural oxidation and “amine blush” (in amine-cured epoxies) begin to build up, weakening the bond for subsequent layers. If you miss it, always dull the surface with abrasive (sanding) and wipe thoroughly. Never simply “recoat later” unless the tech sheet confirms a long window. Find additional insights in How to Recoat Over Old Coatings Without Full Removal: Essential Judgement Flow.
Sanding: When Technique Causes Trouble
Sanding that leaves the surface too smooth (over 150 grit) or done with worn-out paper will burnish and glaze the substrate. The remedy is to always finish with 80–120 grit, moving in overlapping passes, and to remove all dust and residue. Vacuum, tack with a clean cloth (no oily or scented products), and check visually for dullness—don’t guess by feel alone.
Salt Contamination: Steps for True Removal
The only way to remove salt is dissolution and “float off”—mechanical sanding just drives it deeper. Rinse > wipe with distilled or deionized water > repeat until a test patch dries without visible spotting. Never assume a single wash is enough on weathered marine materials.
Mechanical Load and Thermal Cycling: Why Some Areas Crack and Fail, Even with Perfect Prep
Boat hulls, decks, railings, and interiors all move under mechanical and environmental loads—flex, vibration, impact, freeze-thaw. If the wrong resin system (too rigid or too brittle) is chosen, cracks may propagate or the entire patch may peel along an old joint. For flex-prone zones or joints under compression, always select systems rated for both adhesion and flexural/tensile strength. Detailed manufacturer guidelines are crucial here; this is where product selection counts as much as surface technique. See the Marine Epoxy Resin Manufacturer guide for help matching systems to substrates and dynamic loads.
Resin Selection: The Often-Ignored Factor
Not all epoxies are interchangeable: thick films, thin priming, gap-filling, fast-set, chemical-resistant, low-VOC, or specialized marine grades all behave differently. Using an “all purpose” system can lead to mismatches in pot life, viscosity, or exotherm, destabilizing adhesion. Advanced manufacturers like ZDSpoxy test systems for compatibility with wood, fiberglass, composite laminates, or even damp surfaces. On projects where high temperatures or chemical exposure is expected, always verify with a technical datasheet—and when in doubt, ask for application-specific product advice.
Epoxy Failures in the Field: Typical Scenarios and Real Consequences
Field Examples: Classic Failures and What Went Wrong
- Transom repairs peel within one season—subtle hull flex was ignored, or the wrong filler/adhesive used
- Deck repairs develop soft blisters—coated too soon after a rainstorm, locking in invisible moisture
- Seams along stringers delaminate—surface gloss left in hard-to-sand corners
- Vertical surface patches “fish eye”—unwiped sea spray or contamination in-between layers
What We Learn from Site Failures
Every failure leaves clues. A clean bond line torn with substrate fibers means the glue was good—likely a mechanical or environmental cause. A smooth slide means poor prep or contamination. Swollen, cloudy failure signals moisture below. Keeping a simple site log—date, humidity, surface temp, and all products used—can turn mistakes into learning for future jobs.
Prevention Steps: How To Stop Epoxy Delamination for Good
Surface Preparation Checklists: The ZDSpoxy Way
- Sand all surfaces to dullness (80–120 grit)
- Vacuum and wipe twice with alcohol or acetone (never gasoline or “multi-use” cleaners)
- Rinse with distilled water if salt exposure is suspected
- Check moisture level with appropriate meter and confirm dry with a clear plastic tent (if in doubt)
- Record air and surface temperature; avoid all late-evening, fog, or dew-likely time windows
- Prime large pores (old wood, joint lines) with dedicated primer before bulk epoxy
Selecting the Right Epoxy Product for the Job
Match your resin system to substrate and requirement (e.g., thin primer for oily woods, gap-filling putty for damaged core, flexible adhesive for moving structures). ZDSpoxy, for instance, offers specialty systems with extra surface wet-out for humid climates and low-exotherm patches when large batches are needed. Refer to technical datasheets, and don’t substitute when performance is critical.
Watching the Clock: Managing the Recoat Window
- Note start and end times for each layer
- Recoat as soon as surface is tack-free (“just lost the sticky”)
- If you miss it, sand and wipe—never shortcut
Practical Tools and Test Methods
- Pocket moisture meter for wood, digital thermometer for air/surface temp
- Disposable white towels for solvent wiping
- Plastic film/tape for overnight condensation test
Primer and Filler Choices for Lasting Bonds
When to Use Dedicated Primers or Putties
Primers like ZDS-2060AB chemically optimize the bond at the interface—especially vital on old wood repairs or damp-prone areas. For filling larger gaps or making feather-edges, a ready-mixed wood repair putty such as ZDS-189 fixes common ‘dusty edge’ failures found in many DIY attempts.
Shrinkage and Exotherm: Why Batch Size Matters
Hot, humid weather or large batch pours can cure so quickly that the bond-line distorts or shrinks, causing micro-cracks. Always mix only as much as you can lay out in 10–20 minutes, and for thick pours, divide the application.
Testing Your Work: Simple On-Site Adhesion Checks
Before putting a boat back into service or recoating a large section, test adhesion with a simple lift test (razor-blade under an edge) or for higher value jobs, use a pull-off test following How to Test Adhesion Before You Coat.
Epoxy Delamination Causes: Summary and Practical Steps Forward
Delamination rarely results from faulty resin alone. Nearly every failure comes back to prep, timing, contamination, or selection. Taking the time to sand, clean, check for salt/moisture, use the right primer/filler, and manage the recoat window means every bond will last. When in doubt, return to data sheets or technical support—and document everything. One successful repair is worth a dozen quick fixes that fail next season. With careful planning and the right materials, anyone can achieve long-term waterproof bonds—even in the harsh marine environment.
Frequently Asked Questions
What creates fish eyes or craters in marine epoxy repairs?
Salts, oils, or silicone contaminants on the surface disrupt wetting, causing epoxy to separate and form ‘fisheyes’ or crater defects. Always rinse and degrease before application.
How does humidity or moisture cause epoxy delamination?
Moisture inside the substrate or ambient humidity condenses under the epoxy film, forming blisters or cloudy regions that break adhesion over time.
Why does sanding with very fine grit cause problems?
Extra-fine sanding creates a glossy, polished surface that looks good but actually smooths away all mechanical grip, leading to weak bonds and delamination under stress.
Can I repair over old epoxy if it looks in good condition?
Only if the old epoxy is dull, free of contamination, and properly sanded—otherwise, intercoat adhesion will be compromised and new delamination can occur.
What’s the simple test for substrate moisture before epoxy work?
Use a pocket moisture meter or tape a clear plastic sheeting down for 24 hours; condensation or darkening beneath means it’s too wet to coat.
How do I know which epoxy type or system to pick for each boat repair?
Check the technical data sheet or consult a marine epoxy selection guide to match substrate type, load (flex vs rigid), gap size, and environmental exposure.
Related Reading
- Top Tactics for Removing Amine Blush Before Recoating Marine Epoxy
- How High-Temp Epoxy Resists Gas Turbine Exhaust—and What It Means for Marine Repairs
- Preventing Runaway Heat: Managing Epoxy Exotherm in Thick Pours
- Step-by-Step: Creating the Ultimate Osmosis Barrier with Marine Epoxy
- How Long Before It’s Walkable? Real Cure Times for Marine Epoxy Floors